Cooking Products Service Manual
Original July, 19964321891
© 1996 Whirlpool Corporation Page
INSTALLING THE RANGE
![]() WARNING
WARNING
Electrical Shock Hazard
Take special care when drilling holes in the floor or wall. Electrical wires may be behind the wall or floor covering and could cause an electrical shock if you touch them.
Locate the electrical circuits that could be af- fected by the installation of the
Personal Injury Hazard
To reduce the risk of tipping of the range, the range must be secured by a properly installed
If range is moved to a new location, the
Because of the weight and size of this range, two or more people are required to move it.
Do not use the handle for lifting.
Failure to follow these instructions could result in injury.
INSTALLING THE ANTI-TIP BRACKET
5.Remove the cardboard shipping base from under the range.
6.Remove the storage drawer from the range.
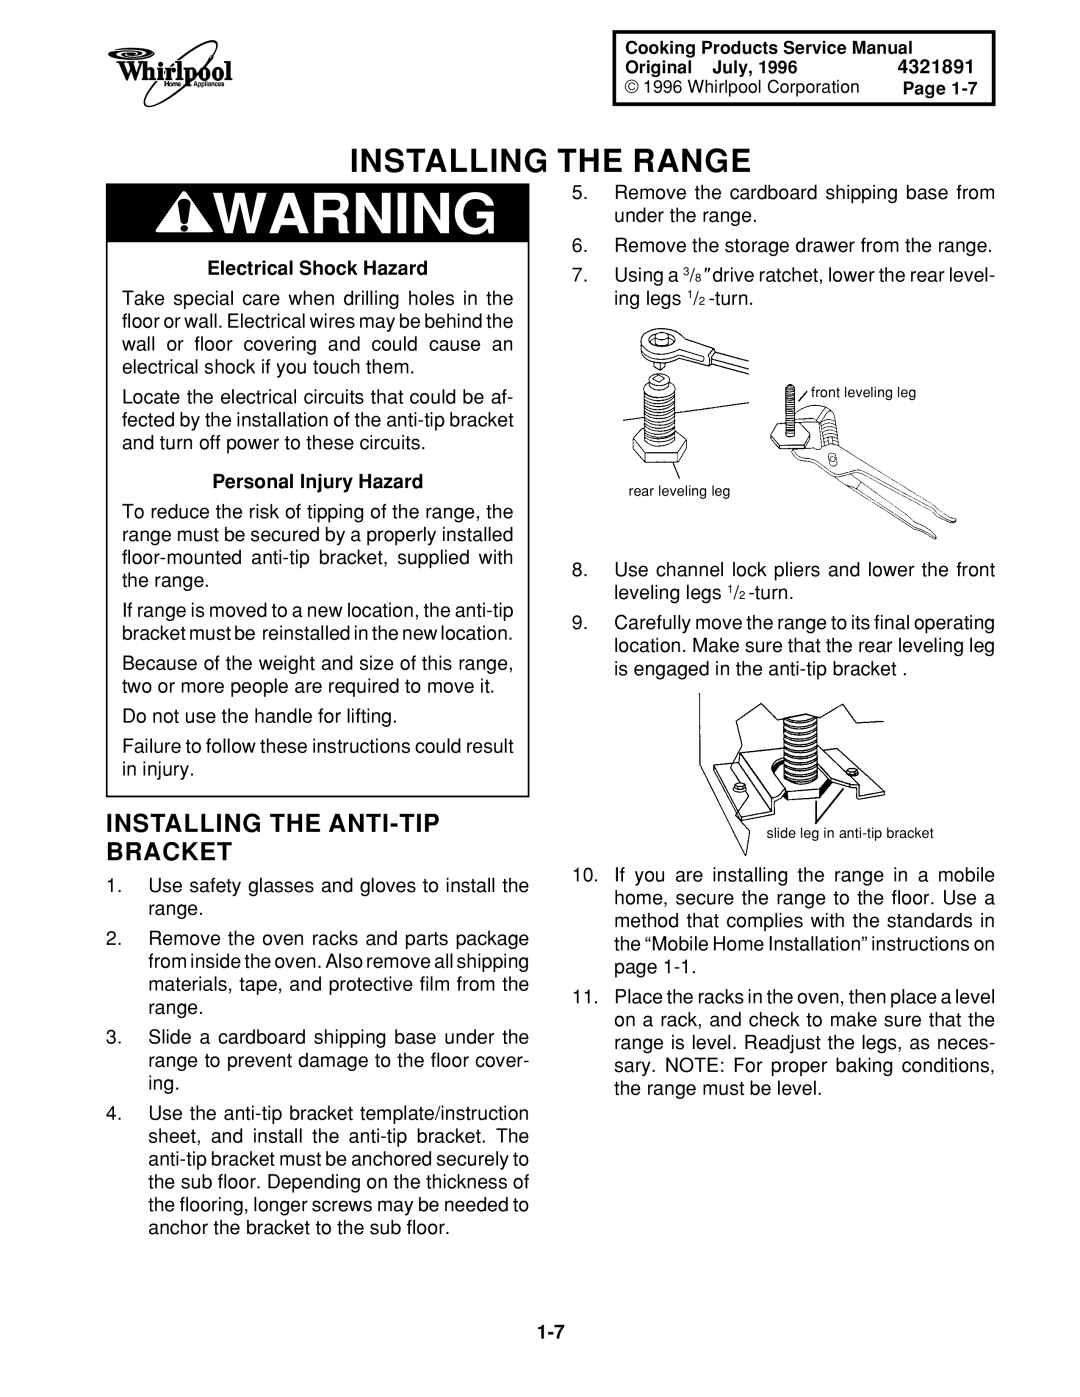
7.Using a 3/8" drive ratchet, lower the rear level- ing legs 1/2
front leveling leg
rear leveling leg
8.Use channel lock pliers and lower the front leveling legs 1/2
9.Carefully move the range to its final operating location. Make sure that the rear leveling leg is engaged in the
slide leg in
1.Use safety glasses and gloves to install the range.
2.Remove the oven racks and parts package from inside the oven. Also remove all shipping materials, tape, and protective film from the range.
3.Slide a cardboard shipping base under the range to prevent damage to the floor cover- ing.
4.Use the
10.If you are installing the range in a mobile home, secure the range to the floor. Use a method that complies with the standards in the “Mobile Home Installation” instructions on page
11.Place the racks in the oven, then place a level on a rack, and check to make sure that the range is level. Readjust the legs, as neces- sary. NOTE: For proper baking conditions, the range must be level.