REMOVING THE BROIL BURNER & IGNITOR
![]() WARNING
WARNING
Electrical Shock Hazard
Disconnect from electrical supply before servic- ing unit.
Failure to do so could result in death or electri- cal shock.
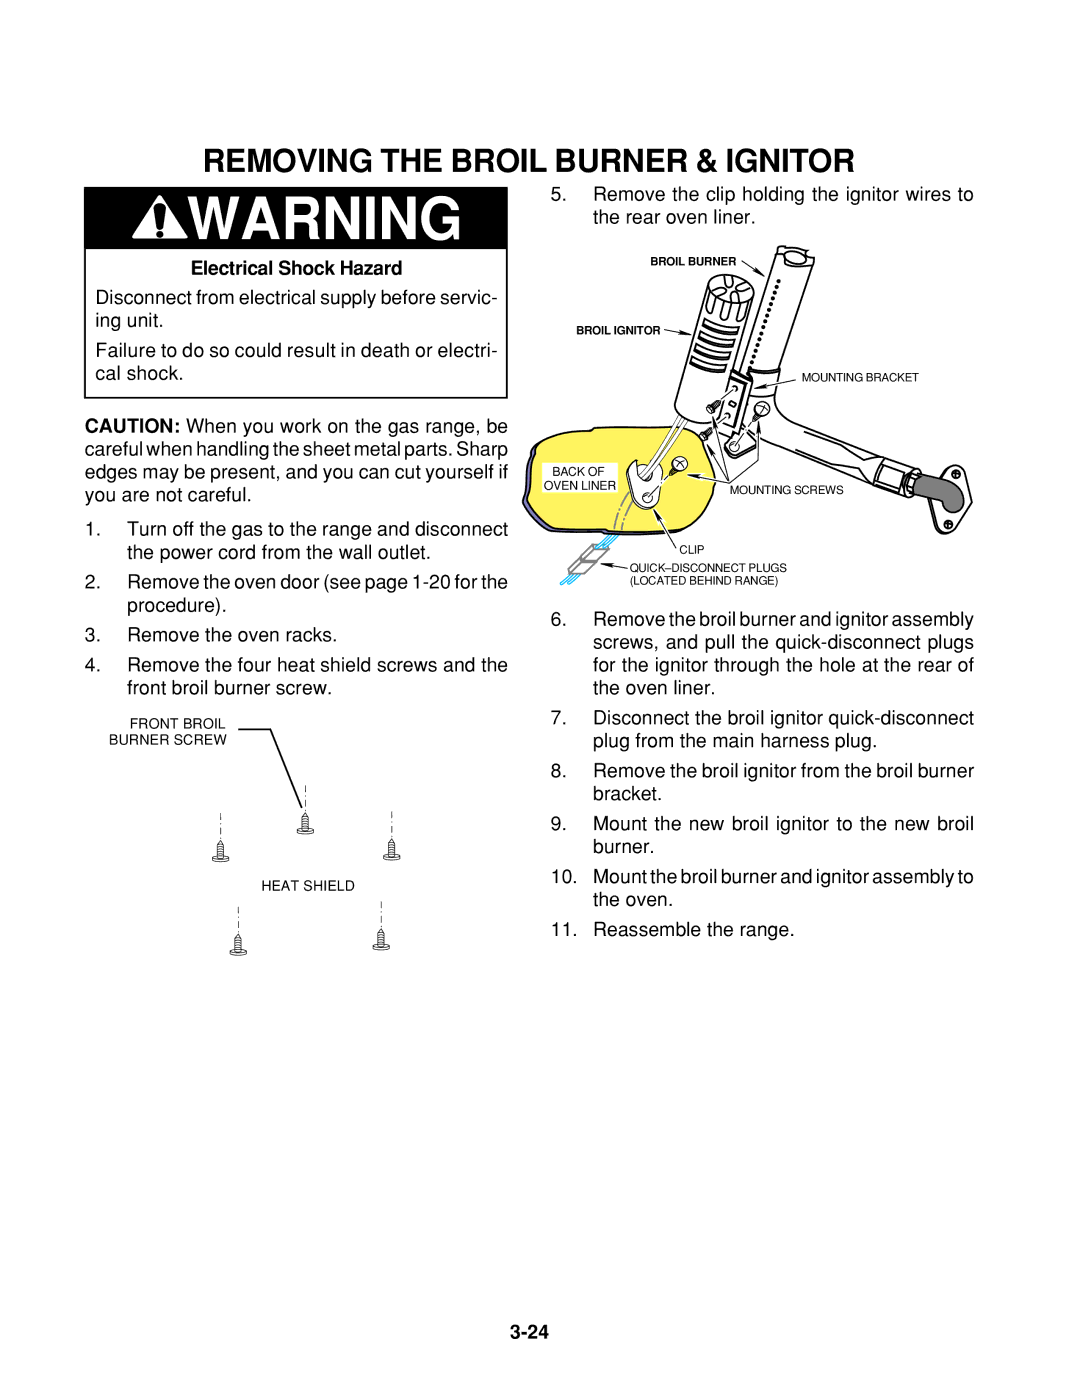
5.Remove the clip holding the ignitor wires to the rear oven liner.
BROIL BURNER ![]()
![]()
BROIL IGNITOR![]()
MOUNTING BRACKET |
CAUTION: When you work on the gas range, be careful when handling the sheet metal parts. Sharp edges may be present, and you can cut yourself if you are not careful.
1.Turn off the gas to the range and disconnect the power cord from the wall outlet.
2.Remove the oven door (see page
3.Remove the oven racks.
4.Remove the four heat shield screws and the front broil burner screw.
FRONT BROIL
BURNER SCREW
HEAT SHIELD
BACK OF |
|
OVEN LINER | MOUNTING SCREWS |
|
CLIP
![]()
![]()
(LOCATED BEHIND RANGE)
6.Remove the broil burner and ignitor assembly screws, and pull the
7.Disconnect the broil ignitor
8.Remove the broil ignitor from the broil burner bracket.
9.Mount the new broil ignitor to the new broil burner.
10.Mount the broil burner and ignitor assembly to the oven.
11.Reassemble the range.
