REMOVING THE GAS SAFETY VALVE &
PRESSURE REGULATOR
![]() WARNING
WARNING
Electrical Shock Hazard
Disconnect from electrical supply before servic- ing unit.
Failure to do so could result in death or electri- cal shock.
CAUTION: When you work on the gas range, be careful when handling the sheet metal parts. Sharp edges may be present, and you can cut yourself if you are not careful.
1.Pull the range away from the wall so that you can access the back.
2.Turn off the gas to the range and disconnect the power cord from the wall outlet.
3.Remove the bake burner from the oven (see page
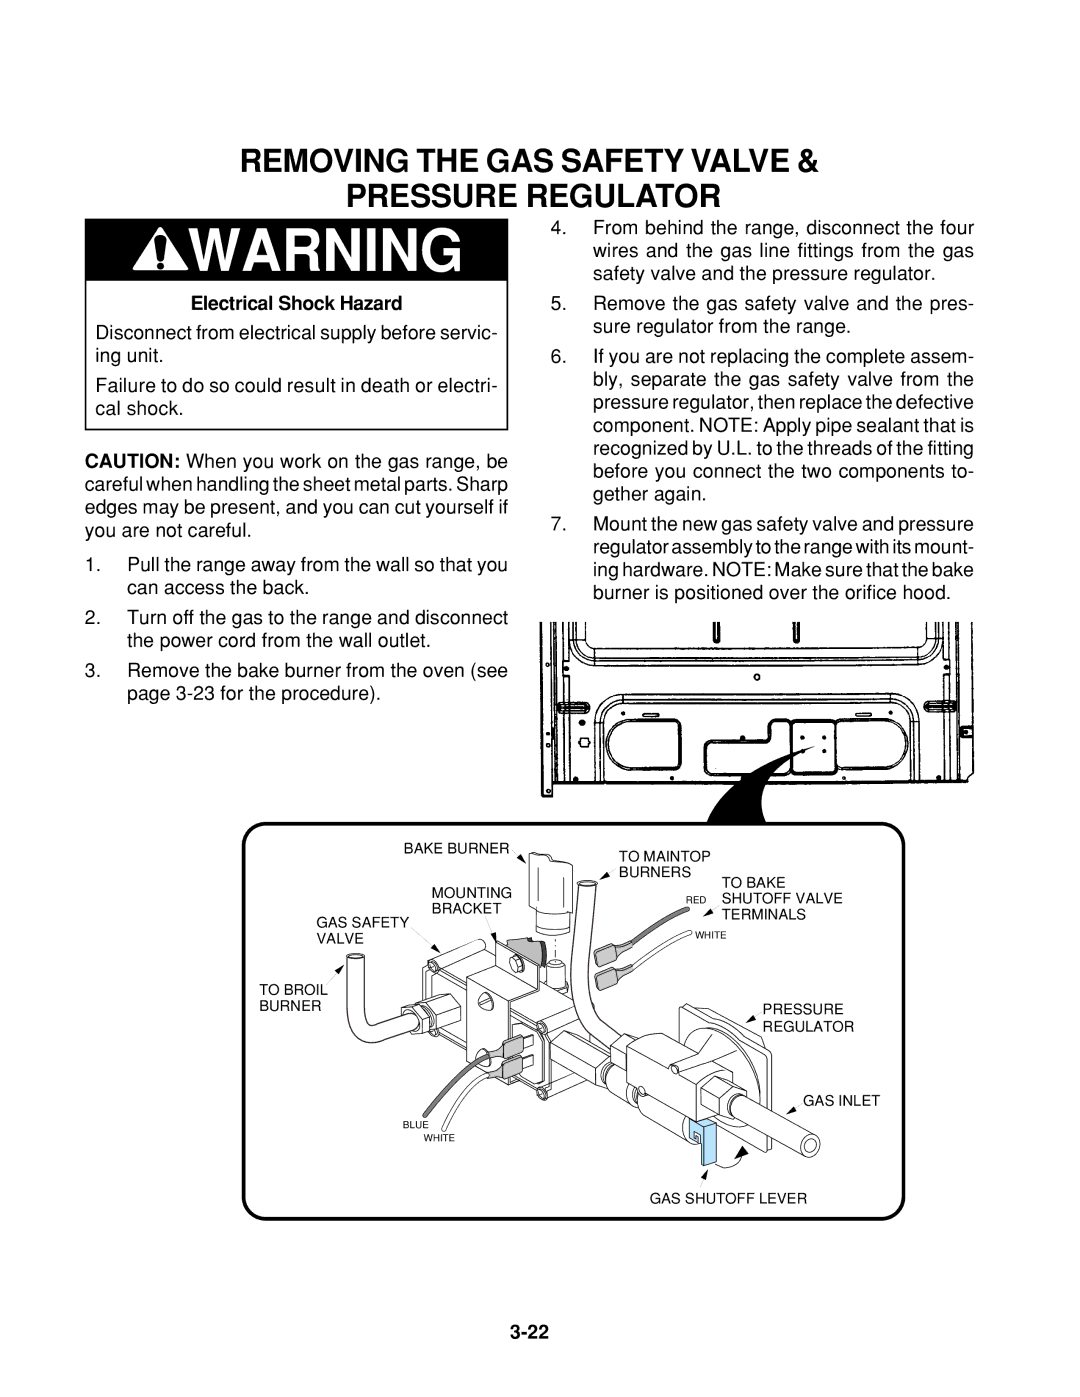
4.From behind the range, disconnect the four wires and the gas line fittings from the gas safety valve and the pressure regulator.
5.Remove the gas safety valve and the pres- sure regulator from the range.
6.If you are not replacing the complete assem- bly, separate the gas safety valve from the pressure regulator, then replace the defective component. NOTE: Apply pipe sealant that is recognized by U.L. to the threads of the fitting before you connect the two components to- gether again.
7.Mount the new gas safety valve and pressure regulator assembly to the range with its mount- ing hardware. NOTE: Make sure that the bake burner is positioned over the orifice hood.
BAKE BURNER | TO MAINTOP |
| |
|
| ||
| BURNERS | TO BAKE | |
MOUNTING |
| ||
RED | SHUTOFF VALVE | ||
BRACKET | |||
| TERMINALS | ||
GAS SAFETY |
| ||
WHITE | |||
VALVE | |||
|
| ||
TO BROIL |
|
| |
BURNER |
| PRESSURE | |
|
| REGULATOR | |
|
| GAS INLET | |
BLUE |
|
| |
WHITE |
|
| |
| GAS SHUTOFF LEVER | ||
