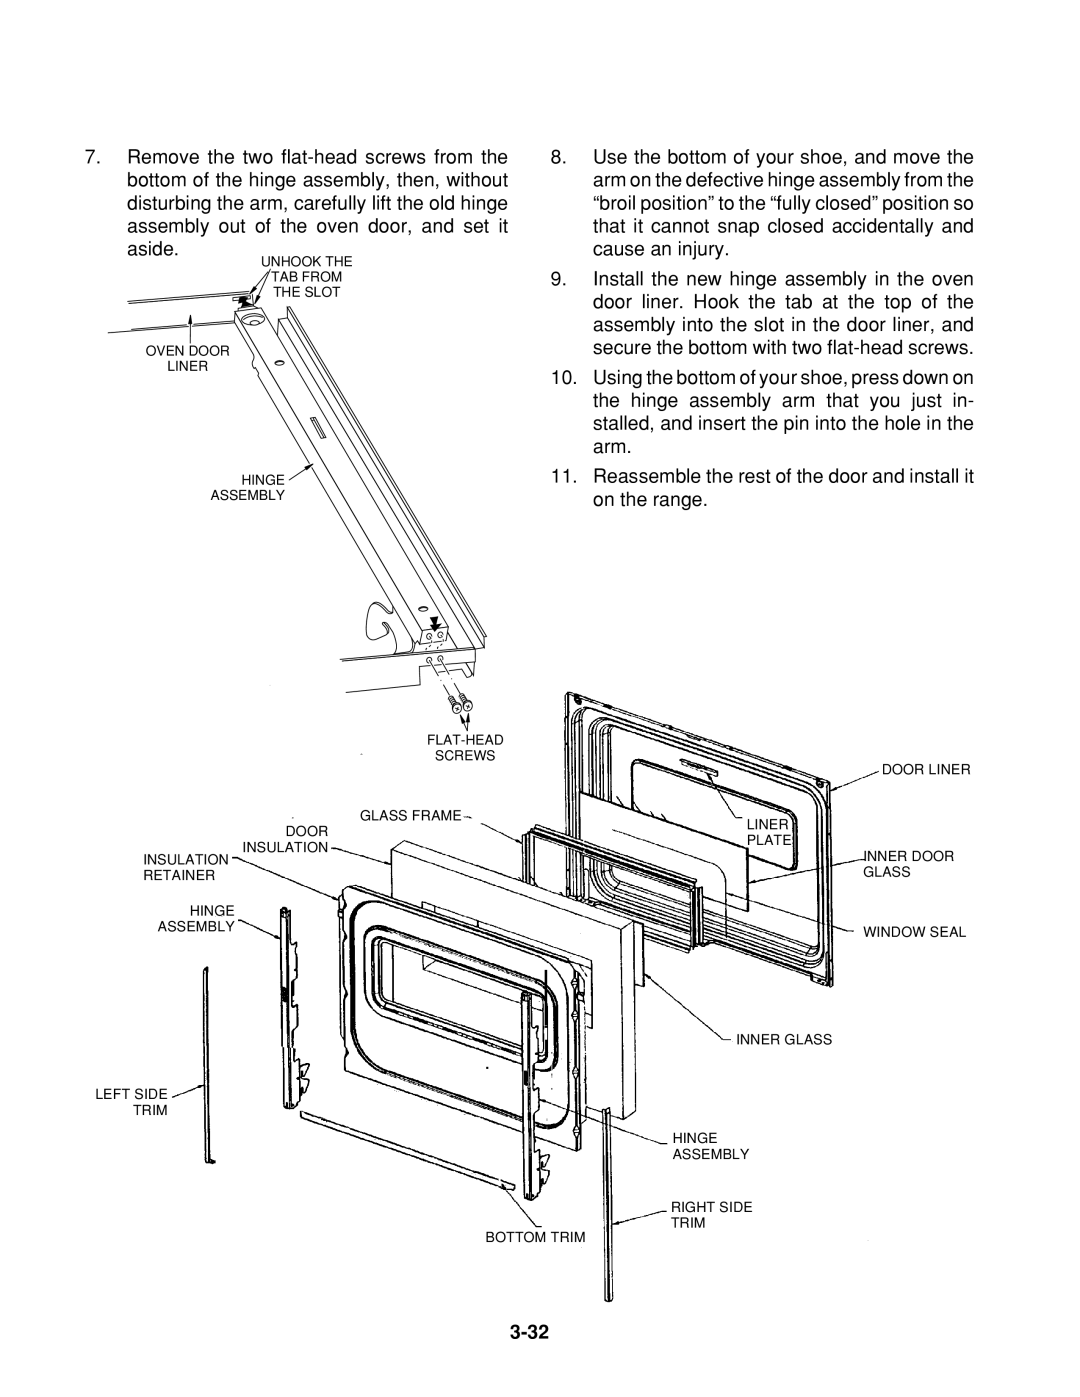
7.Remove the two
aside.
UNHOOK THE
TAB FROM
THE SLOT
OVEN DOOR
LINER
8.Use the bottom of your shoe, and move the arm on the defective hinge assembly from the “broil position” to the “fully closed” position so that it cannot snap closed accidentally and cause an injury.
9.Install the new hinge assembly in the oven door liner. Hook the tab at the top of the assembly into the slot in the door liner, and secure the bottom with two
10.Using the bottom of your shoe, press down on the hinge assembly arm that you just in- stalled, and insert the pin into the hole in the arm.
HINGE | 11. Reassemble the rest of the door and install it |
ASSEMBLY | on the range. |
SCREWS
|
|
| DOOR LINER |
| DOOR | GLASS FRAME | LINER |
|
| ||
|
| PLATE | |
| INSULATION |
| |
INSULATION |
| INNER DOOR | |
|
| ||
RETAINER |
|
| GLASS |
HINGE |
|
|
|
ASSEMBLY |
|
| WINDOW SEAL |
|
|
|
INNER GLASS
LEFT SIDE
TRIM
HINGE
ASSEMBLY
RIGHT SIDE
TRIM
BOTTOM TRIM
