Operating the ARN
Ensuring a Successful Installation
After connecting the ARN to the network, you can ensure a successful installation by checking the diagnostic LEDs on the front panel of the base module (refer to Figure
When you power on the ARN, the following sequence of front panel LED activity should occur:
•All base module LEDs light momentarily; this tests that the LEDs are operational.
•The Run, Boot, and Fail LEDs count through a short, initial startup sequence.
•The Pwr (power) LED lights and remains on.
•The Run LED begins flashing and continues to flash until the ARN completes all diagnostic tests.
•As the diagnostic procedure tests each module, the LED representing that module flashes slowly. If the module passes its diagnostic test, the LED remains on. If the module fails its diagnostic test, the Fail LED remains on and the module LED flashes rapidly.
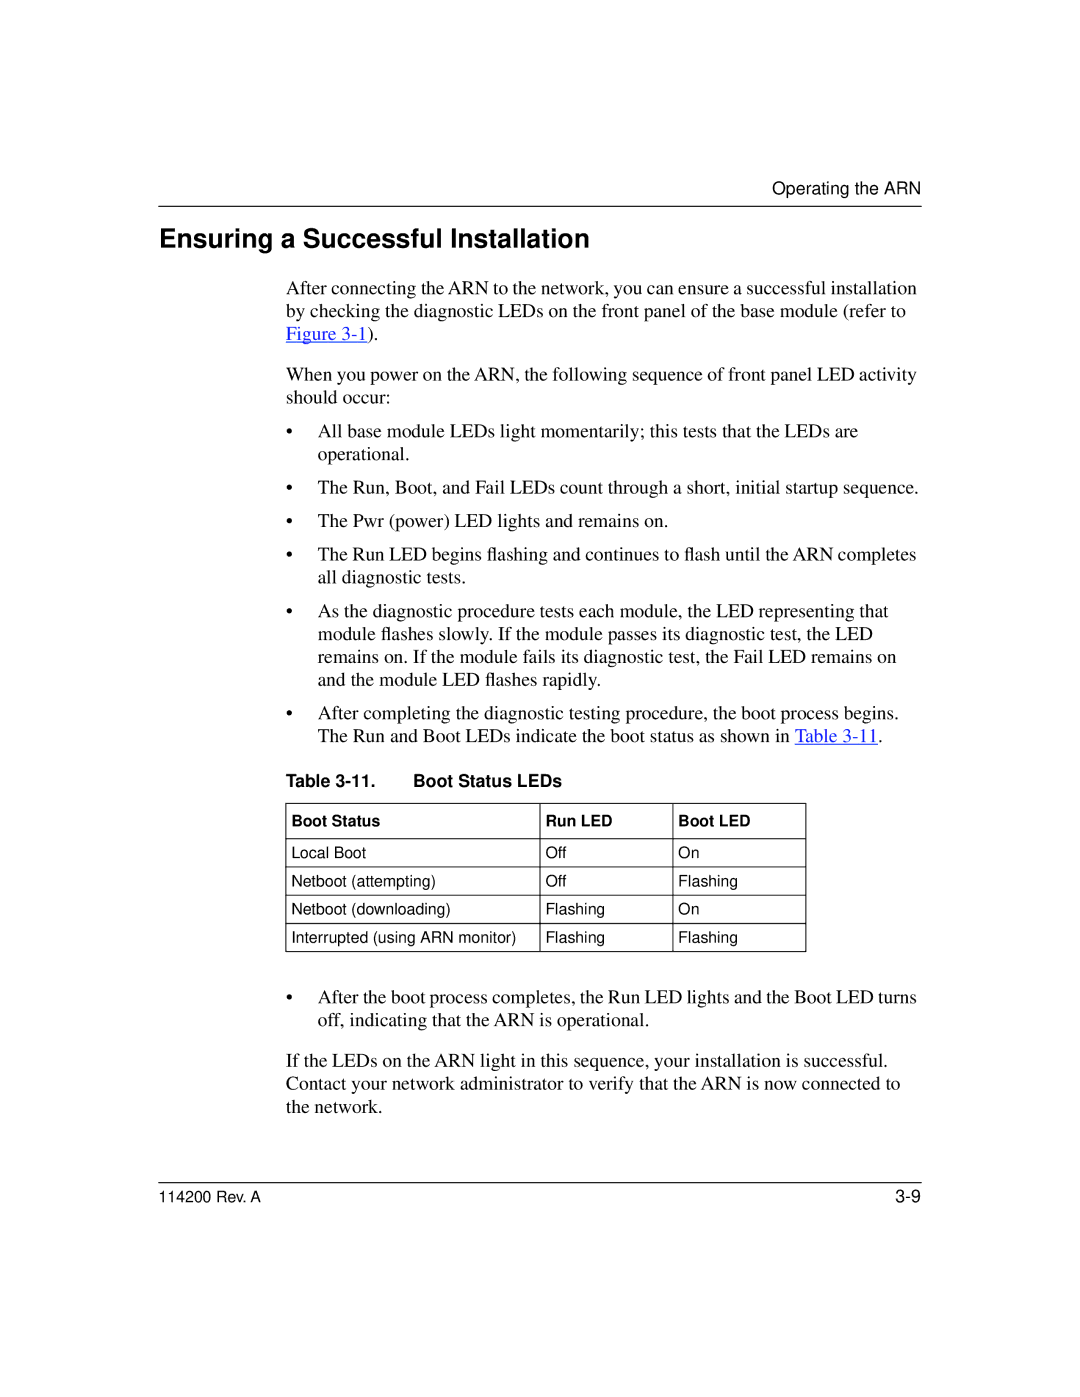
•After completing the diagnostic testing procedure, the boot process begins. The Run and Boot LEDs indicate the boot status as shown in Table
Table | Boot Status LEDs |
| |
|
|
|
|
Boot Status |
| Run LED | Boot LED |
|
|
|
|
Local Boot |
| Off | On |
|
|
| |
Netboot (attempting) | Off | Flashing | |
|
|
| |
Netboot (downloading) | Flashing | On | |
|
|
| |
Interrupted (using ARN monitor) | Flashing | Flashing | |
|
|
|
|
•After the boot process completes, the Run LED lights and the Boot LED turns off, indicating that the ARN is operational.
If the LEDs on the ARN light in this sequence, your installation is successful. Contact your network administrator to verify that the ARN is now connected to the network.
114200 Rev. A |