Preset Setting Tool
2: Changing Settings from the Preset Preview Frame
To Make Settings...
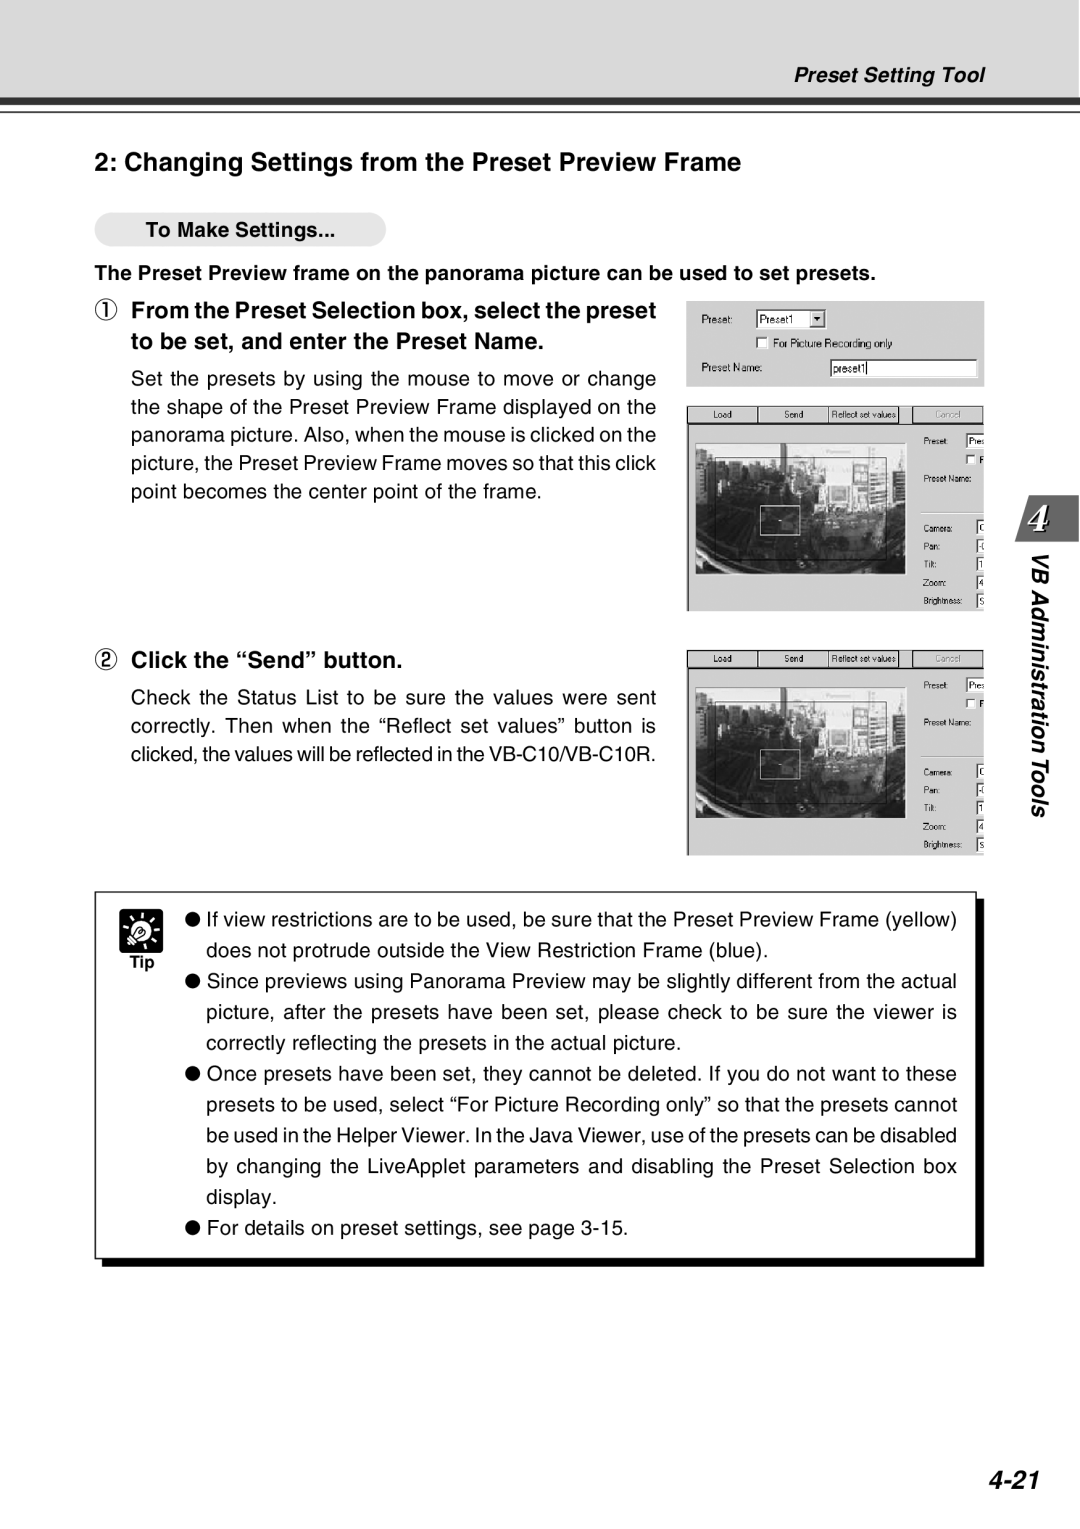
The Preset Preview frame on the panorama picture can be used to set presets.
1From the Preset Selection box, select the preset to be set, and enter the Preset Name.
Set the presets by using the mouse to move or change the shape of the Preset Preview Frame displayed on the panorama picture. Also, when the mouse is clicked on the picture, the Preset Preview Frame moves so that this click point becomes the center point of the frame.
2Click the “Send” button.
Check the Status List to be sure the values were sent correctly. Then when the “Reflect set values” button is clicked, the values will be reflected in the
VB Administration Tools
Tip
● If view restrictions are to be used, be sure that the Preset Preview Frame (yellow) does not protrude outside the View Restriction Frame (blue).
●Since previews using Panorama Preview may be slightly different from the actual picture, after the presets have been set, please check to be sure the viewer is correctly reflecting the presets in the actual picture.
●Once presets have been set, they cannot be deleted. If you do not want to these presets to be used, select “For Picture Recording only” so that the presets cannot be used in the Helper Viewer. In the Java Viewer, use of the presets can be disabled by changing the LiveApplet parameters and disabling the Preset Selection box display.
●For details on preset settings, see page