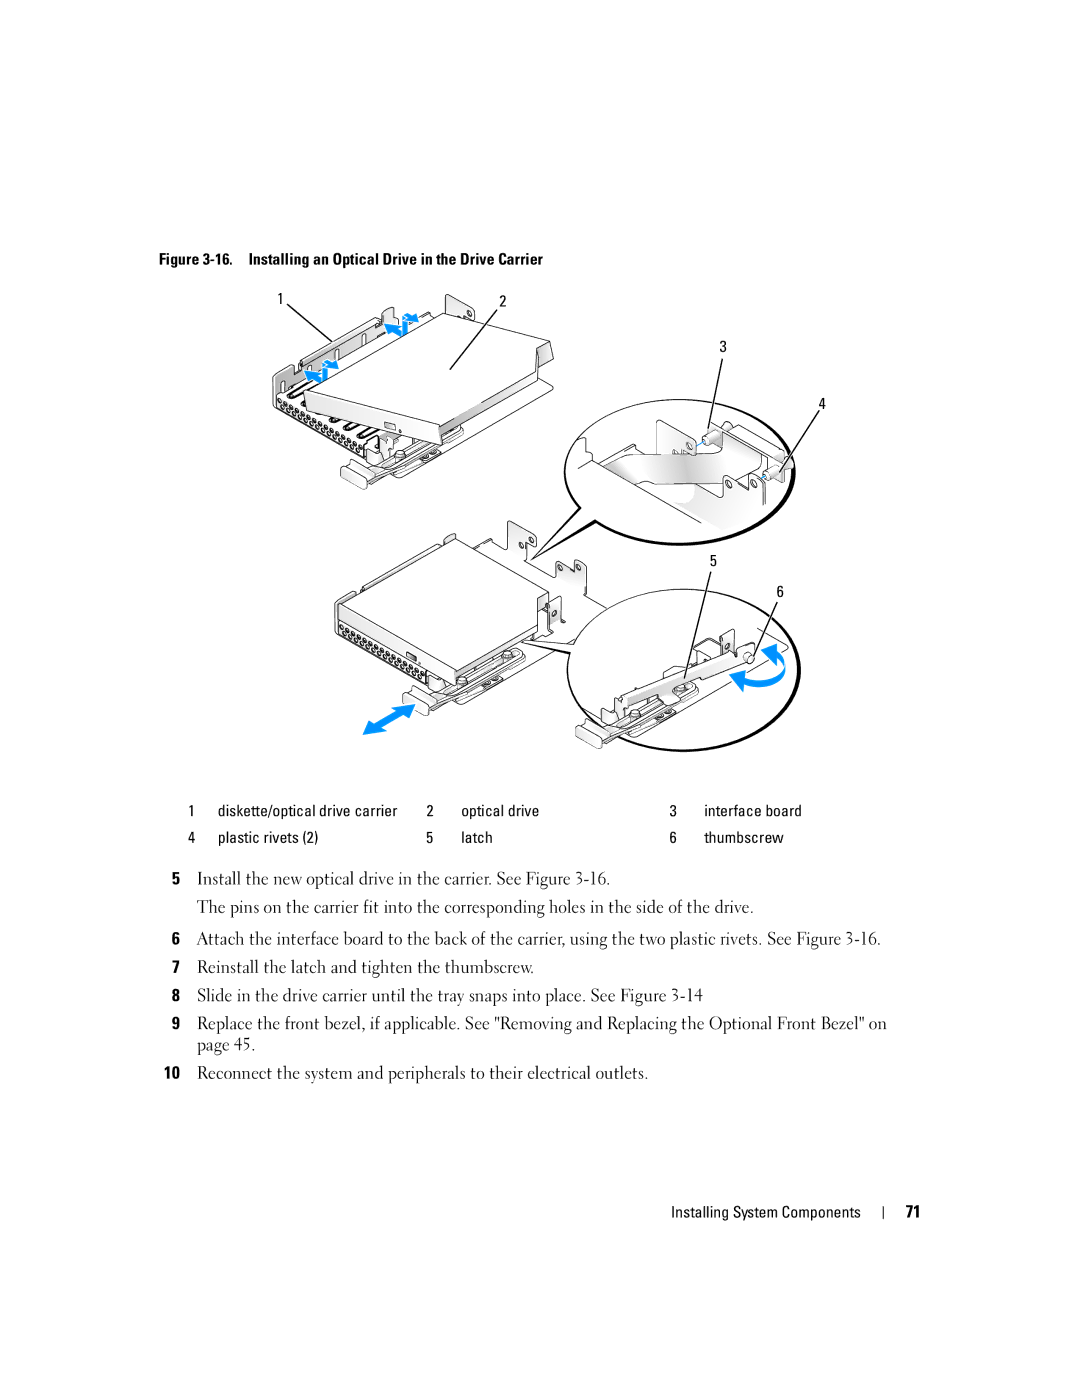
Figure 3-16. Installing an Optical Drive in the Drive Carrier
1 | 2 |
3
4
5
6
1 | diskette/optical drive carrier | 2 | optical drive | 3 | interface board |
4 | plastic rivets (2) | 5 | latch | 6 | thumbscrew |
5Install the new optical drive in the carrier. See Figure
The pins on the carrier fit into the corresponding holes in the side of the drive.
6Attach the interface board to the back of the carrier, using the two plastic rivets. See Figure
7Reinstall the latch and tighten the thumbscrew.
8Slide in the drive carrier until the tray snaps into place. See Figure
9Replace the front bezel, if applicable. See "Removing and Replacing the Optional Front Bezel" on page 45.
10Reconnect the system and peripherals to their electrical outlets.
Installing System Components
71