Hard disk drive
![]() NOTE: Read Warnings and cautions on page 59 before servicing this component. This section provides information to successfully remove and install a hard disk drive.
NOTE: Read Warnings and cautions on page 59 before servicing this component. This section provides information to successfully remove and install a hard disk drive.
Removing the hard disk drive
To remove a hard disk drive:
1.Disconnect power from the workstation (see Predisassembly procedures on page 66).
2.Remove the side access panel (see Removing the side access panel on page 69).
3.Disconnect the power and data cables from the drive.
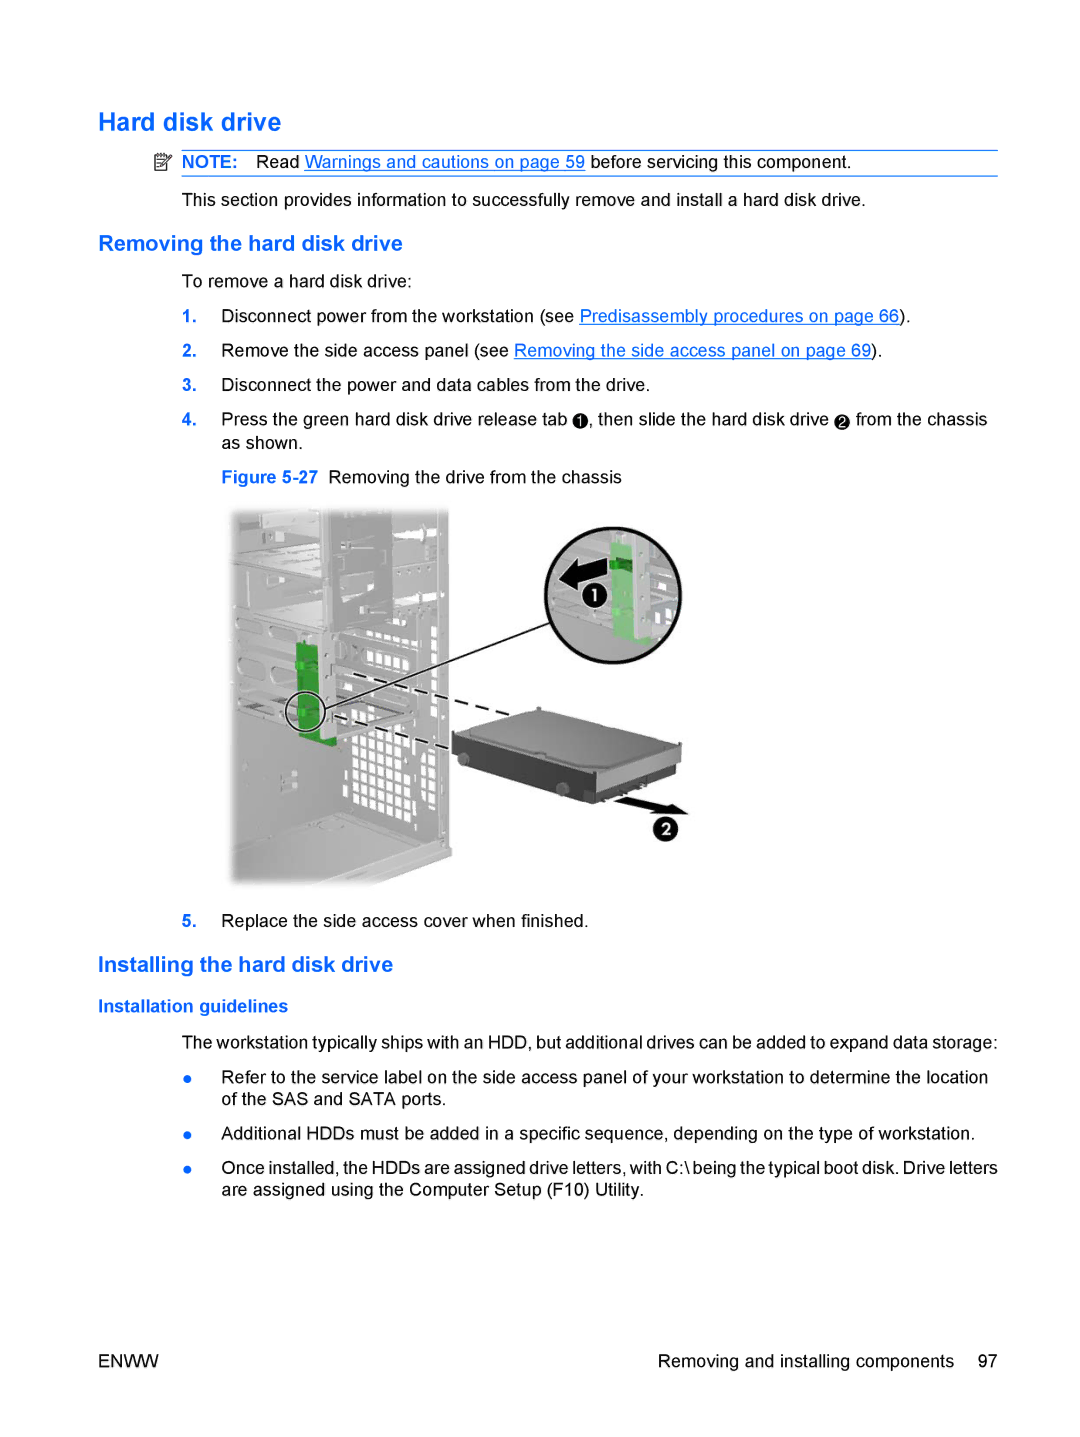
4.Press the green hard disk drive release tab ![]() , then slide the hard disk drive 2 from the chassis as shown.
, then slide the hard disk drive 2 from the chassis as shown.
Figure 5-27 Removing the drive from the chassis
5.Replace the side access cover when finished.
Installing the hard disk drive
Installation guidelines
The workstation typically ships with an HDD, but additional drives can be added to expand data storage:
●Refer to the service label on the side access panel of your workstation to determine the location of the SAS and SATA ports.
●Additional HDDs must be added in a specific sequence, depending on the type of workstation.
●Once installed, the HDDs are assigned drive letters, with C:\ being the typical boot disk. Drive letters are assigned using the Computer Setup (F10) Utility.
ENWW | Removing and installing components 97 |