System board
![]() NOTE: Read Warnings and cautions on page 59 before servicing this component.
NOTE: Read Warnings and cautions on page 59 before servicing this component.
This section describes replacing the system board.
Removing the system board
To remove the system board:
1.Disconnect power from the workstation (see Predisassembly procedures on page 66).
2.Remove the side access panel (see Removing the side access panel on page 69).
3.Remove expansion boards and graphics cards (see Removing an expansion card on page 93), and then remove the CPU heatsink (see Removing the CPU heatsink on page 101).
TIP: Make a note of the cable connections before disconnecting them from the system board. For more information, refer to Power connectionson page 83.
4.Disconnect all cabling from the system board.
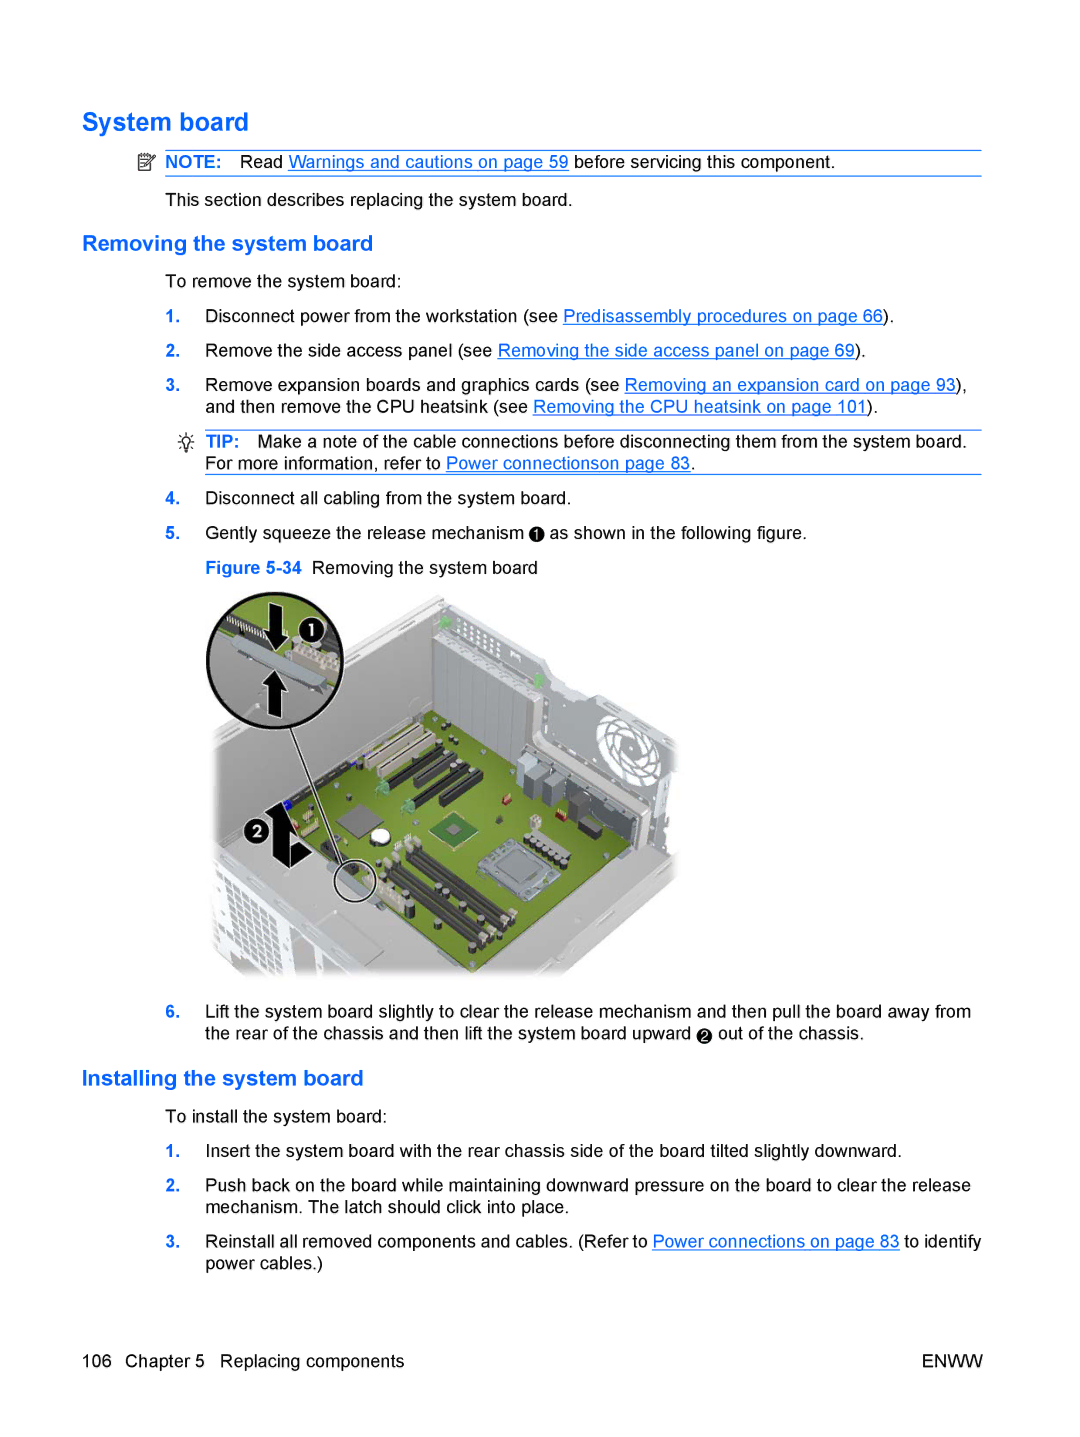
5.Gently squeeze the release mechanism ![]() as shown in the following figure. Figure
as shown in the following figure. Figure
6.Lift the system board slightly to clear the release mechanism and then pull the board away from the rear of the chassis and then lift the system board upward 2 out of the chassis.
Installing the system board
To install the system board:
1.Insert the system board with the rear chassis side of the board tilted slightly downward.
2.Push back on the board while maintaining downward pressure on the board to clear the release mechanism. The latch should click into place.
3.Reinstall all removed components and cables. (Refer to Power connections on page 83 to identify power cables.)
106 Chapter 5 Replacing components | ENWW |