Note: The electromagnetic interference (EMI) integrity and cooling of the server are both protected by having bays 1 through 4 covered or occupied. When you install a drive, save the filler panel from the bay, in case you later remove the drive and do not replace it with another.
Preinstallation steps (all bays)
Before you install drives in the server, verify that you have all the cables and any other equipment specified in the documentation that comes with the drive. You might also need to perform certain preinstallation activities. Some of the steps are required only during the initial installation of an option.
1.Read “Safety information” on page 133, “Handling electrostatic discharge- sensitive devices” on page 136, and the documentation that comes with the drive.
2.Choose the bay in which you want to install the drive.
3.Check the instructions that come with the drive to see if you need to set any switches or jumpers on the drive.
Installing a drive in bay 1, 2, 3, or 4
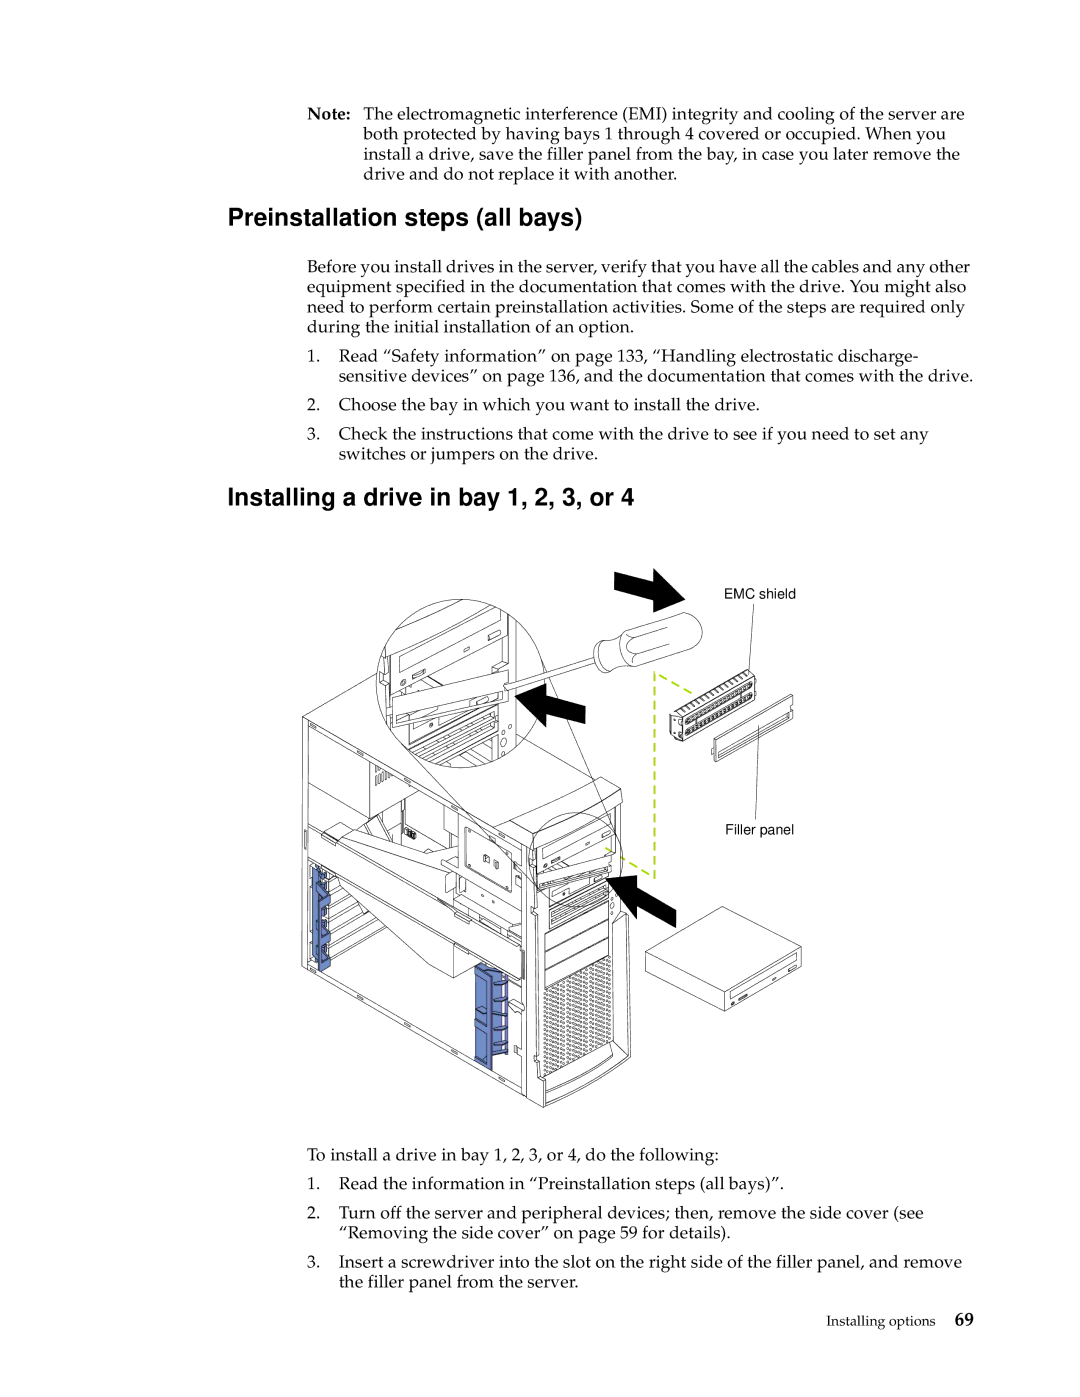
EMC shield
Filler panel
To install a drive in bay 1, 2, 3, or 4, do the following:
1.Read the information in “Preinstallation steps (all bays)”.
2.Turn off the server and peripheral devices; then, remove the side cover (see “Removing the side cover” on page 59 for details).
3.Insert a screwdriver into the slot on the right side of the filler panel, and remove the filler panel from the server.
Installing options 69
