Installing memory modules
Adding memory to the server is an easy way to make programs run faster. You can increase the amount of memory in the server by installing options called memory- module kits. Each kit contains one
The server comes with a dual
Notes:
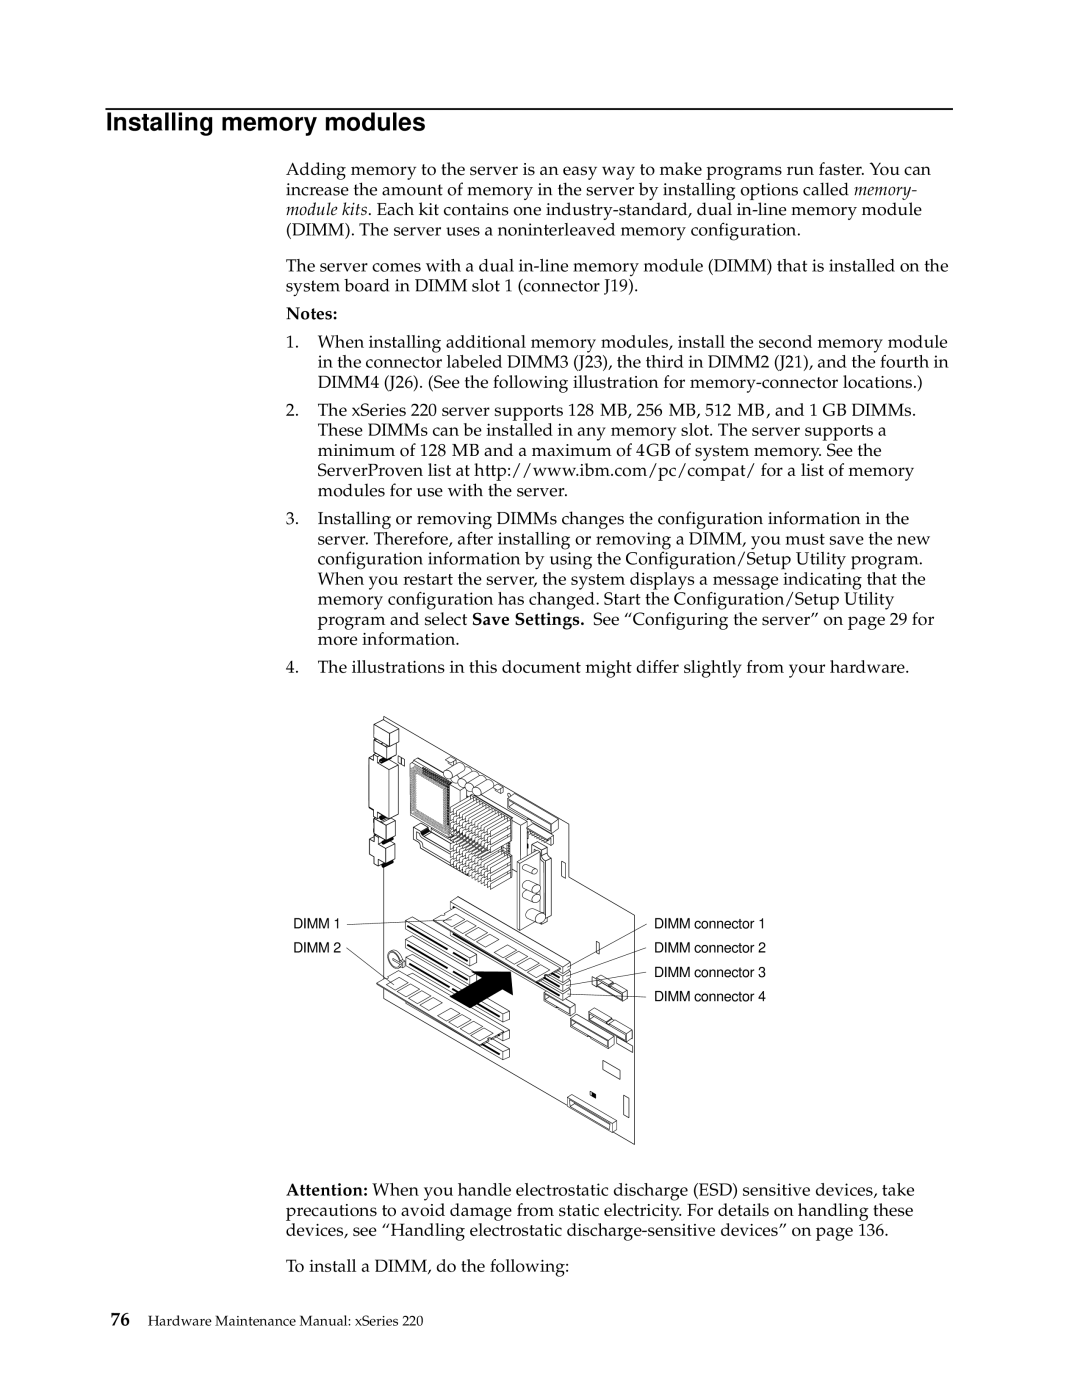
1.When installing additional memory modules, install the second memory module in the connector labeled DIMM3 (J23), the third in DIMM2 (J21), and the fourth in DIMM4 (J26). (See the following illustration for
2.The xSeries 220 server supports 128 MB, 256 MB, 512 MB, and 1 GB DIMMs. These DIMMs can be installed in any memory slot. The server supports a minimum of 128 MB and a maximum of 4GB of system memory. See the ServerProven list at http://www.ibm.com/pc/compat/ for a list of memory modules for use with the server.
3.Installing or removing DIMMs changes the configuration information in the server. Therefore, after installing or removing a DIMM, you must save the new configuration information by using the Configuration/Setup Utility program. When you restart the server, the system displays a message indicating that the memory configuration has changed. Start the Configuration/Setup Utility program and select Save Settings. See “Configuring the server” on page 29 for more information.
4.The illustrations in this document might differ slightly from your hardware.
DIMM 1 | DIMM connector 1 |
DIMM 2 | DIMM connector 2 |
| DIMM connector 3 |
| DIMM connector 4 |
Attention: When you handle electrostatic discharge (ESD) sensitive devices, take precautions to avoid damage from static electricity. For details on handling these devices, see “Handling electrostatic
To install a DIMM, do the following:
