HELIX DN9340E/DN9344E Remote Control Software
User Guide
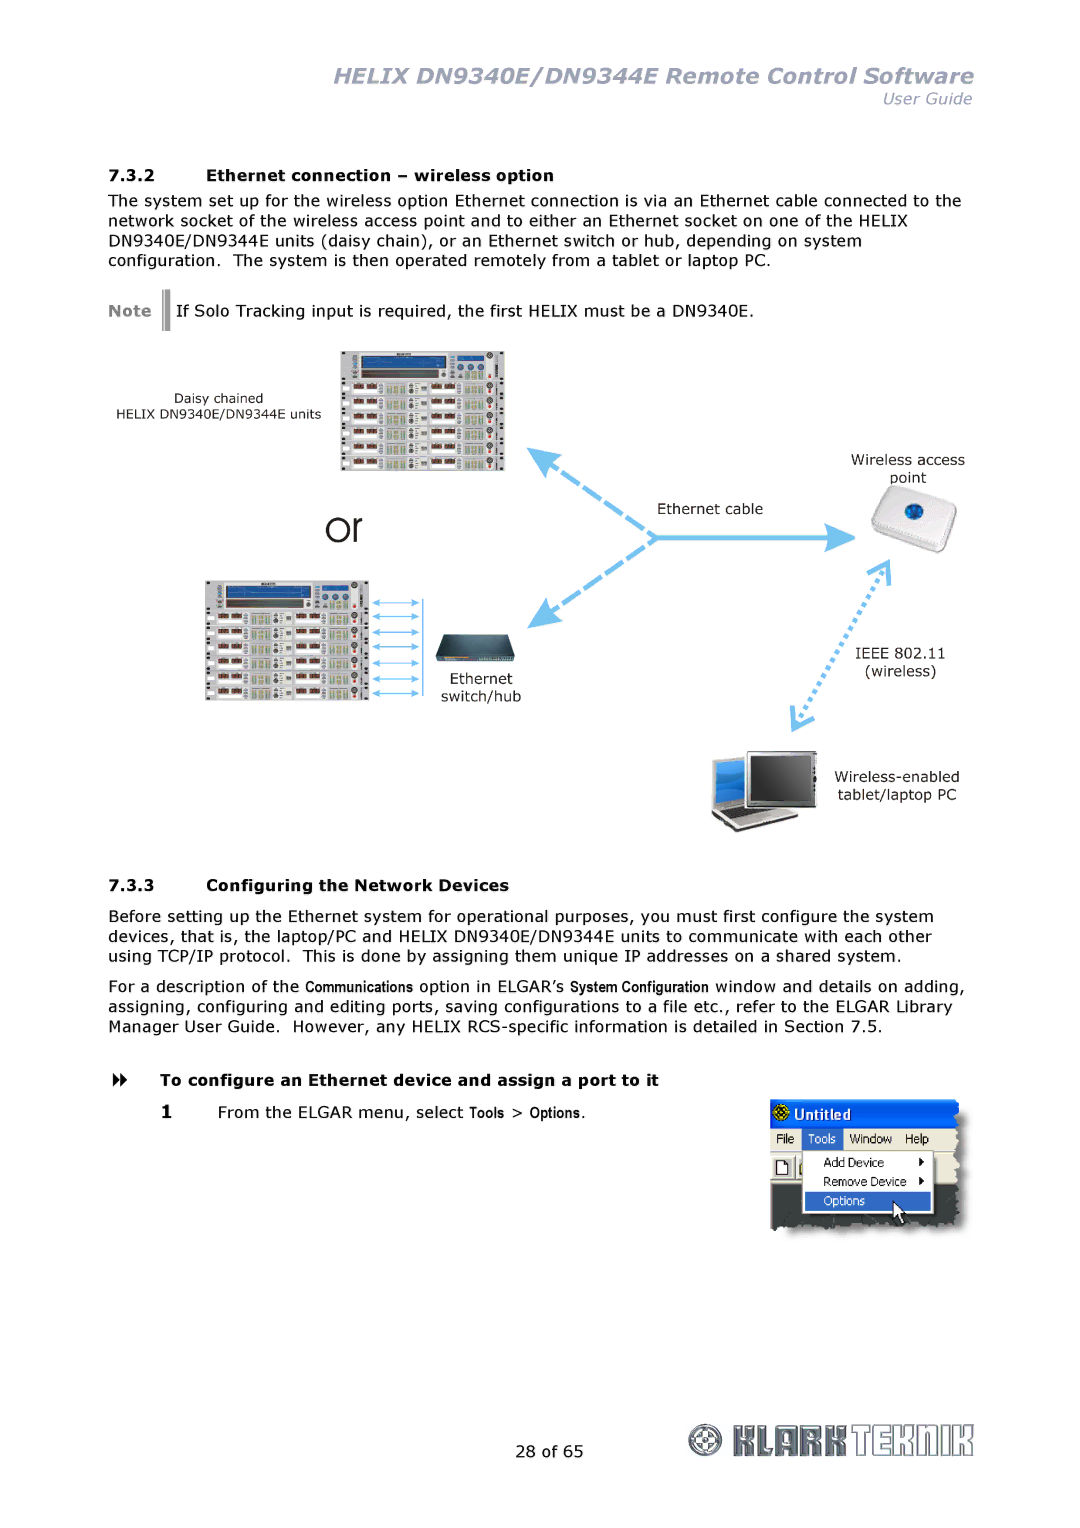
7.3.2Ethernet connection – wireless option
The system set up for the wireless option Ethernet connection is via an Ethernet cable connected to the network socket of the wireless access point and to either an Ethernet socket on one of the HELIX DN9340E/DN9344E units (daisy chain), or an Ethernet switch or hub, depending on system configuration. The system is then operated remotely from a tablet or laptop PC.
Note ![]()
![]() If Solo Tracking input is required, the first HELIX must be a DN9340E.
If Solo Tracking input is required, the first HELIX must be a DN9340E.
7.3.3Configuring the Network Devices
Before setting up the Ethernet system for operational purposes, you must first configure the system devices, that is, the laptop/PC and HELIX DN9340E/DN9344E units to communicate with each other using TCP/IP protocol. This is done by assigning them unique IP addresses on a shared system.
For a description of the Communications option in ELGAR’s System Configuration window and details on adding, assigning, configuring and editing ports, saving configurations to a file etc., refer to the ELGAR Library Manager User Guide. However, any HELIX
To configure an Ethernet device and assign a port to it
1From the ELGAR menu, select Tools > Options.
28 of 65