HELIX DN9340E/DN9344E Remote Control Software
User Guide
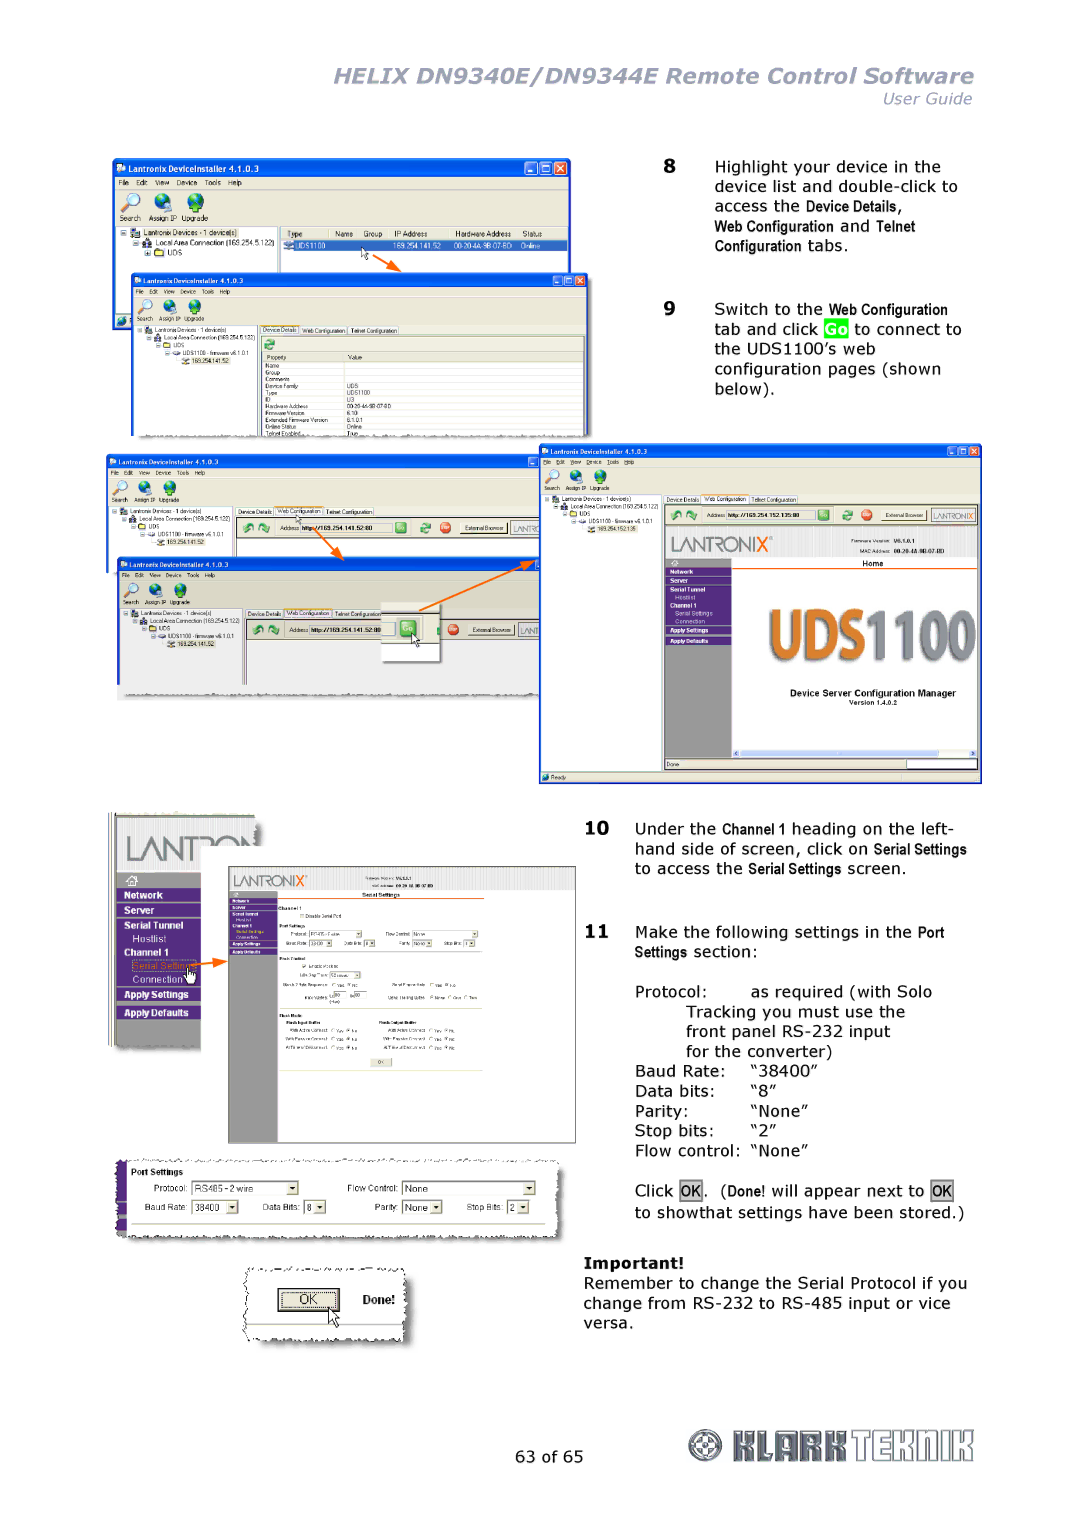
8 Highlight your device in the device list and
Web Configuration and Telnet
Configuration tabs.
9 Switch to the Web Configuration tab and click Go to connect to the UDS1100’s web configuration pages (shown below).
10Under the Channel 1 heading on the left- hand side of screen, click on Serial Settings to access the Serial Settings screen.
11Make the following settings in the Port Settings section:
Protocol: as required (with Solo Tracking you must use the front panel
Baud Rate: | “38400” |
Data bits: | “8” |
Parity: | “None” |
Stop bits: | “2” |
Flow control: | “None” |
Click
OK . (Done! will appear next to
OK
to showthat settings have been stored.)
Important!
Remember to change the Serial Protocol if you change from
63 of 65