27
4. Settings Required for Network Printing
16.Select “Queues Serviced by Printer” and press “Enter.”
17.Select “CN3101e” created in step 12 from the “Defined printer” list and press “Enter.”
18.Press “Insert” to display the “Available Queue” list of the printer.
19.Select the print queue prepared in step 4. Specify priority using a corresponding number, 1 being the top priority and 10 being the lowest. Then, press “Enter” to validate the selection.
20.Press “Esc” to quit Pconsole.
*For the queue user rights, printer notification option, assignment of multiple queues, and password, see the document available for NetWare and set them as necessary.
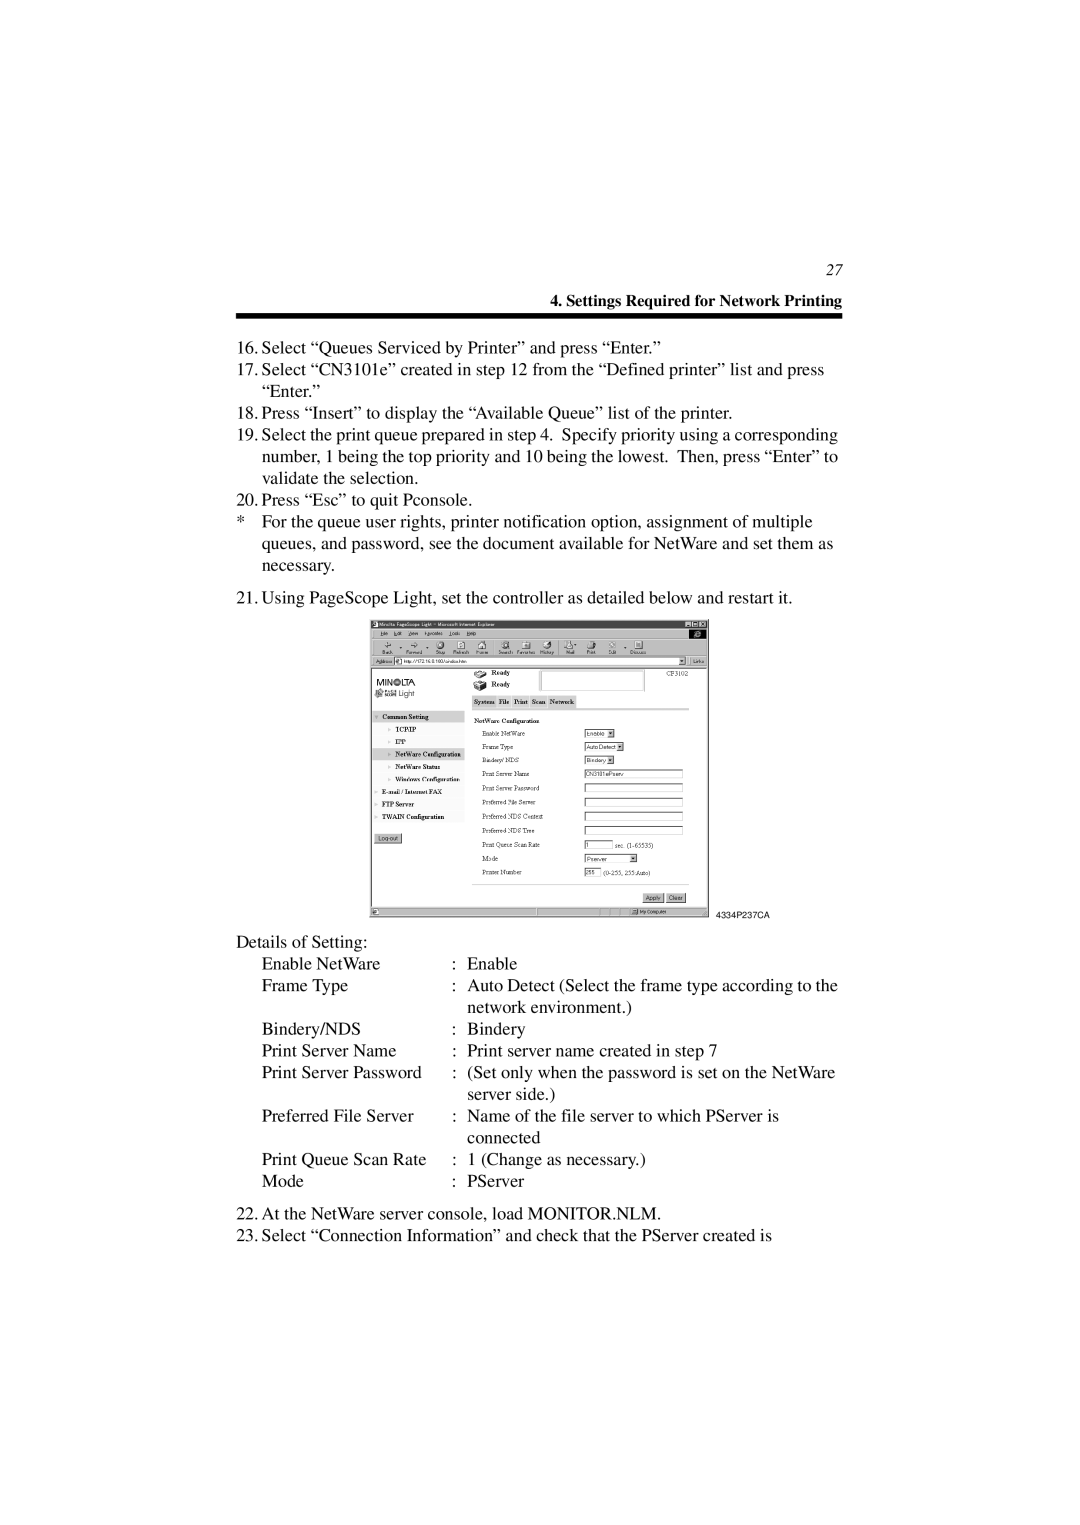
21. Using PageScope Light, set the controller as detailed below and restart it.
| 4334P237CA |
Details of Setting: |
|
Enable NetWare | : Enable |
Frame Type | : Auto Detect (Select the frame type according to the |
| network environment.) |
Bindery/NDS | : Bindery |
Print Server Name | : Print server name created in step 7 |
Print Server Password | : (Set only when the password is set on the NetWare |
| server side.) |
Preferred File Server | : Name of the file server to which PServer is |
| connected |
Print Queue Scan Rate | : 1 (Change as necessary.) |
Mode | : PServer |
22.At the NetWare server console, load MONITOR.NLM.
23.Select “Connection Information” and check that the PServer created is