M R V C o m m u n i c a t i o n s , I n c . – I n s t a l l a t i o n M a n u a l
Transceiver Alignment
General
Successful installation of the TereScope depends primarily on precise and accurate optical alignment. Carefully follow the instructions below!!!
Tools and Equipment
Note
The customer can order patch cables and
MRV.
The following tools and equipment are required at each link end:
•A communication device (mobile phone or
•
•
Procedure
Turn on the power to the TereScope heads from the power source.
Models TS700/155 ,TS700/100 and TS800/155: Set DIP switch toggles 1, 2 to the “Alignment” position (indicated on the back panel). In TS800 models set the SD2 DIP switch. In TS700/100 only DIP switch toggle 1.
Model TS700G: Even if the data port is left unconnected, the TereScope transmits an Idle Signal which can be used to perform alignment.
The transceiver alignment procedure is implemented in two stages:
#Coarse Alignment
#Fine Alignment
Coarse Alignment
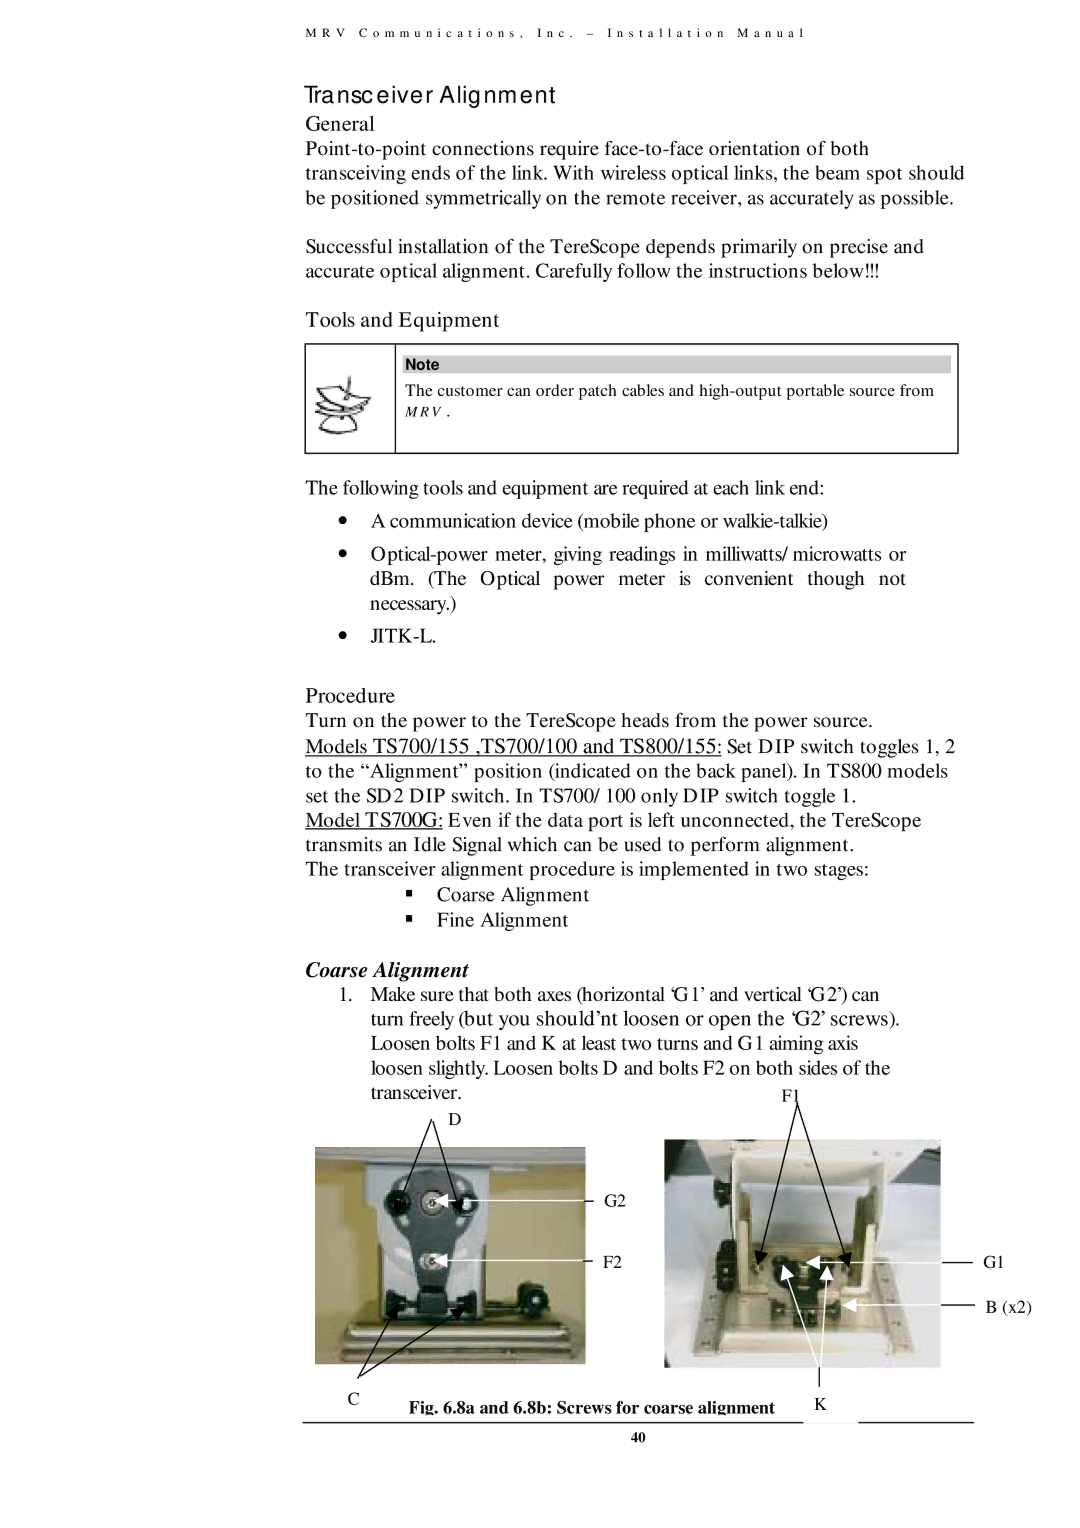
1.Make sure that both axes (horizontal ‘G1’ and vertical ‘G2’) can turn freely (but you should’nt loosen or open the ‘G2’ screws). Loosen bolts F1 and K at least two turns and G1 aiming axis
loosen slightly. Loosen bolts D and bolts F2 on both sides of the
transceiver. | F1 |
D |
|
G2
F2 | G1 |
B (x2)
C | Fig. 6.8a and 6.8b: Screws for coarse alignment | K |
|
|
|
40
