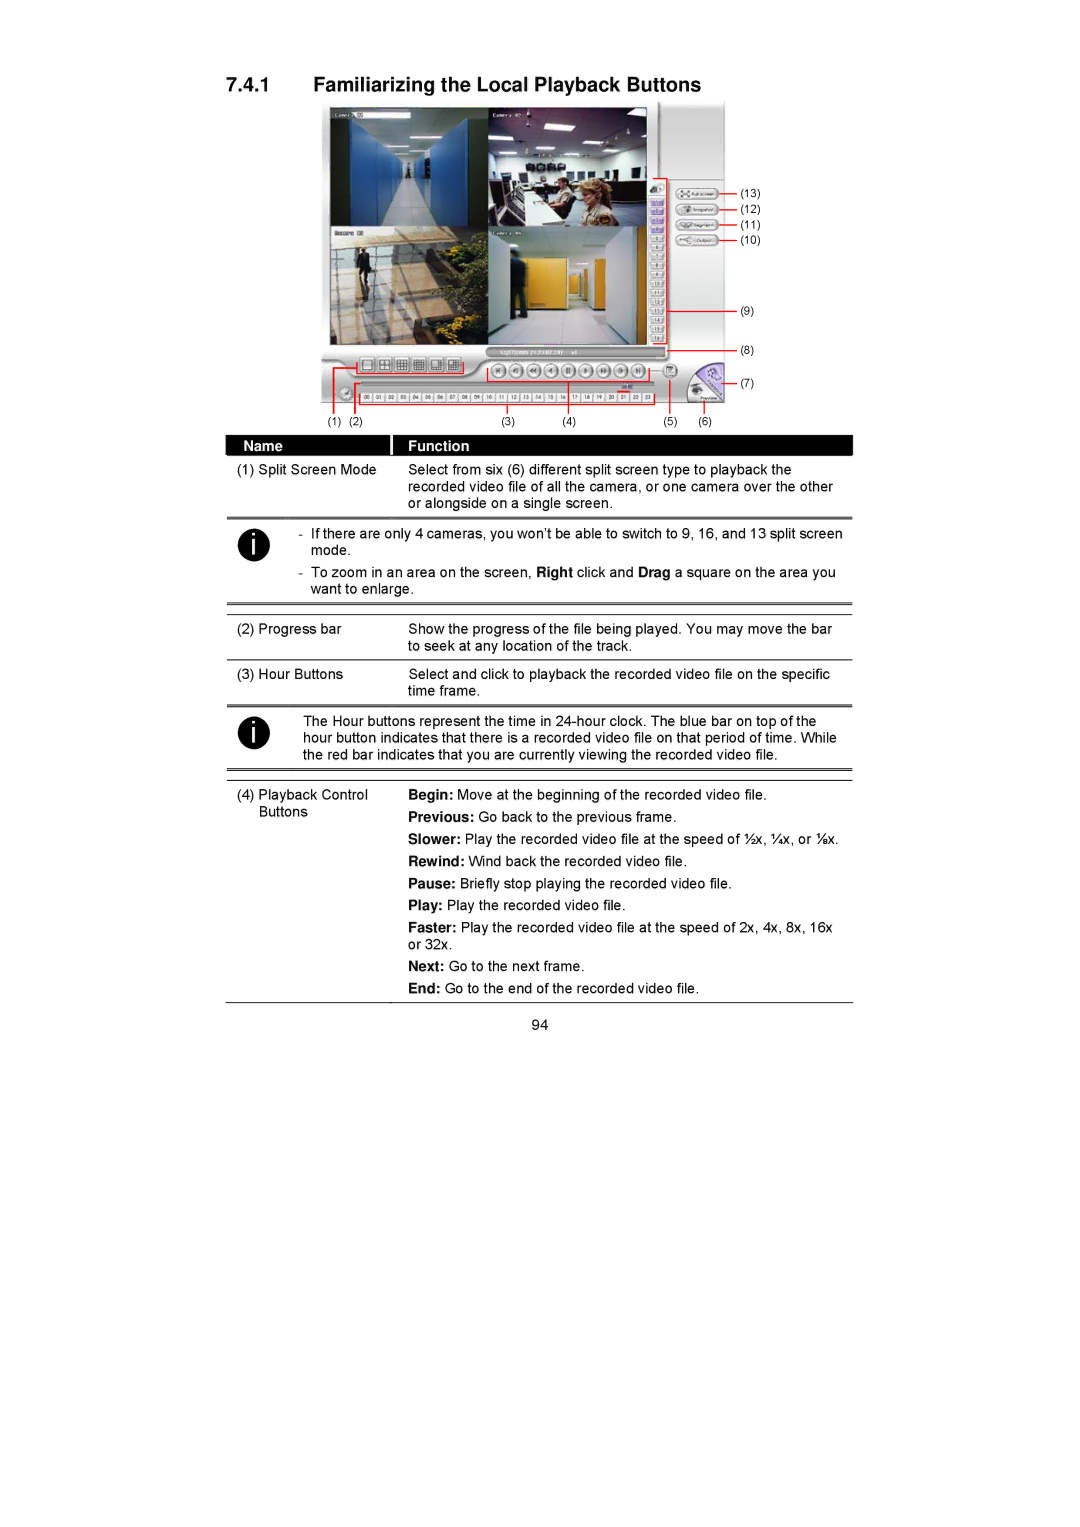
7.4.1Familiarizing the Local Playback Buttons
(13)
(12)
(11)
(10)
(9)
(8)
(7)
|
| (1) | (2) | (3) | (4) | (5) | (6) | |
|
|
|
|
|
|
|
|
|
Name |
|
|
|
| Function |
|
|
|
(1) Split Screen Mode |
| Select from six (6) different split screen type to playback the | ||||||
|
|
|
|
| recorded video file of all the camera, or one camera over the other | |||
|
|
|
|
| or alongside on a single screen. |
|
| |
|
|
| ||||||
i | - | If there are only 4 cameras, you won’t be able to switch to 9, 16, and 13 split screen | ||||||
| mode. |
|
|
|
|
| ||
-To zoom in an area on the screen, Right click and Drag a square on the area you want to enlarge.
(2) | Progress bar | Show the progress of the file being played. You may move the bar |
|
| to seek at any location of the track. |
|
|
|
(3) | Hour Buttons | Select and click to playback the recorded video file on the specific |
|
| time frame. |
i | The Hour buttons represent the time in |
hour button indicates that there is a recorded video file on that period of time. While | |
| the red bar indicates that you are currently viewing the recorded video file. |
|
|
|
|
(4)Playback Control Buttons
Begin: Move at the beginning of the recorded video file.
Previous: Go back to the previous frame.
Slower: Play the recorded video file at the speed of ½x, ¼x, or ⅛x.
Rewind: Wind back the recorded video file.
Pause: Briefly stop playing the recorded video file.
Play: Play the recorded video file.
Faster: Play the recorded video file at the speed of 2x, 4x, 8x, 16x or 32x.
Next: Go to the next frame.
End: Go to the end of the recorded video file.
94
