Name |
| Function | |
(11) | Camera ID |
| Show the number of cameras that are being viewed. When you are |
|
|
| in single screen mode, click the camera ID number to switch and |
|
|
| view other camera. |
|
|
|
|
(12) | Event log |
| Show the record of activities that take place in the system. To filter |
|
|
| the records, select and click the option button to only display Event, |
|
|
| System, Operation, Network or POS. |
|
|
|
|
(13) | Snapshot |
| Capture and save the screen shot either in *.jpg or *.bmp format. |
|
|
| |
(14) Full screen |
| Use the entire area of the screen to only display the video. | |
|
|
| To return, Right click the mouse or press ESC on the keyboard. |
|
|
|
|
(15) | Alarm |
| Alert and display warning info. Only |
|
|
| and turn on, off and trigger the Sensor and Relay by |
|
|
| item in the Sensor and Relay list. |
|
|
|
|
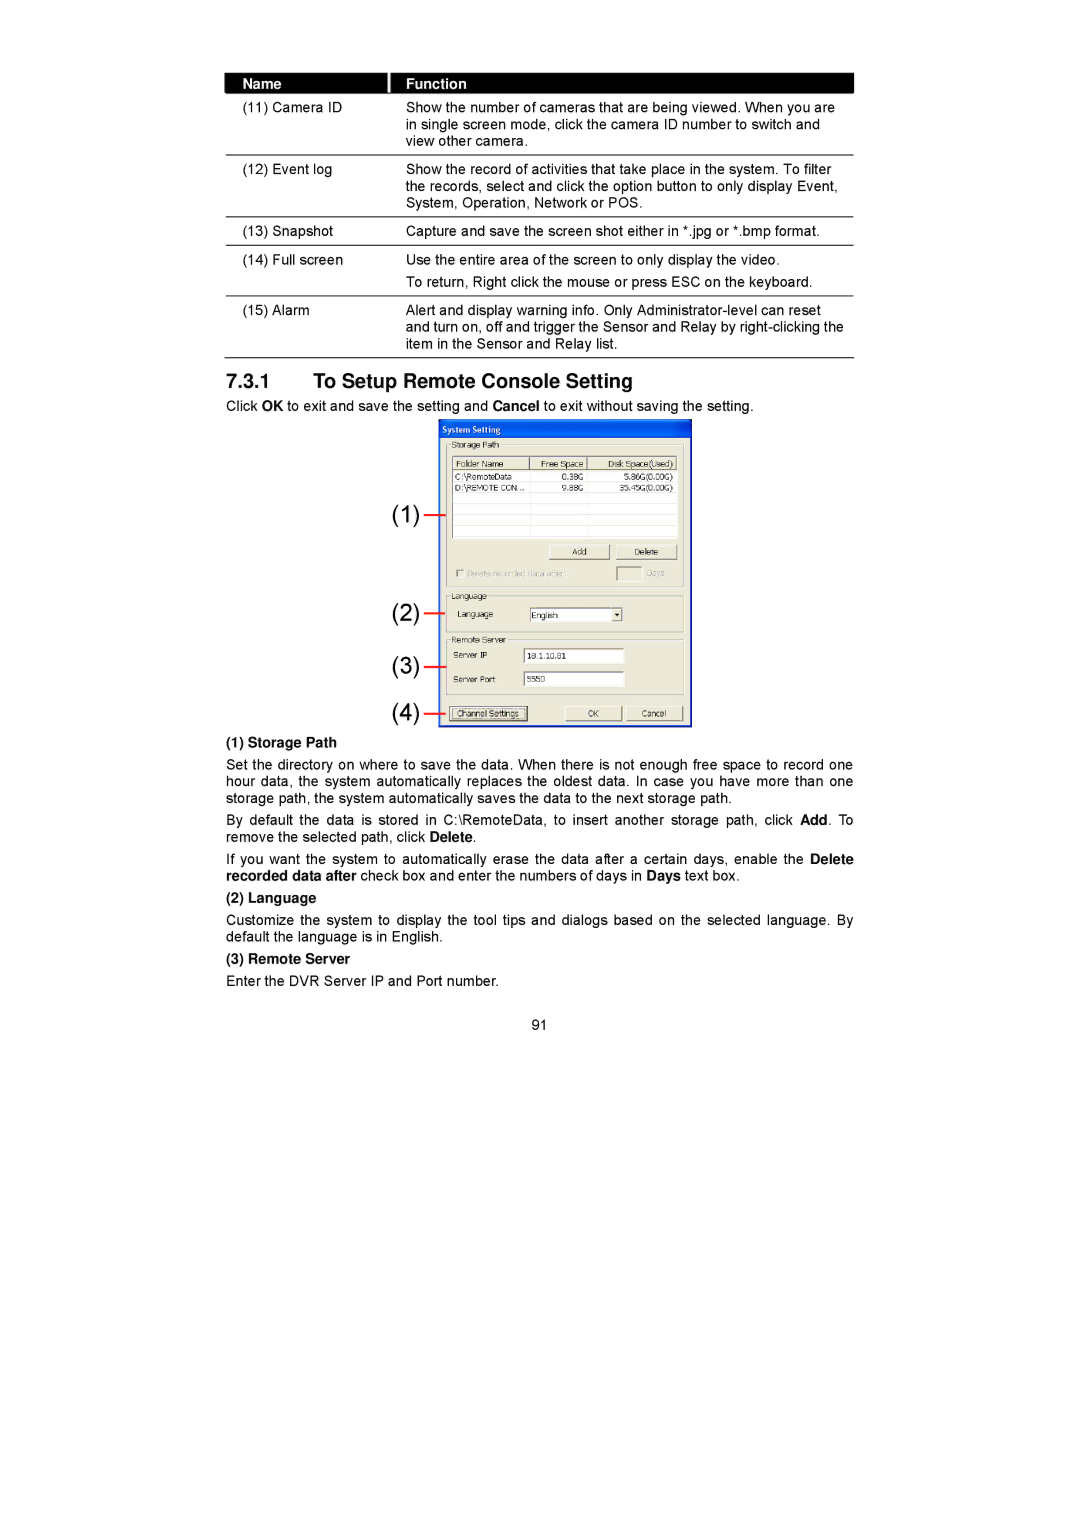
7.3.1To Setup Remote Console Setting
Click OK to exit and save the setting and Cancel to exit without saving the setting.
(1)
(2)
(3)
(4)
(1) Storage Path
Set the directory on where to save the data. When there is not enough free space to record one hour data, the system automatically replaces the oldest data. In case you have more than one storage path, the system automatically saves the data to the next storage path.
By default the data is stored in C:\RemoteData, to insert another storage path, click Add. To remove the selected path, click Delete.
If you want the system to automatically erase the data after a certain days, enable the Delete recorded data after check box and enter the numbers of days in Days text box.
(2) Language
Customize the system to display the tool tips and dialogs based on the selected language. By default the language is in English.
(3) Remote Server
Enter the DVR Server IP and Port number.
91