Chapter 4 Customizing the DVR System
In the Preview/Advanced screen mode, click ![]() button to customize your DVR. When the DVR configuration setup selection appears, select and click the buttons you want to change the setting.
button to customize your DVR. When the DVR configuration setup selection appears, select and click the buttons you want to change the setting.
4.1System Setting
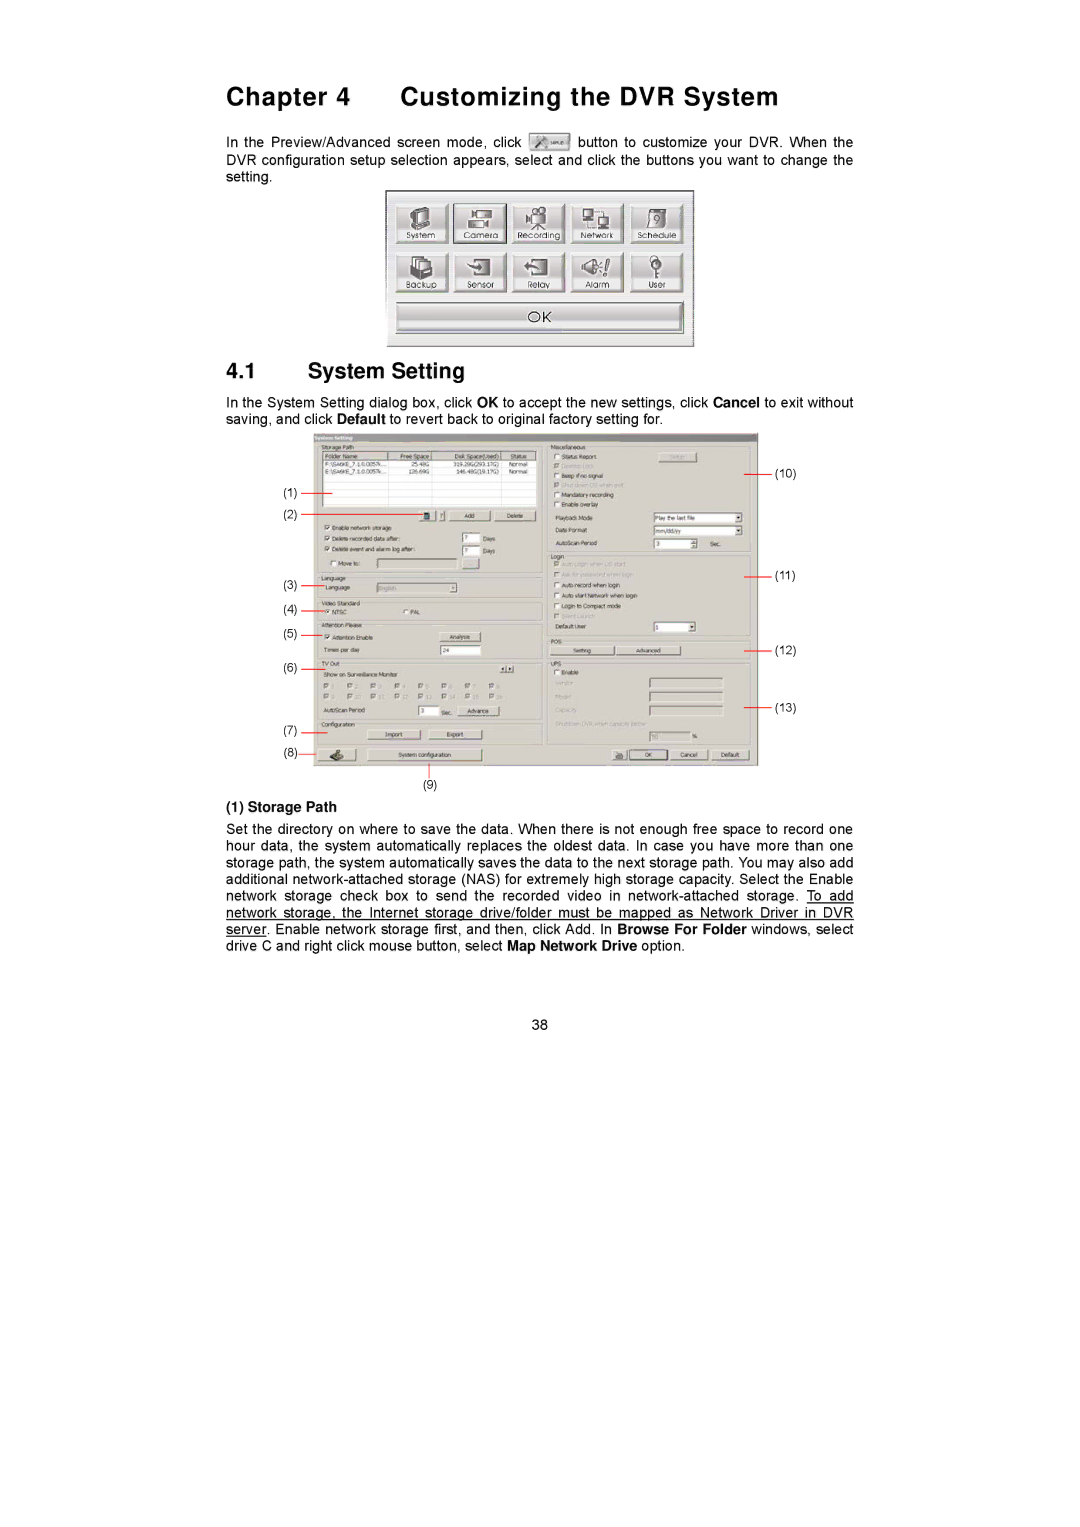
In the System Setting dialog box, click OK to accept the new settings, click Cancel to exit without saving, and click Default to revert back to original factory setting for.
(1)
(2)
(3)
(4)
(5)
(6)
(7)
(10)
(11)
(12)
(13)
(8)
(9)
(1) Storage Path
Set the directory on where to save the data. When there is not enough free space to record one hour data, the system automatically replaces the oldest data. In case you have more than one storage path, the system automatically saves the data to the next storage path. You may also add additional
38