4.9Alarm Setting
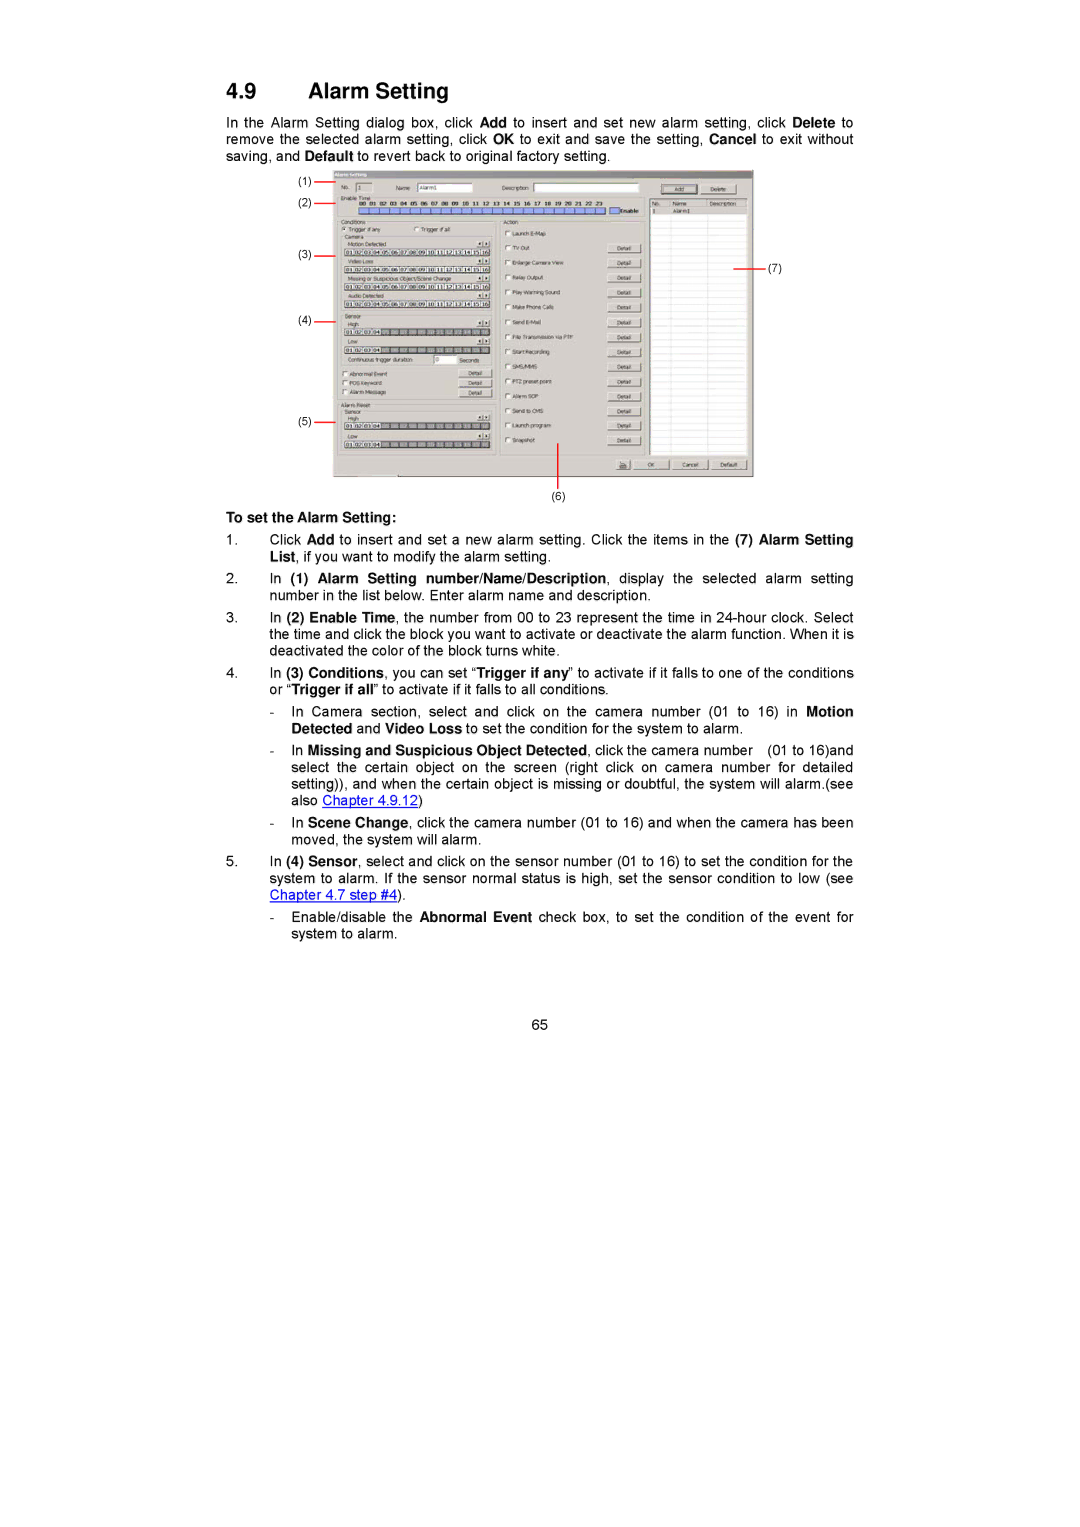
In the Alarm Setting dialog box, click Add to insert and set new alarm setting, click Delete to remove the selected alarm setting, click OK to exit and save the setting, Cancel to exit without saving, and Default to revert back to original factory setting.
(1)
(2)
(3)
(7)
(4)
(5)
(6)
To set the Alarm Setting:
1.Click Add to insert and set a new alarm setting. Click the items in the (7) Alarm Setting List, if you want to modify the alarm setting.
2.In (1) Alarm Setting number/Name/Description, display the selected alarm setting number in the list below. Enter alarm name and description.
3.In (2) Enable Time, the number from 00 to 23 represent the time in
4.In (3) Conditions, you can set “Trigger if any” to activate if it falls to one of the conditions or “Trigger if all” to activate if it falls to all conditions.
-In Camera section, select and click on the camera number (01 to 16) in Motion Detected and Video Loss to set the condition for the system to alarm.
- In Missing and Suspicious Object Detected, click the camera number (01 to 16)and select the certain object on the screen (right click on camera number for detailed setting)), and when the certain object is missing or doubtful, the system will alarm.(see also Chapter 4.9.12)
-In Scene Change, click the camera number (01 to 16) and when the camera has been moved, the system will alarm.
5.In (4) Sensor, select and click on the sensor number (01 to 16) to set the condition for the system to alarm. If the sensor normal status is high, set the sensor condition to low (see Chapter 4.7 step #4).
-Enable/disable the Abnormal Event check box, to set the condition of the event for system to alarm.
65