4.9.11To Setup POS Keyword Setting
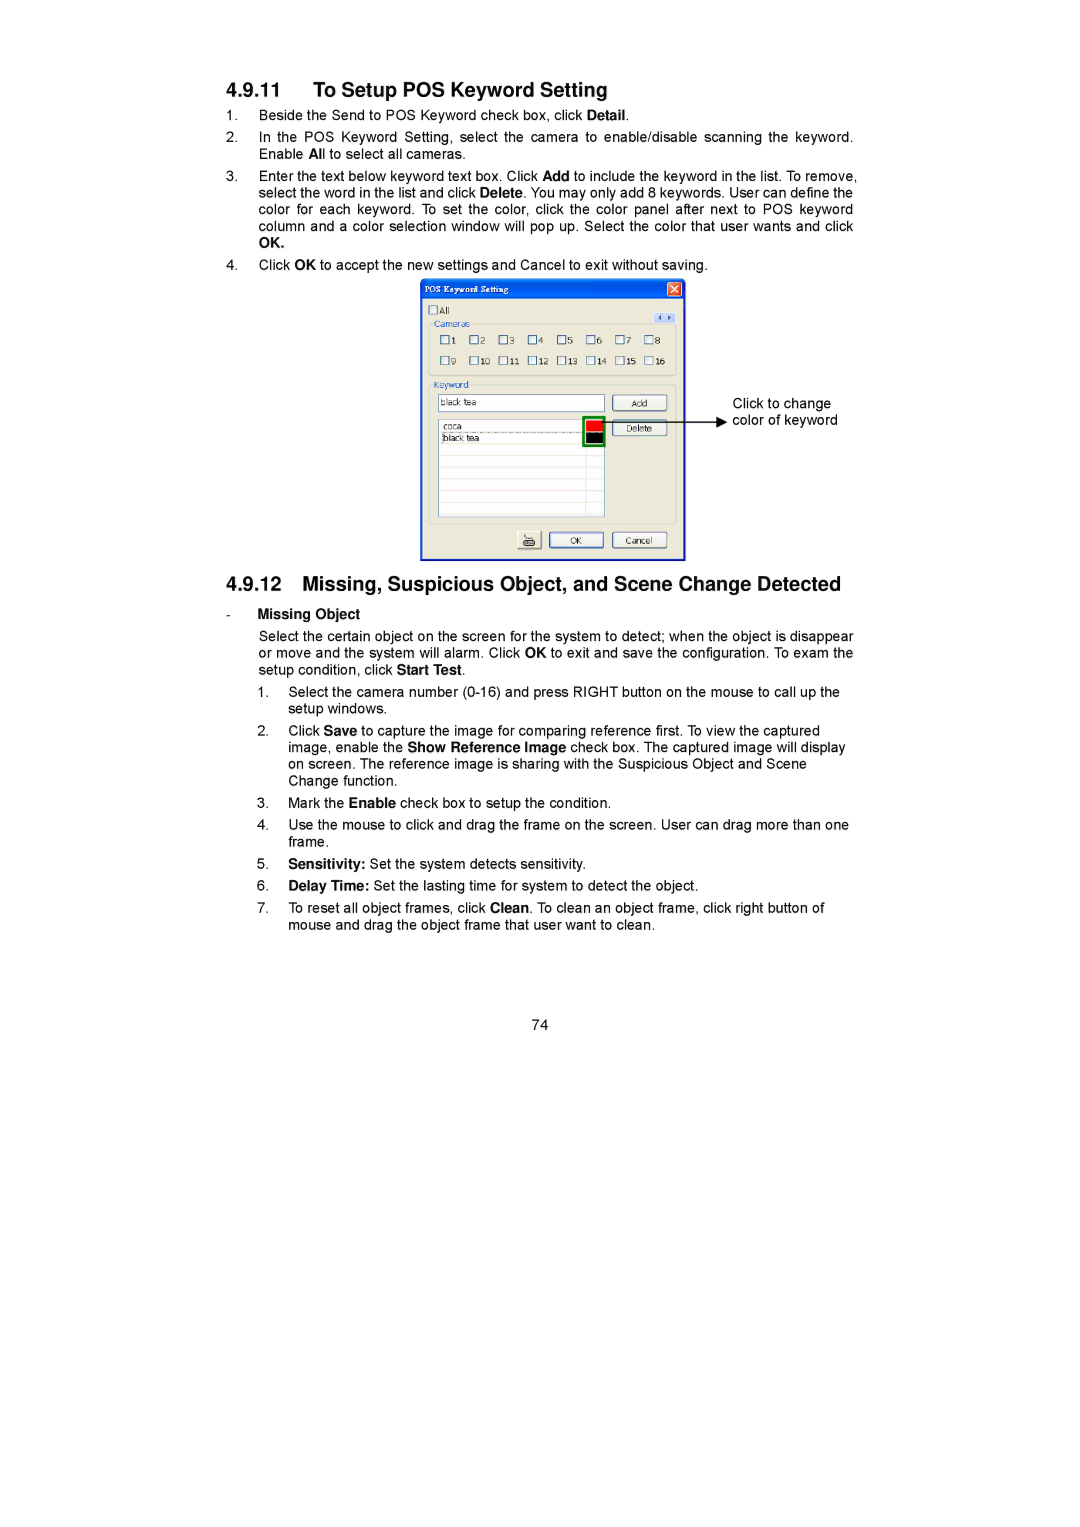
1.Beside the Send to POS Keyword check box, click Detail.
2.In the POS Keyword Setting, select the camera to enable/disable scanning the keyword. Enable All to select all cameras.
3.Enter the text below keyword text box. Click Add to include the keyword in the list. To remove, select the word in the list and click Delete. You may only add 8 keywords. User can define the color for each keyword. To set the color, click the color panel after next to POS keyword column and a color selection window will pop up. Select the color that user wants and click
OK.
4.Click OK to accept the new settings and Cancel to exit without saving.
Click to change
![]()
![]() color of keyword
color of keyword
4.9.12Missing, Suspicious Object, and Scene Change Detected
-Missing Object
Select the certain object on the screen for the system to detect; when the object is disappear or move and the system will alarm. Click OK to exit and save the configuration. To exam the setup condition, click Start Test.
1.Select the camera number
2.Click Save to capture the image for comparing reference first. To view the captured image, enable the Show Reference Image check box. The captured image will display on screen. The reference image is sharing with the Suspicious Object and Scene Change function.
3.Mark the Enable check box to setup the condition.
4.Use the mouse to click and drag the frame on the screen. User can drag more than one frame.
5.Sensitivity: Set the system detects sensitivity.
6.Delay Time: Set the lasting time for system to detect the object.
7.To reset all object frames, click Clean. To clean an object frame, click right button of mouse and drag the object frame that user want to clean.
74