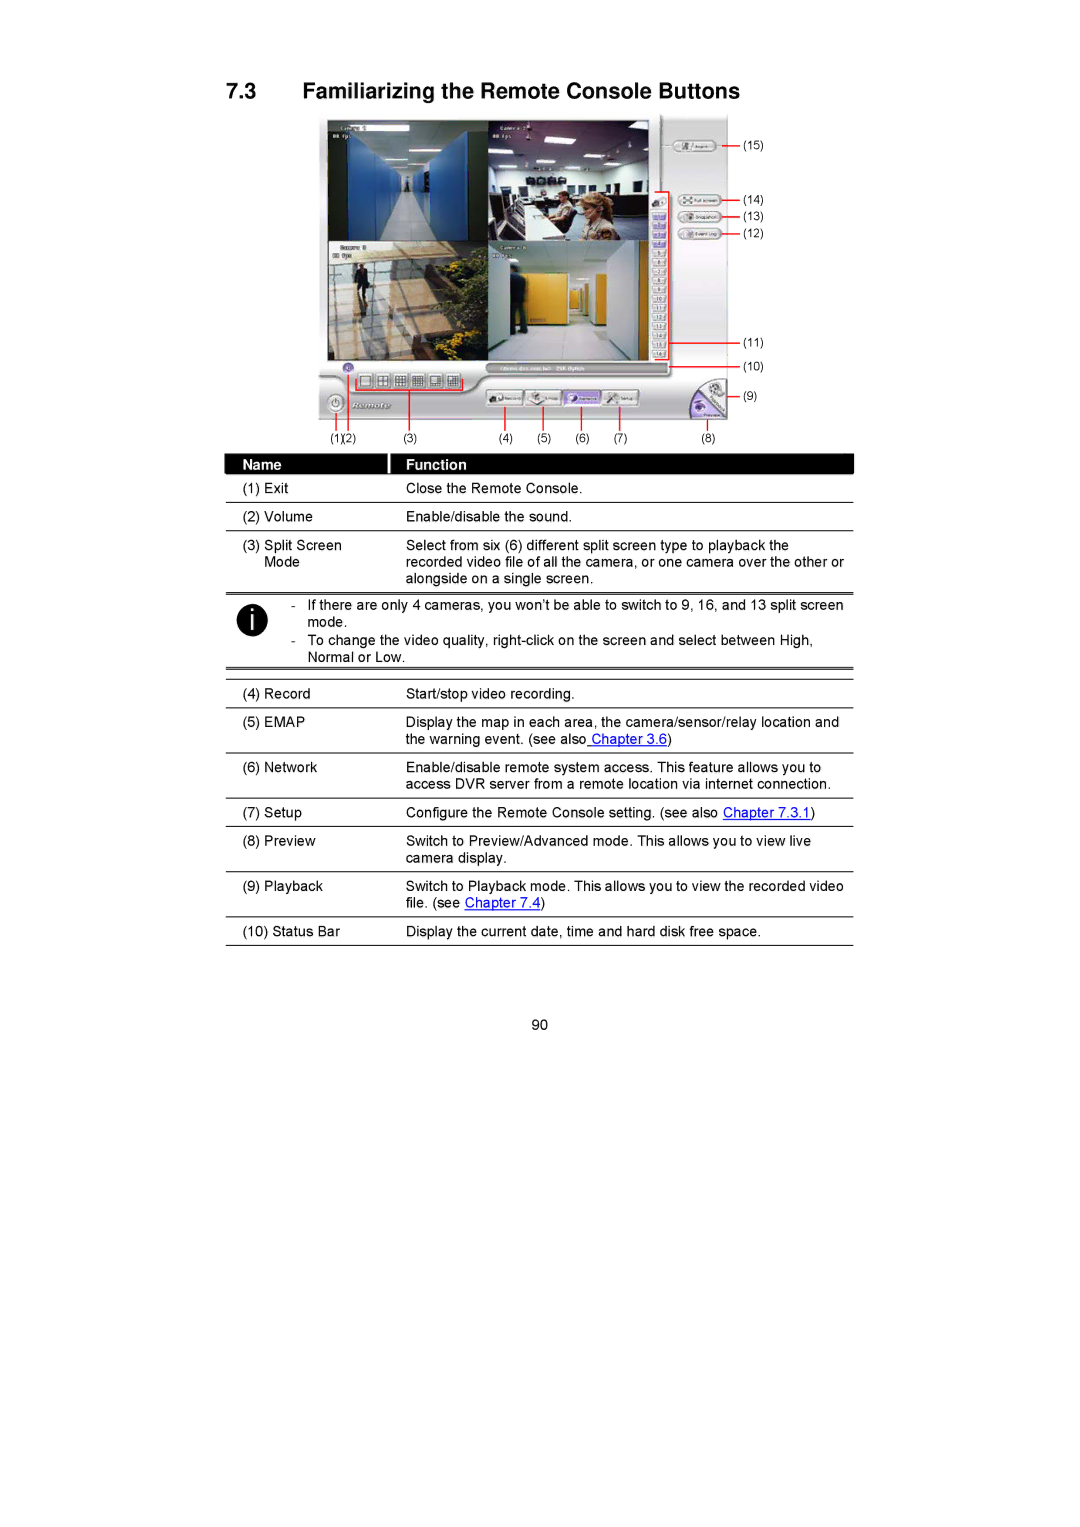
7.3Familiarizing the Remote Console Buttons
(15)
(14)
(13)
(12)
(11)
(10)
(9)
| (1)(2) | (3) | (4) | (5) | (6) | (7) | (8) | |
|
|
|
|
|
|
|
| |
Name |
| Function |
|
|
|
|
| |
(1) | Exit |
| Close the Remote Console. |
|
| |||
|
|
|
|
|
|
| ||
(2) | Volume |
| Enable/disable the sound. |
|
|
| ||
|
|
|
| |||||
(3) | Split Screen |
| Select from six (6) different split screen type to playback the | |||||
| Mode |
| recorded video file of all the camera, or one camera over the other or | |||||
|
|
| alongside on a single screen. |
|
| |||
-If there are only 4 cameras, you won’t be able to switch to 9, 16, and 13 split screen
imode.
-To change the video quality,
(4) | Record | Start/stop video recording. |
|
|
|
(5) | EMAP | Display the map in each area, the camera/sensor/relay location and |
|
| the warning event. (see also Chapter 3.6) |
|
|
|
(6) | Network | Enable/disable remote system access. This feature allows you to |
|
| access DVR server from a remote location via internet connection. |
|
|
|
(7) | Setup | Configure the Remote Console setting. (see also Chapter 7.3.1) |
|
|
|
(8) | Preview | Switch to Preview/Advanced mode. This allows you to view live |
|
| camera display. |
|
|
|
(9) | Playback | Switch to Playback mode. This allows you to view the recorded video |
|
| file. (see Chapter 7.4) |
|
| |
(10) Status Bar | Display the current date, time and hard disk free space. | |
|
|
|
90