Front tab
lor ribbon holder
Flgun, |
|
| ||
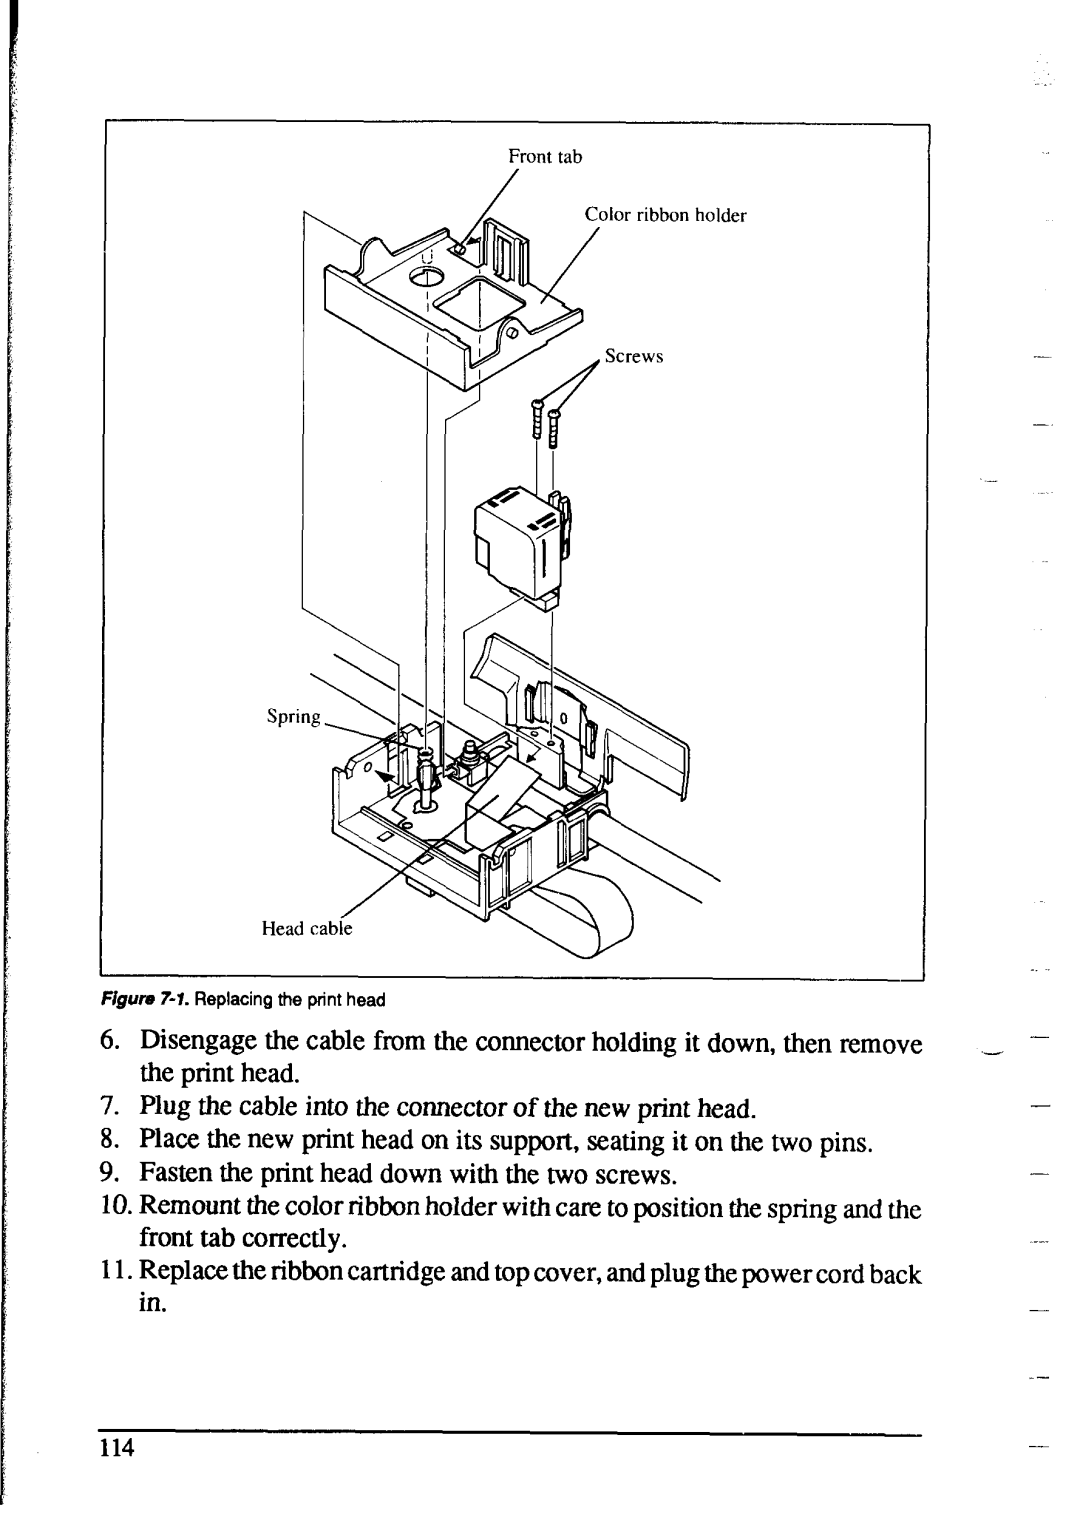
6. | Disengage the cable from the connector | holding it down, then remove | _ - | |
| the print head. |
| - | |
7. | Plug the cable into the connector of the new print head. | |||
| ||||
8. | Place the new print head on its support, | seating it on the two pins. | - | |
9. Fasten the print head down with the two screws. | ||||
| ||||
10. Remount the color ribbon holder with care to position the spring and the
front tab correctly. | |
| |
Il. Replace the ribbon cartridge and top cover, and plug the power cord back |
|
in. |
|
114
-