-
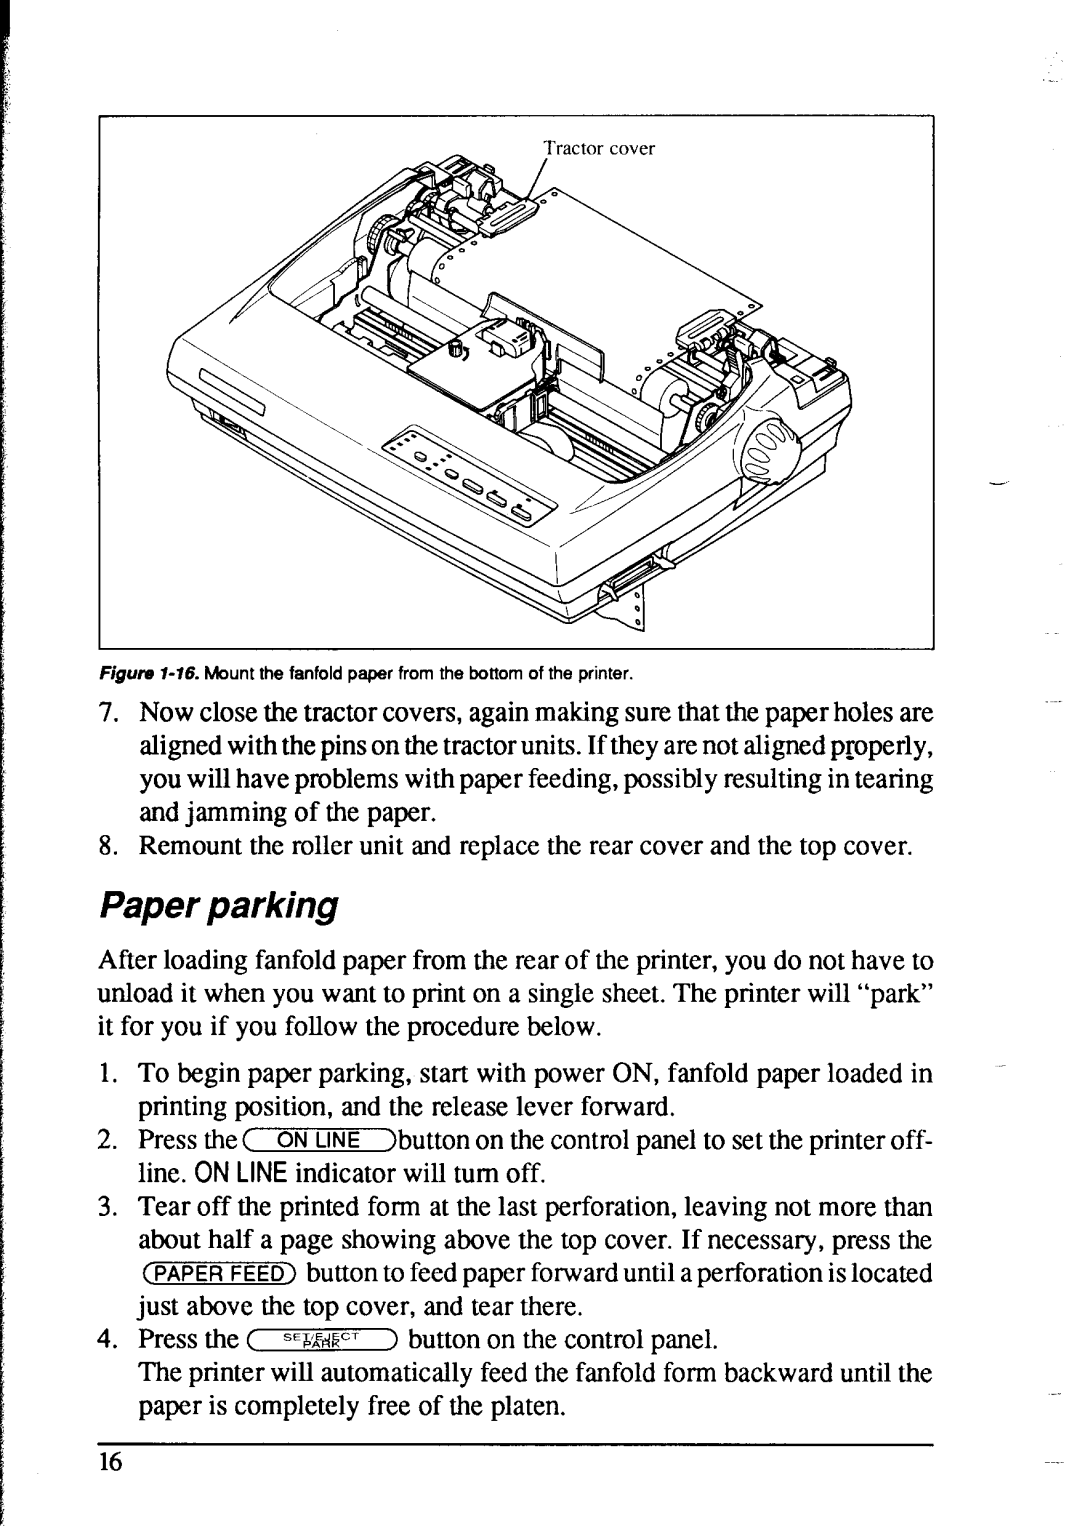
Figuro I-16. Mount the fanfold paper from the bottom of the printer.
7.Now close the tractor covers, again making sure that the paper holes are aligned with the pins on the tractor units. If they are not aligned pIoperly, you will have problems with paper feeding, possibly resulting in tearing and jamming of the paper.
8.Remount the roller unit and replace the rear cover and the top cover.
Paper parking
After loading fanfold paper from the rear of the printer, you do not have to unload it when you want to print on a single sheet. The printer will “park” it for you if you follow the procedure below.
1.To begin paper parking, start with power ON, fanfold paper loaded in printing position, and the release lever forward.
2.Press the ( ON LINE Ibutton on the control panel to set the printer off- line. ON LINE indicator will turn off.
3.Tear off the printed form at the last perforation, leaving not more than about half a page showing above the top cover. If necessary, press the (PAPER FEED) button to feed paper forward until a perforation is located just above the top cover, and tear there.
4.Press the ( sEsdscT 1 button on the control panel.
The printer will automatically feed the fanfold form backward until the paper is completely free of the platen.
16