Updating your Application Profile list
If the application you want to host does not appear in the Application Profile list, you may need to update your application list. If an update is available, click the UPDATE APPLICATION LIST button above the list of application profiles.
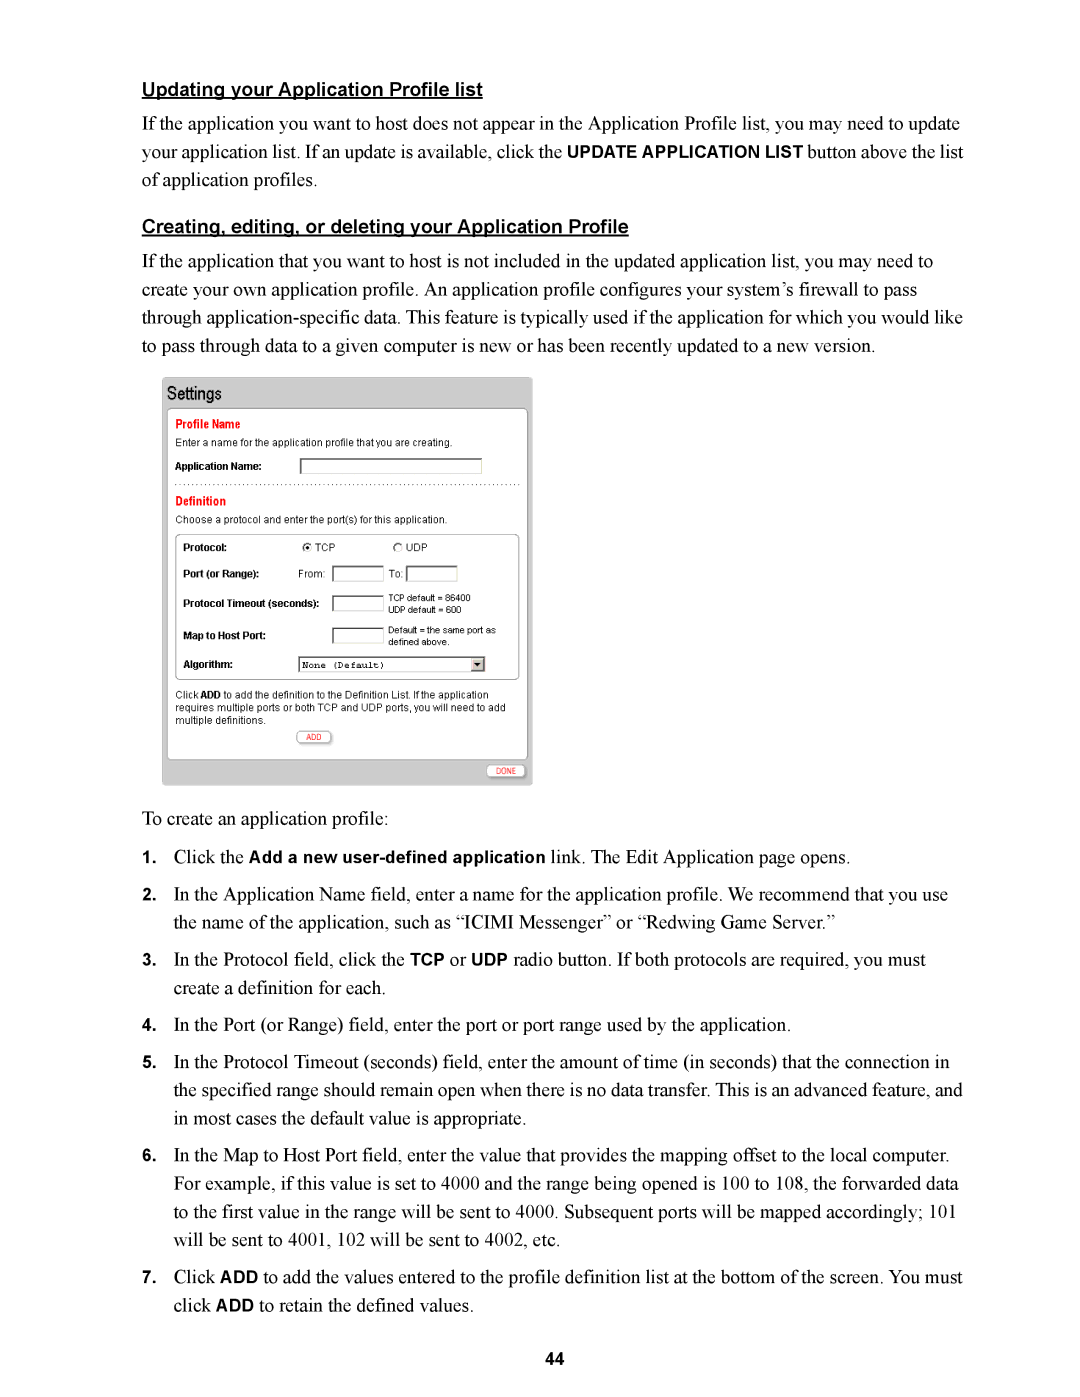
Creating, editing, or deleting your Application Profile
If the application that you want to host is not included in the updated application list, you may need to create your own application profile. An application profile configures your system’s firewall to pass through
To create an application profile:
1.Click the Add a new
2.In the Application Name field, enter a name for the application profile. We recommend that you use the name of the application, such as “ICIMI Messenger” or “Redwing Game Server.”
3.In the Protocol field, click the TCP or UDP radio button. If both protocols are required, you must create a definition for each.
4.In the Port (or Range) field, enter the port or port range used by the application.
5.In the Protocol Timeout (seconds) field, enter the amount of time (in seconds) that the connection in the specified range should remain open when there is no data transfer. This is an advanced feature, and in most cases the default value is appropriate.
6.In the Map to Host Port field, enter the value that provides the mapping offset to the local computer. For example, if this value is set to 4000 and the range being opened is 100 to 108, the forwarded data to the first value in the range will be sent to 4000. Subsequent ports will be mapped accordingly; 101 will be sent to 4001, 102 will be sent to 4002, etc.
7.Click ADD to add the values entered to the profile definition list at the bottom of the screen. You must click ADD to retain the defined values.
44