9If the holes are centered, go on to Setting the Side Guide. If the holes are not centered, go on to Step 10 to adjust the Punch.
10Open the Right Punch Door.
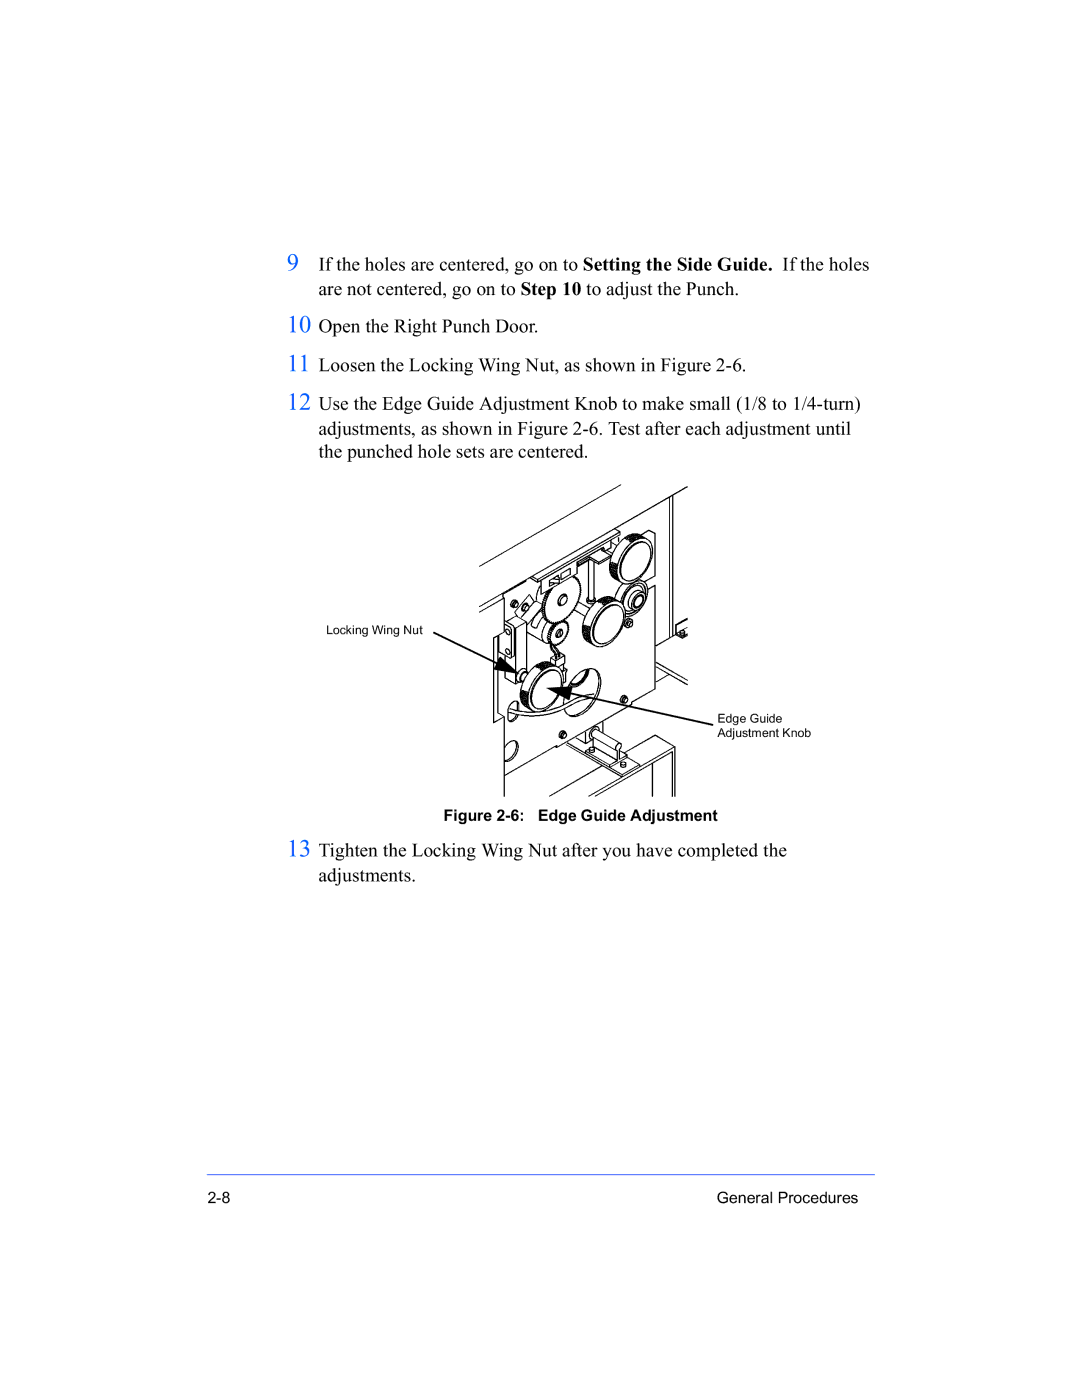
11Loosen the Locking Wing Nut, as shown in Figure
12Use the Edge Guide Adjustment Knob to make small (1/8 to
Locking Wing Nut
Edge Guide
Adjustment Knob
Figure 2-6: Edge Guide Adjustment
13Tighten the Locking Wing Nut after you have completed the adjustments.
General Procedures |
