37
Removing and Installing the Processor Air Duct
Always operate your Altos R510’s chassis with the processor air duct in place. The air duct is required for proper airflow within the chassis.
For instructions on adding or replacing a processor, first remove the processor air duct and the processor air dam, and then see page 83 for instructions on processor installations and removals. Return to these instructions to reinstall the processor air dam and processor air duct after installing your processor and heat sink.
Removing the Processor Air Duct
1Remove the chassis cover. For instructions, see "Removing the Chassis Cover."
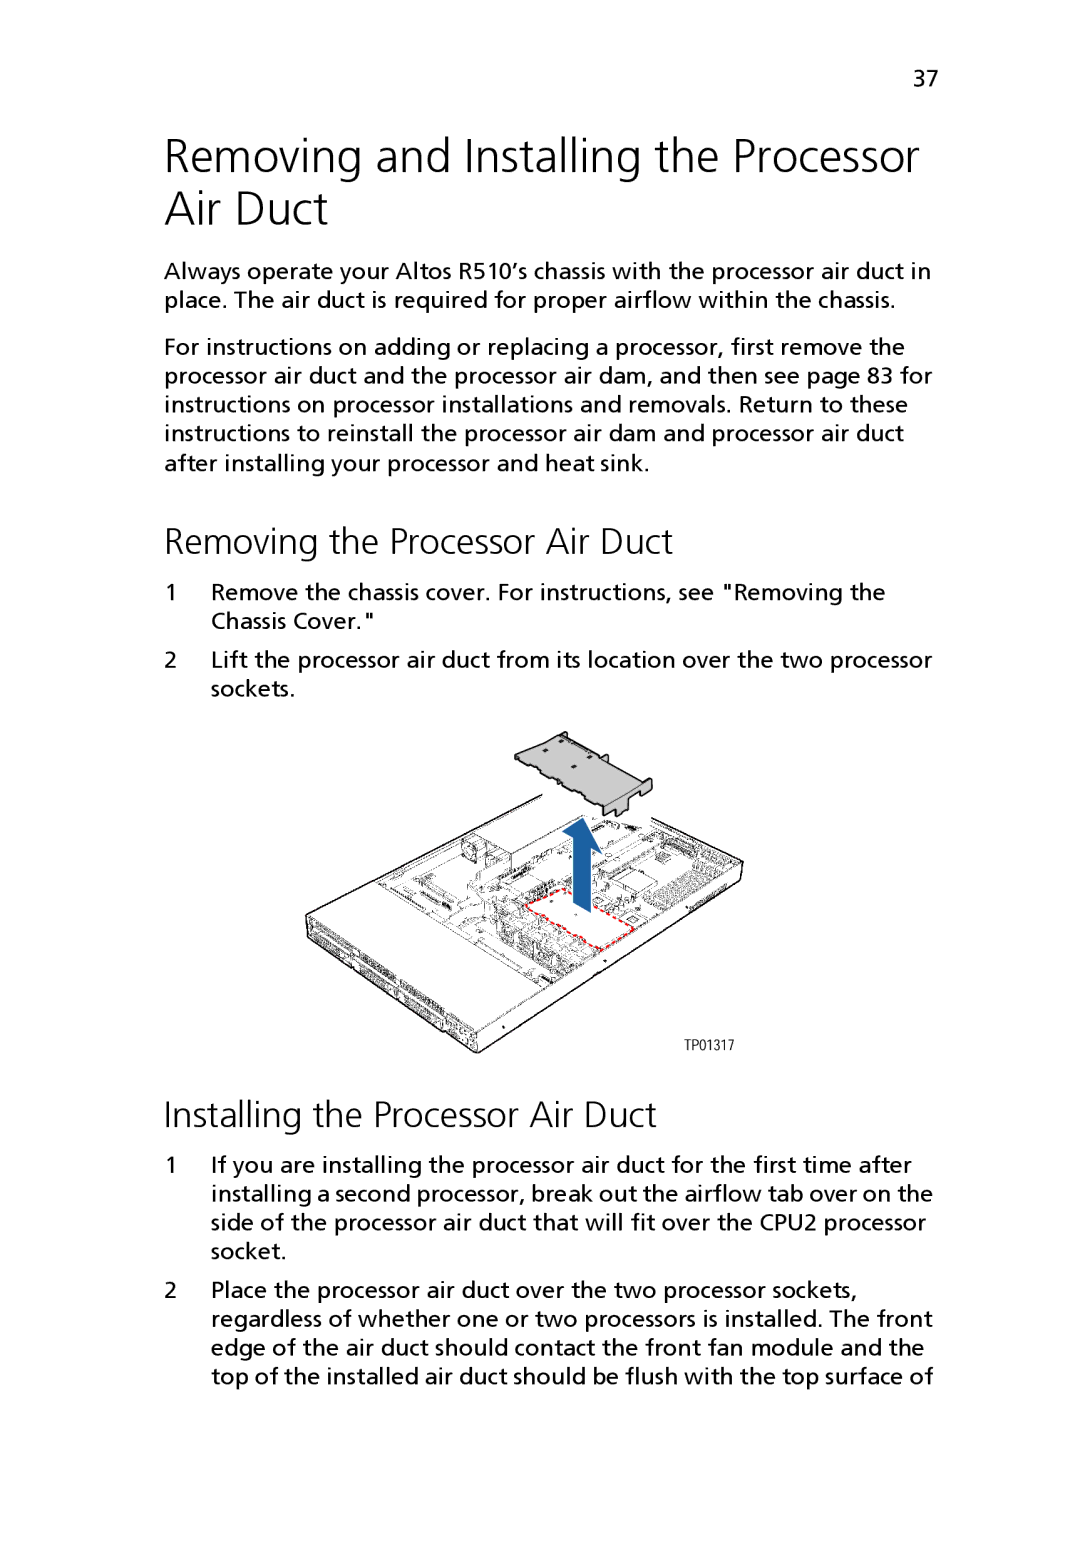
2Lift the processor air duct from its location over the two processor sockets.
Installing the Processor Air Duct
1If you are installing the processor air duct for the first time after installing a second processor, break out the airflow tab over on the side of the processor air duct that will fit over the CPU2 processor socket.
2Place the processor air duct over the two processor sockets, regardless of whether one or two processors is installed. The front edge of the air duct should contact the front fan module and the top of the installed air duct should be flush with the top surface of