70 | 4 Configuring the system |
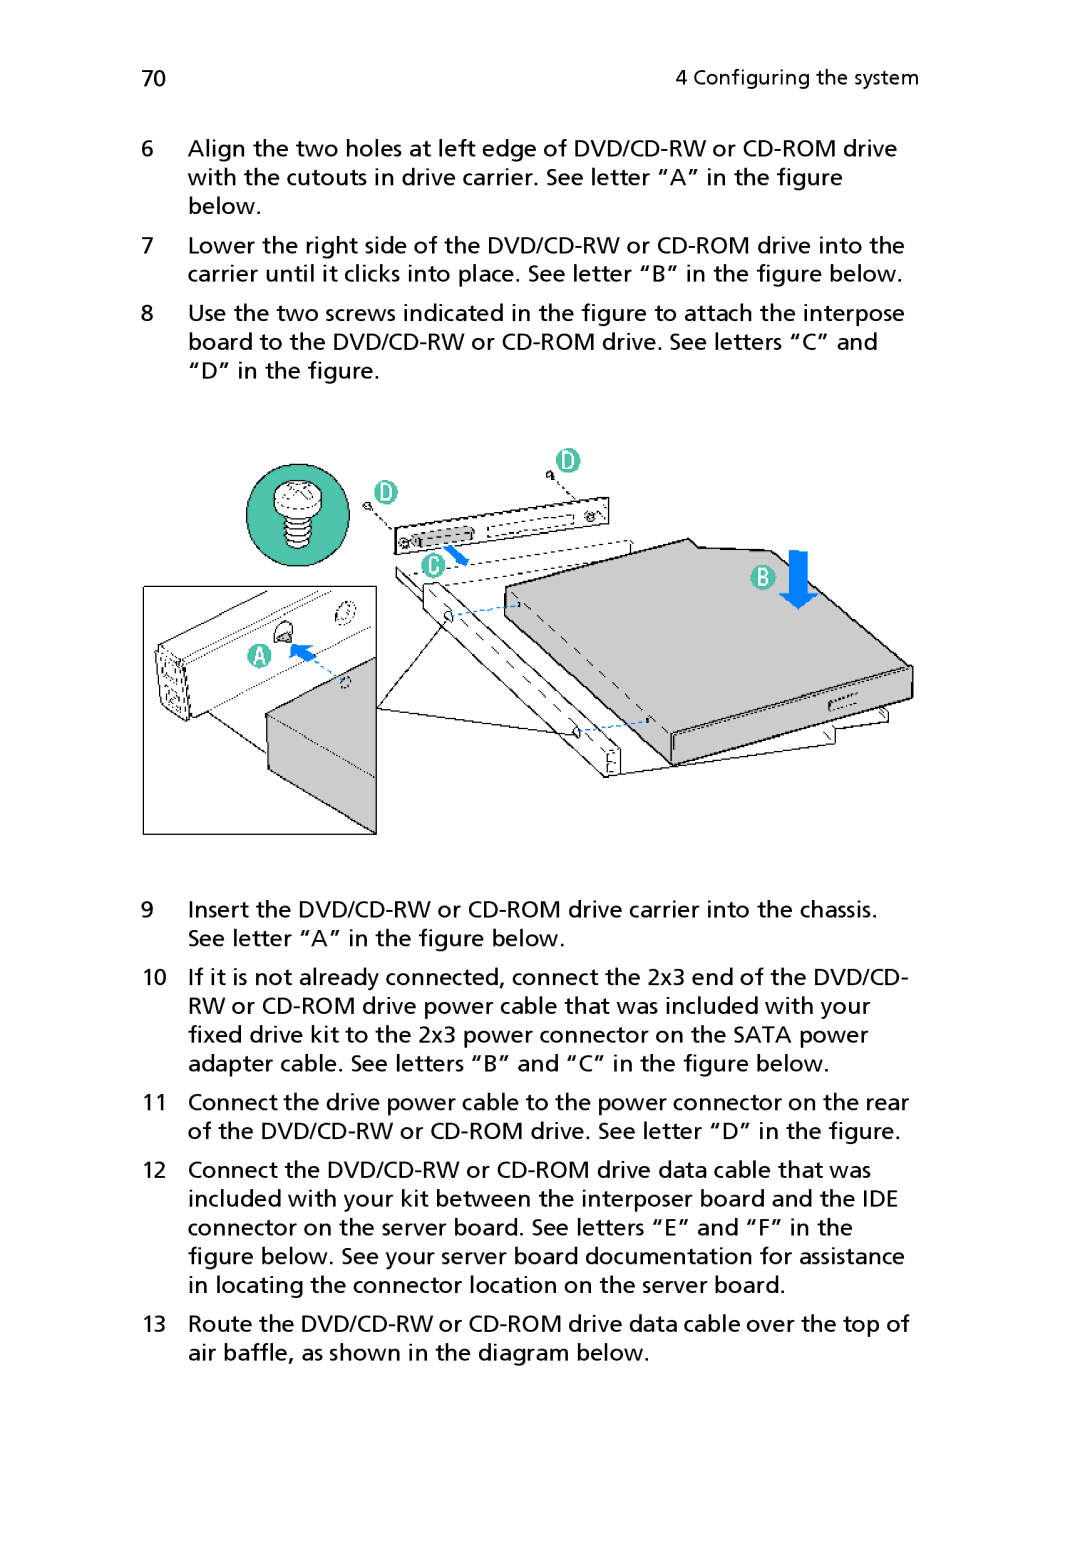
6Align the two holes at left edge of DVD/CD-RW or CD-ROM drive with the cutouts in drive carrier. See letter “A” in the figure below.
7Lower the right side of the DVD/CD-RW or CD-ROM drive into the carrier until it clicks into place. See letter “B” in the figure below.
8Use the two screws indicated in the figure to attach the interpose board to the DVD/CD-RW or CD-ROM drive. See letters “C” and “D” in the figure.
9Insert the DVD/CD-RW or CD-ROM drive carrier into the chassis. See letter “A” in the figure below.
10If it is not already connected, connect the 2x3 end of the DVD/CD- RW or CD-ROM drive power cable that was included with your fixed drive kit to the 2x3 power connector on the SATA power adapter cable. See letters “B” and “C” in the figure below.
11Connect the drive power cable to the power connector on the rear of the DVD/CD-RW or CD-ROM drive. See letter “D” in the figure.
12Connect the DVD/CD-RW or CD-ROM drive data cable that was included with your kit between the interposer board and the IDE connector on the server board. See letters “E” and “F” in the figure below. See your server board documentation for assistance in locating the connector location on the server board.
13Route the DVD/CD-RW or CD-ROM drive data cable over the top of air baffle, as shown in the diagram below.