Contact Arming
The Contact Arming screen enables you to assign a group of contacts in an alarm table to a monitor.
Figure 77. Contact Arming screen
To begin assigning a group of contacts to a monitor from the Alarms – Monitor screen:
1.Click on a monitor.
2.Click the Contact Arming tab. The selected monitor number appears just below the tab in the Monitor field.
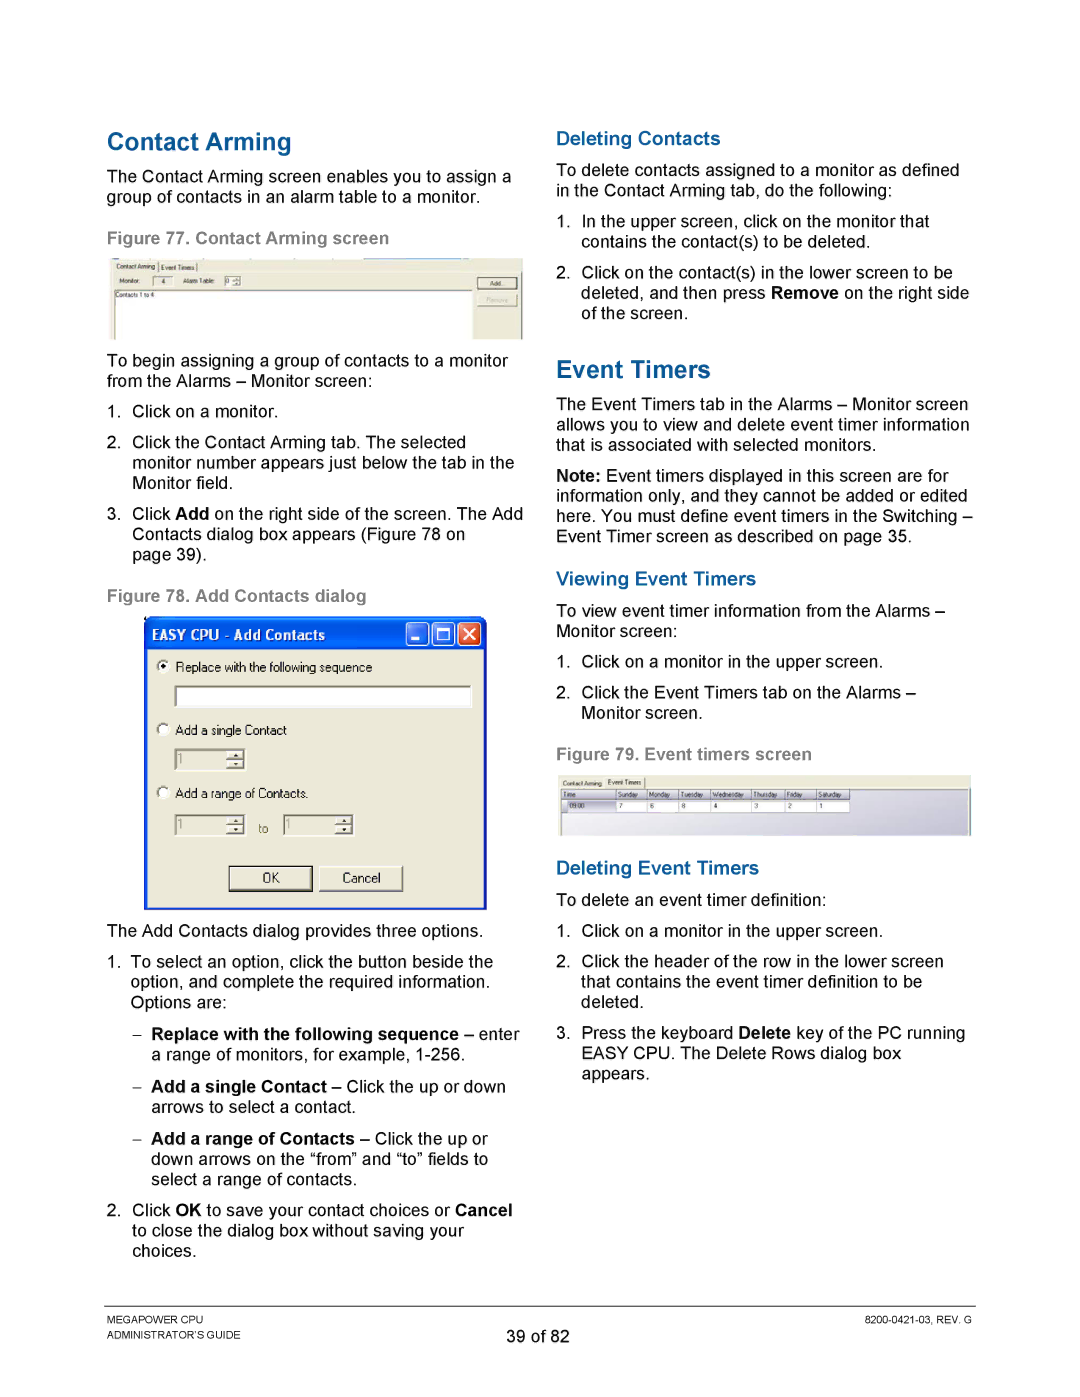
3.Click Add on the right side of the screen. The Add Contacts dialog box appears (Figure 78 on page 39).
Figure 78. Add Contacts dialog
The Add Contacts dialog provides three options.
1.To select an option, click the button beside the option, and complete the required information. Options are:
−Replace with the following sequence – enter a range of monitors, for example,
−Add a single Contact – Click the up or down arrows to select a contact.
−Add a range of Contacts – Click the up or down arrows on the “from” and “to” fields to select a range of contacts.
2.Click OK to save your contact choices or Cancel to close the dialog box without saving your choices.
Deleting Contacts
To delete contacts assigned to a monitor as defined in the Contact Arming tab, do the following:
1.In the upper screen, click on the monitor that contains the contact(s) to be deleted.
2.Click on the contact(s) in the lower screen to be deleted, and then press Remove on the right side of the screen.
Event Timers
The Event Timers tab in the Alarms – Monitor screen allows you to view and delete event timer information that is associated with selected monitors.
Note: Event timers displayed in this screen are for information only, and they cannot be added or edited here. You must define event timers in the Switching – Event Timer screen as described on page 35.
Viewing Event Timers
To view event timer information from the Alarms – Monitor screen:
1.Click on a monitor in the upper screen.
2.Click the Event Timers tab on the Alarms – Monitor screen.
Figure 79. Event timers screen
Deleting Event Timers
To delete an event timer definition:
1.Click on a monitor in the upper screen.
2.Click the header of the row in the lower screen that contains the event timer definition to be deleted.
3.Press the keyboard Delete key of the PC running EASY CPU. The Delete Rows dialog box appears.
MEGAPOWER CPU ADMINISTRATOR’S GUIDE
39 of 82
