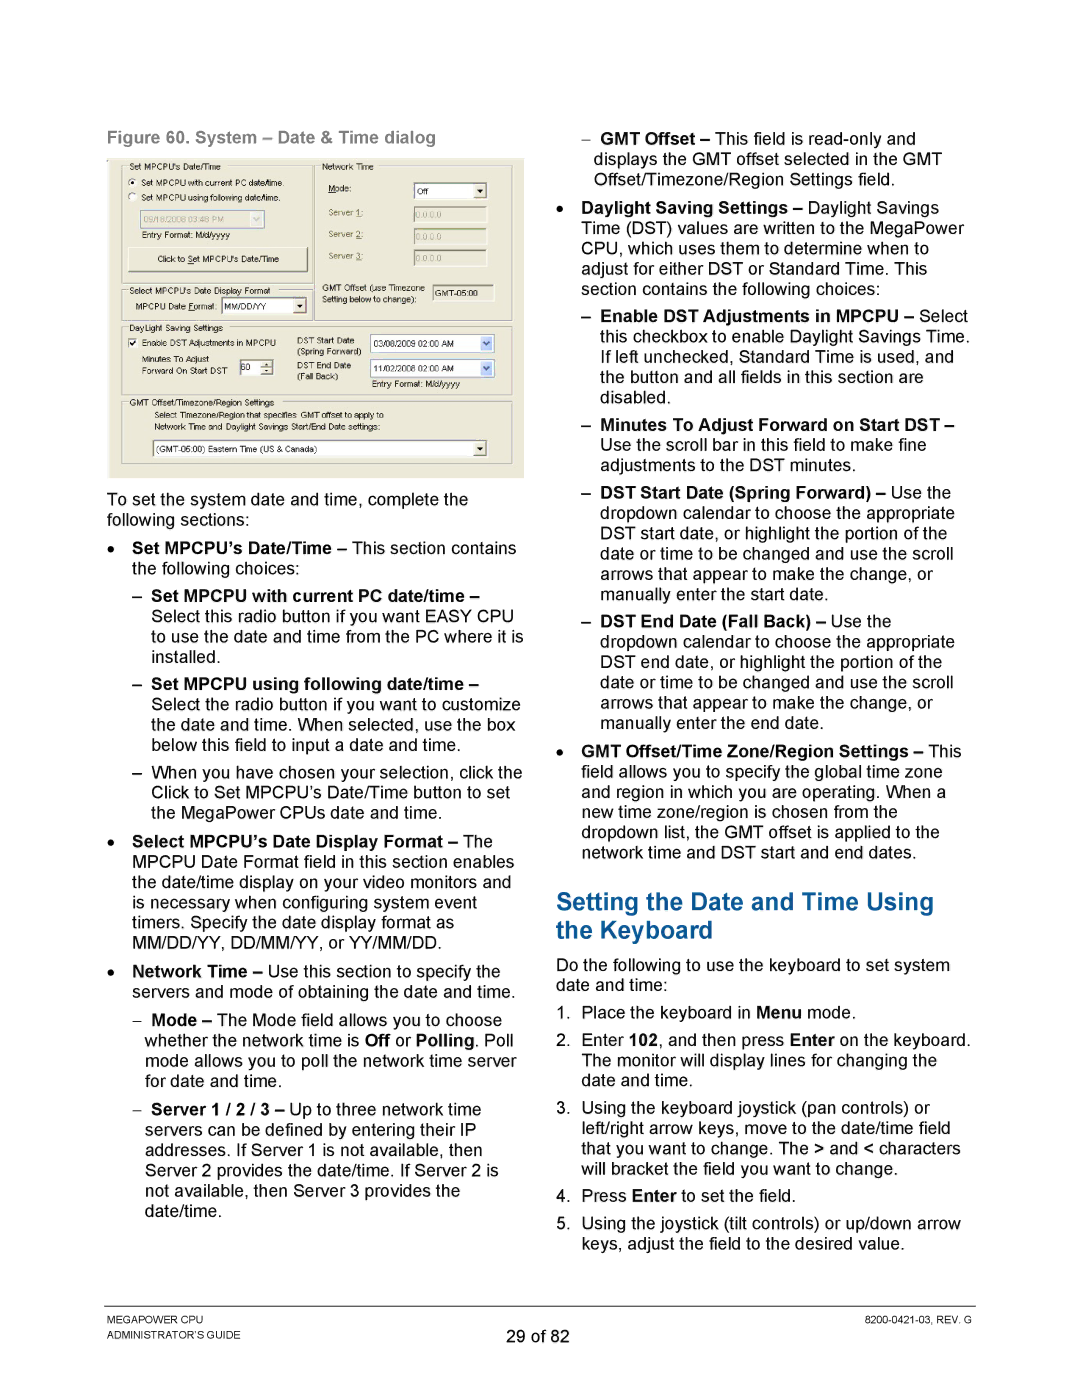
Figure 60. System – Date & Time dialog
To set the system date and time, complete the following sections:
•Set MPCPU’s Date/Time – This section contains the following choices:
–Set MPCPU with current PC date/time – Select this radio button if you want EASY CPU to use the date and time from the PC where it is installed.
–Set MPCPU using following date/time – Select the radio button if you want to customize the date and time. When selected, use the box below this field to input a date and time.
–When you have chosen your selection, click the Click to Set MPCPU’s Date/Time button to set the MegaPower CPUs date and time.
•Select MPCPU’s Date Display Format – The MPCPU Date Format field in this section enables the date/time display on your video monitors and is necessary when configuring system event timers. Specify the date display format as MM/DD/YY, DD/MM/YY, or YY/MM/DD.
•Network Time – Use this section to specify the servers and mode of obtaining the date and time.
−Mode – The Mode field allows you to choose whether the network time is Off or Polling. Poll mode allows you to poll the network time server for date and time.
−Server 1 / 2 / 3 – Up to three network time servers can be defined by entering their IP addresses. If Server 1 is not available, then Server 2 provides the date/time. If Server 2 is not available, then Server 3 provides the date/time.
−GMT Offset – This field is
•Daylight Saving Settings – Daylight Savings Time (DST) values are written to the MegaPower CPU, which uses them to determine when to adjust for either DST or Standard Time. This section contains the following choices:
– Enable DST Adjustments in MPCPU – Select this checkbox to enable Daylight Savings Time. If left unchecked, Standard Time is used, and the button and all fields in this section are disabled.
– Minutes To Adjust Forward on Start DST – Use the scroll bar in this field to make fine adjustments to the DST minutes.
– DST Start Date (Spring Forward) – Use the dropdown calendar to choose the appropriate DST start date, or highlight the portion of the date or time to be changed and use the scroll arrows that appear to make the change, or manually enter the start date.
– DST End Date (Fall Back) – Use the dropdown calendar to choose the appropriate DST end date, or highlight the portion of the date or time to be changed and use the scroll arrows that appear to make the change, or manually enter the end date.
•GMT Offset/Time Zone/Region Settings – This field allows you to specify the global time zone and region in which you are operating. When a new time zone/region is chosen from the dropdown list, the GMT offset is applied to the network time and DST start and end dates.
Setting the Date and Time Using the Keyboard
Do the following to use the keyboard to set system date and time:
1.Place the keyboard in Menu mode.
2.Enter 102, and then press Enter on the keyboard. The monitor will display lines for changing the date and time.
3.Using the keyboard joystick (pan controls) or left/right arrow keys, move to the date/time field that you want to change. The > and < characters will bracket the field you want to change.
4.Press Enter to set the field.
5.Using the joystick (tilt controls) or up/down arrow keys, adjust the field to the desired value.
MEGAPOWER CPU ADMINISTRATOR’S GUIDE
29 of 82
