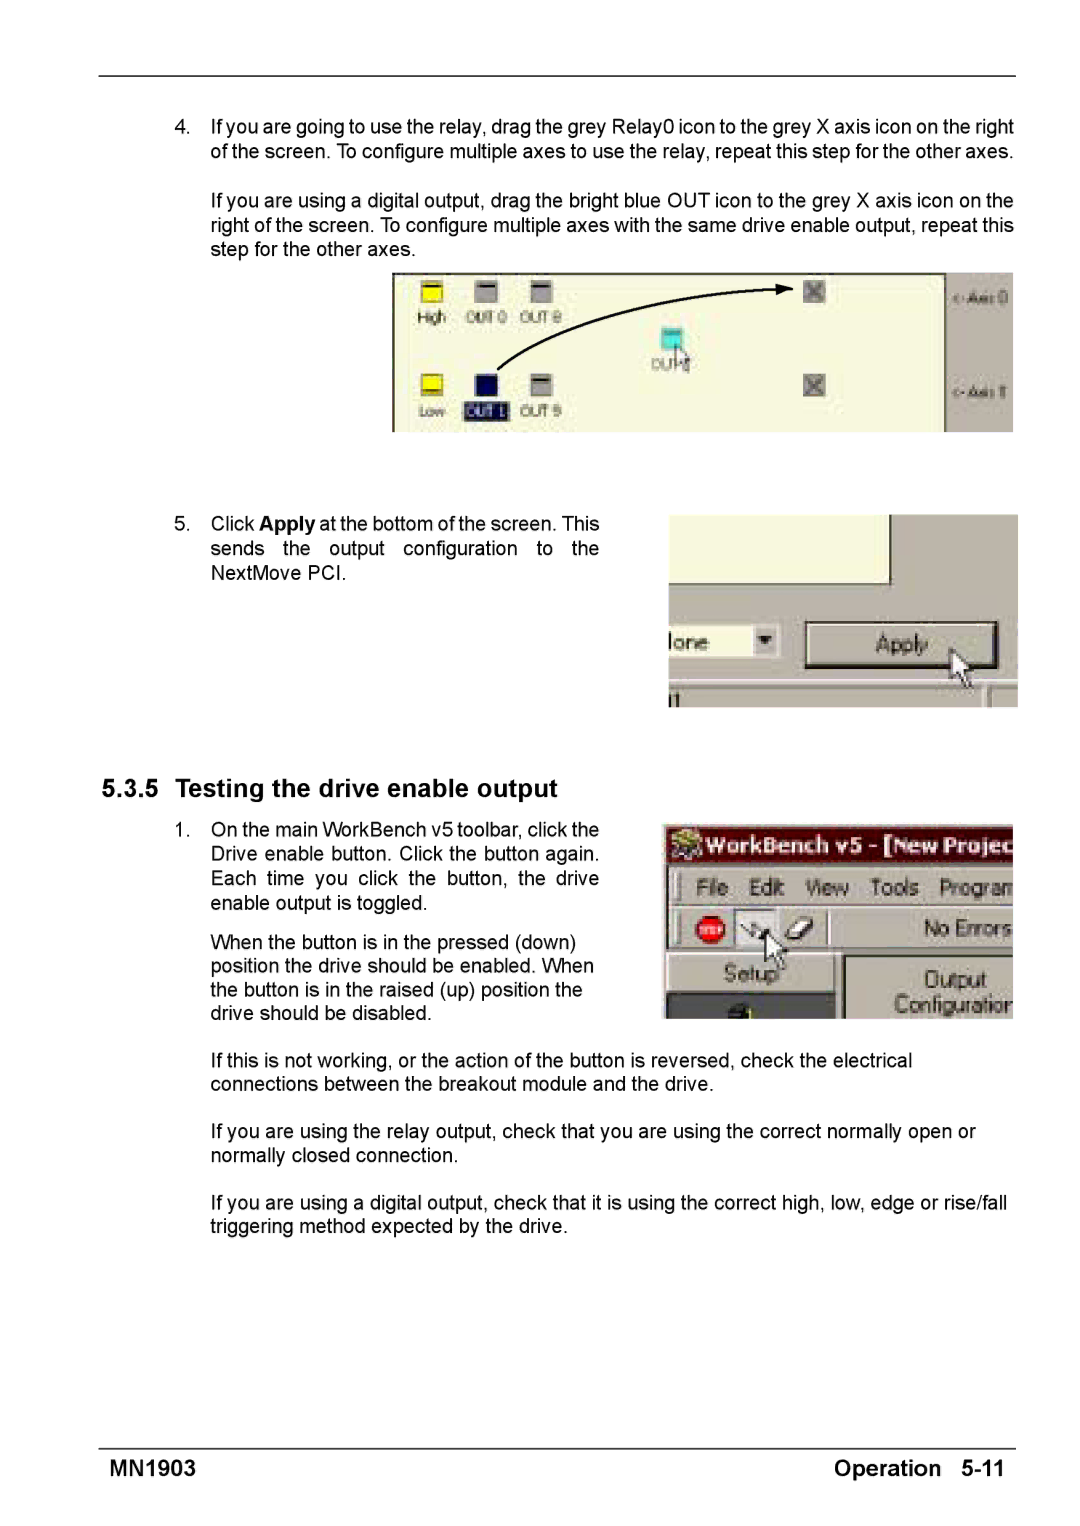
4.If you are going to use the relay, drag the grey Relay0 icon to the grey X axis icon on the right of the screen. To configure multiple axes to use the relay, repeat this step for the other axes.
If you are using a digital output, drag the bright blue OUT icon to the grey X axis icon on the right of the screen. To configure multiple axes with the same drive enable output, repeat this step for the other axes.
5.Click Apply at the bottom of the screen. This sends the output configuration to the NextMove PCI.
5.3.5Testing the drive enable output
1.On the main WorkBench v5 toolbar, click the Drive enable button. Click the button again. Each time you click the button, the drive enable output is toggled.
When the button is in the pressed (down) position the drive should be enabled. When the button is in the raised (up) position the drive should be disabled.
If this is not working, or the action of the button is reversed, check the electrical connections between the breakout module and the drive.
If you are using the relay output, check that you are using the correct normally open or normally closed connection.
If you are using a digital output, check that it is using the correct high, low, edge or rise/fall triggering method expected by the drive.
MN1903 | Operation |