5 |
3 |
5 |
1
1
2
5 |
6 |
1 |
2 |
1 2
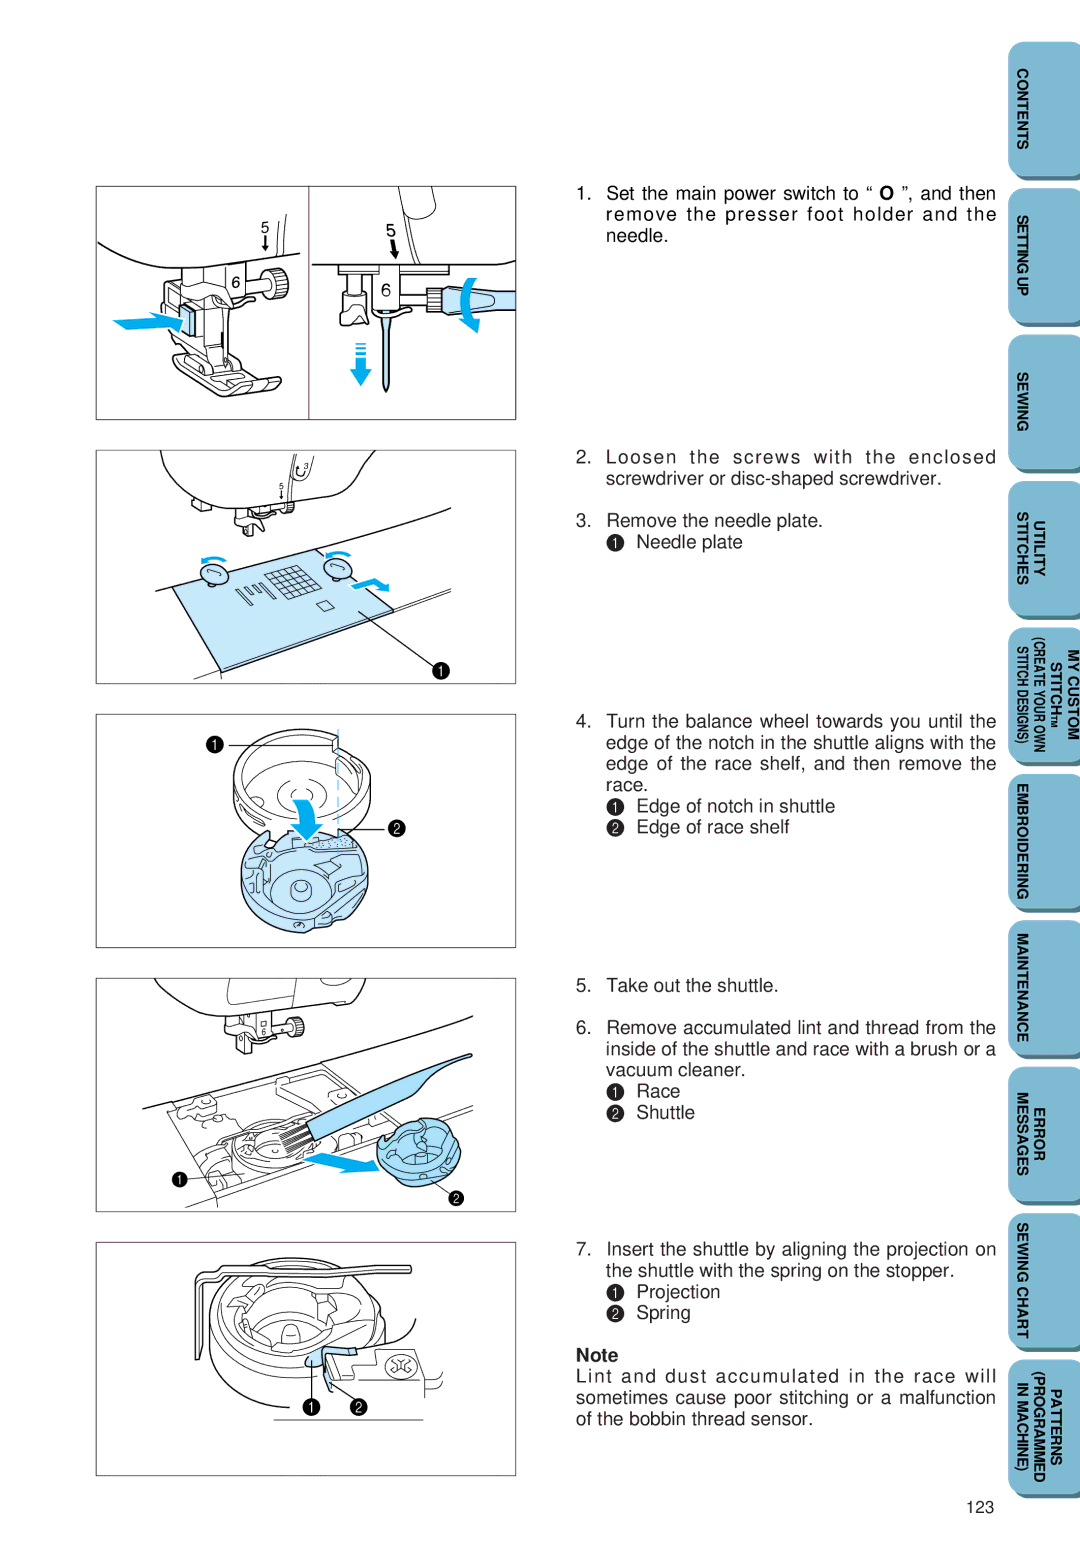
1.Set the main power switch to “O ”, and then remove the presser foot holder and the needle.
2.Loosen the screws with the enclosed screwdriver or
3.Remove the needle plate. 1 Needle plate
4.Turn the balance wheel towards you until the edge of the notch in the shuttle aligns with the edge of the race shelf, and then remove the race.
1 Edge of notch in shuttle
2 Edge of race shelf
5.Take out the shuttle.
6.Remove accumulated lint and thread from the inside of the shuttle and race with a brush or a vacuum cleaner.
1 Race
2 Shuttle
7.Insert the shuttle by aligning the projection on the shuttle with the spring on the stopper.
1 Projection
2 Spring
Note
Lint and dust accumulated in the race will sometimes cause poor stitching or a malfunction of the bobbin thread sensor.
CONTENTS |
|
|
SETTING UP |
|
|
SEWING |
|
|
STITCHES | UTILITY |
|
STITCH DESIGNS) | (CREATE YOUR OWN | MY CUSTOM STITCHTM |
EMBROIDERING |
|
|
MAINTENANCE |
|
|
MESSAGES | ERROR |
|
SEWING CHART |
|
|
IN MACHINE) | (PROGRAMMED | PATTERNS |
