2 |
1 |
(a) |
(b) |
CONTENTS
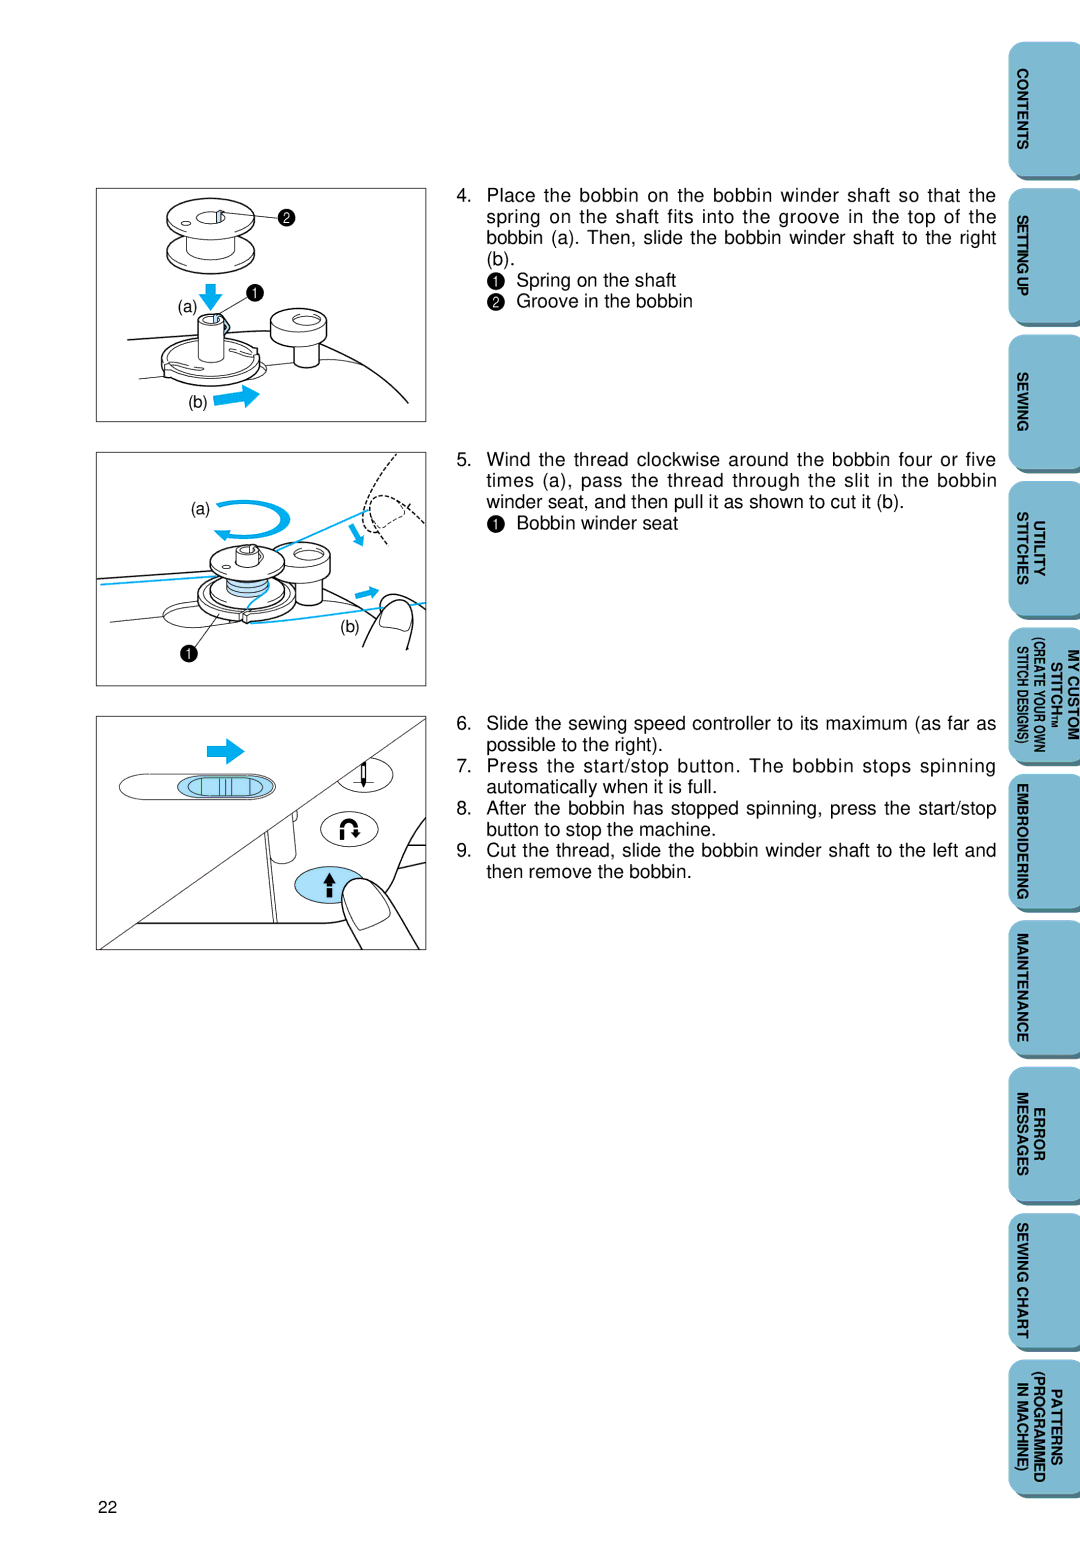
4. Place the bobbin on the bobbin winder shaft so that the |
| ||
spring on the shaft fits into the groove in the top of the | SETTING | ||
bobbin (a). Then, slide the bobbin winder shaft to the right | |||
| |||
(b). | Spring on the shaft |
| |
1 | UP | ||
2 | Groove in the bobbin | ||
| |||
|
| SEWING | |
(a) |
(b) |
1 |
5.Wind the thread clockwise around the bobbin four or five times (a), pass the thread through the slit in the bobbin winder seat, and then pull it as shown to cut it (b).
1 Bobbin winder seat
6.Slide the sewing speed controller to its maximum (as far as possible to the right).
7.Press the start/stop button. The bobbin stops spinning automatically when it is full.
8.After the bobbin has stopped spinning, press the start/stop button to stop the machine.
9.Cut the thread, slide the bobbin winder shaft to the left and then remove the bobbin.
STITCHES | UTILITY |
|
|
STITCH DESIGNS) | (CREATE YOUR OWN | STITCHTM | MY CUSTOM |
EMBROIDERING |
|
|
|
MAINTENANCE |
|
|
|
MESSAGES | ERROR |
|
|
SEWING CHART |
|
|
|
IN MACHINE) | (PROGRAMMED | PATTERNS |
|
22