LCD screen
CONTENTS |
1
2 3 4
5
7 6
Press a key on the screen with your finger to select the pattern displayed inside the key or to start the indicated function or operation.
Note
When the machine is turned on, the straight stitch (left needle position) is automatically selected.
CAUTION
Be sure to press the key only with your finger. Never press a key with a hard, pointed instrument, such as a pencil or a screwdriver. Furthermore, do not press down too hard on the screen, otherwise it may be damaged.
SETTING UP |
SEWING |
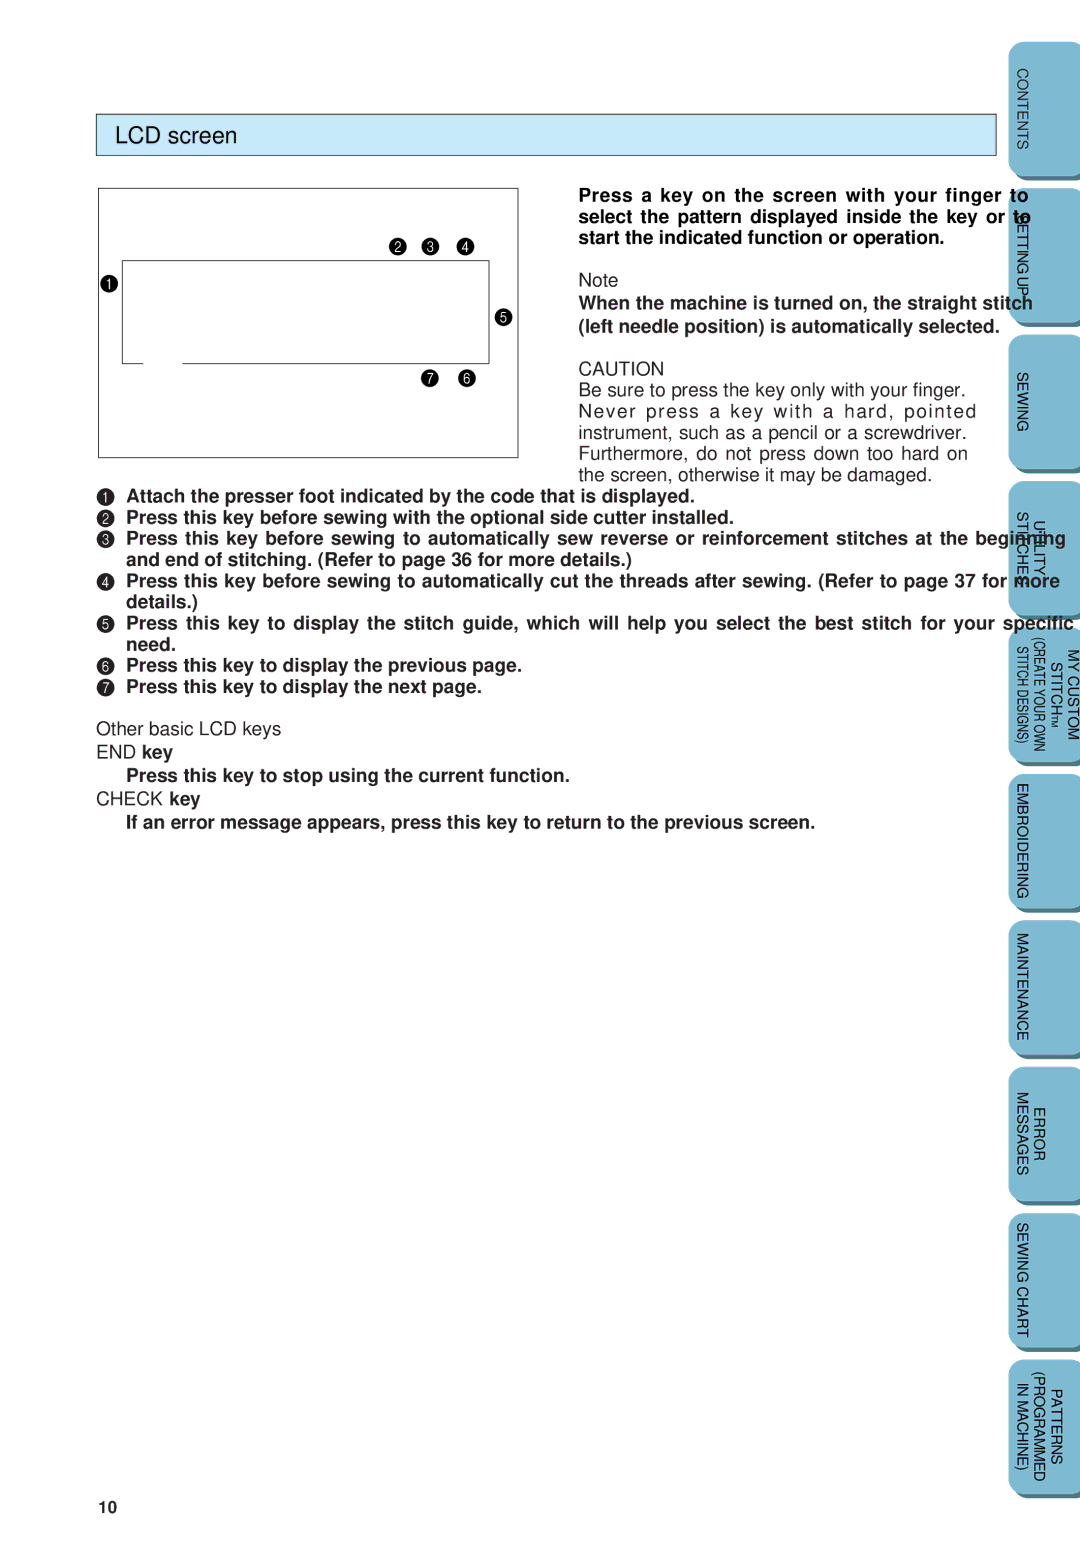
1Attach the presser foot indicated by the code that is displayed.
2 Press this key before sewing with the optional side cutter installed.
3 Press this key before sewing to automatically sew reverse or reinforcement stitches at the beginning and end of stitching. (Refer to page 36 for more details.)
4 Press this key before sewing to automatically cut the threads after sewing. (Refer to page 37 for more details.)
5 Press this key to display the stitch guide, which will help you select the best stitch for your specific need.
6 Press this key to display the previous page.
7 Press this key to display the next page.
Other basic LCD keys
END key
Press this key to stop using the current function.
CHECK key
If an error message appears, press this key to return to the previous screen.
STITCHES | UTILITY |
|
|
STITCH DESIGNS) | (CREATE YOUR OWN | STITCHTM | MY CUSTOM |
EMBROIDERING |
|
|
|
MAINTENANCE |
|
|
|
MESSAGES | ERROR |
|
|
SEWING CHART |
|
|
|
IN MACHINE) | (PROGRAMMED | PATTERNS |
|
10