BASIC SEWING
Sewing using the straight stitch (left needle position)
|
| CAUTION |
|
| |
|
| – Be aware of the needle location | |||
|
| at all times while sewing, and | |||
|
| keep your hands away from all | |||
8 | 3 | moving | parts such as | the | |
needle, | balance wheel | and | |||
| |||||
7 |
| thread | |||
6 | injuries may occur. |
| |||
4 | – Do not pull or push the fabric | ||||
too hard while sewing, otherwise | |||||
|
| ||||
5 |
| injuries may occur. |
| ||
| – Never use bent needles. They | ||||
2 | 1 | can easily break, which could | |||
result in injury. |
| ||||
CONTENTS |
|
SETTING UP |
|
SEWING |
|
STITCHES | UTILITY |
1
2 3 4
5
6 7
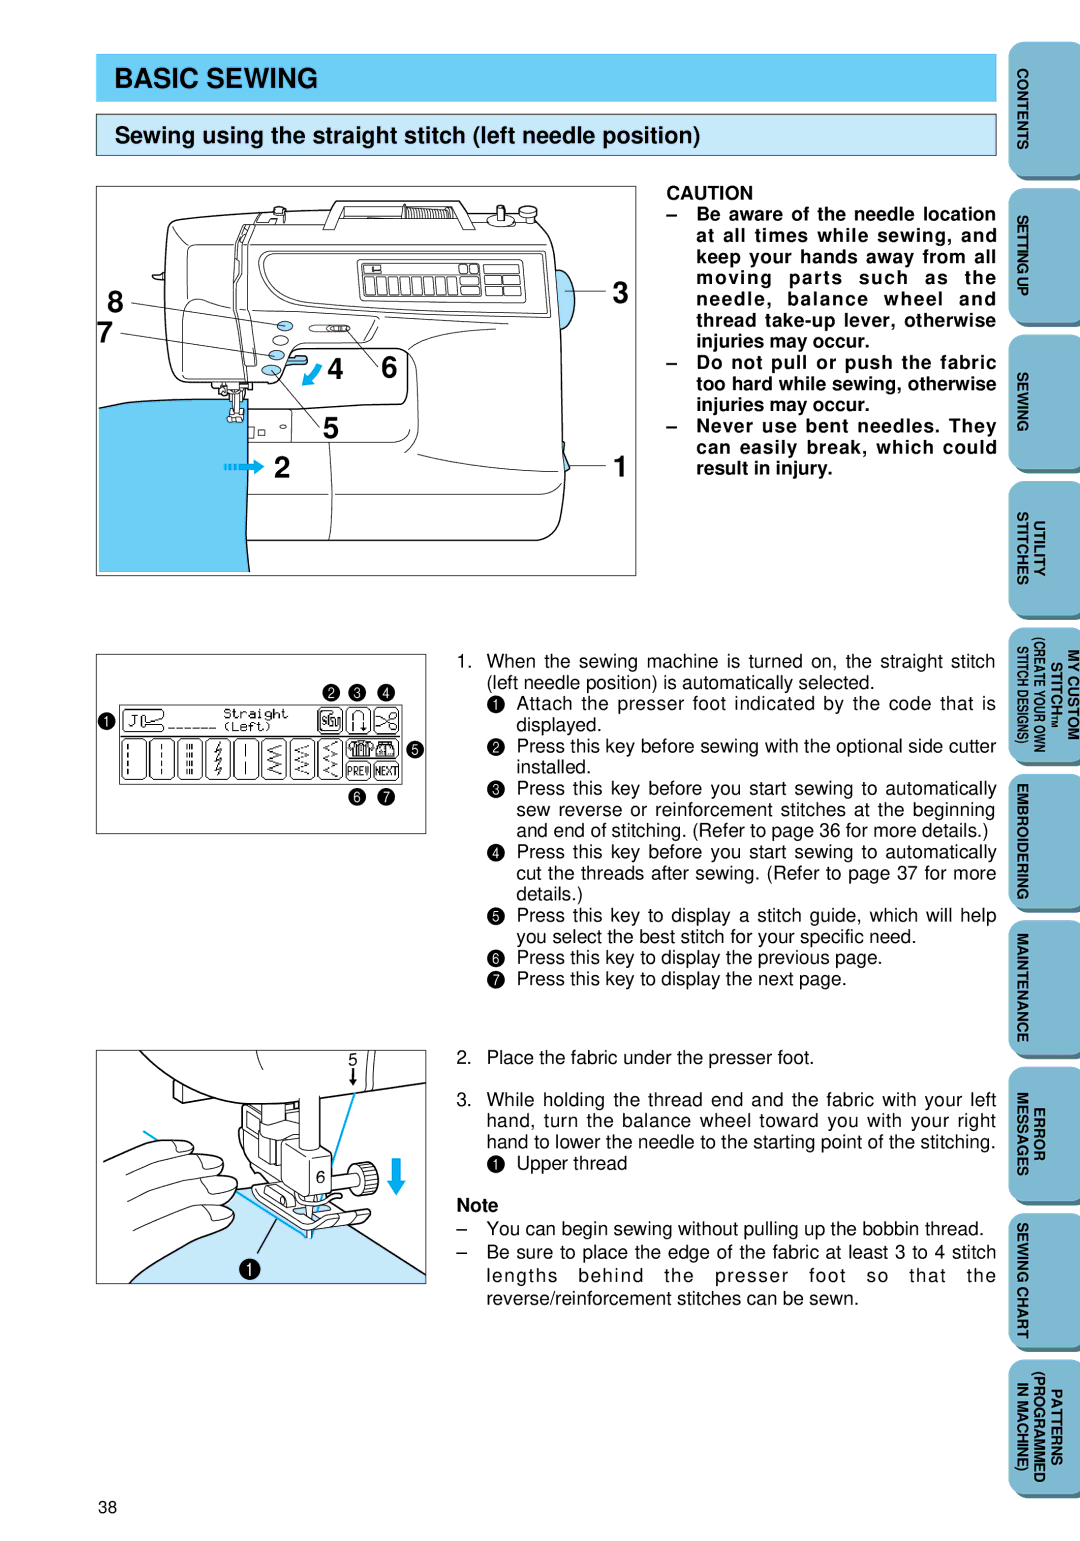
1.When the sewing machine is turned on, the straight stitch (left needle position) is automatically selected.
1 Attach the presser foot indicated by the code that is
displayed.
2Press this key before sewing with the optional side cutter installed.
3Press this key before you start sewing to automatically
sew reverse or reinforcement stitches at the beginning and end of stitching. (Refer to page 36 for more details.)
4Press this key before you start sewing to automatically cut the threads after sewing. (Refer to page 37 for more details.)
5Press this key to display a stitch guide, which will help you select the best stitch for your specific need.
6 Press this key to display the previous page.
7 Press this key to display the next page.
2.Place the fabric under the presser foot.
3.While holding the thread end and the fabric with your left hand, turn the balance wheel toward you with your right hand to lower the needle to the starting point of the stitching. 1 Upper thread
Note
–You can begin sewing without pulling up the bobbin thread.
–Be sure to place the edge of the fabric at least 3 to 4 stitch lengths behind the presser foot so that the reverse/reinforcement stitches can be sewn.
STITCH DESIGNS) | (CREATE YOUR OWN | STITCHTM | MY CUSTOM |
EMBROIDERING |
|
|
|
MAINTENANCE |
|
|
|
MESSAGES | ERROR |
|
|
SEWING CHART |
|
|
|
IN MACHINE) | (PROGRAMMED | PATTERNS |
|
38