PRESSER FEET / FEED DOGS
Changing the presser foot
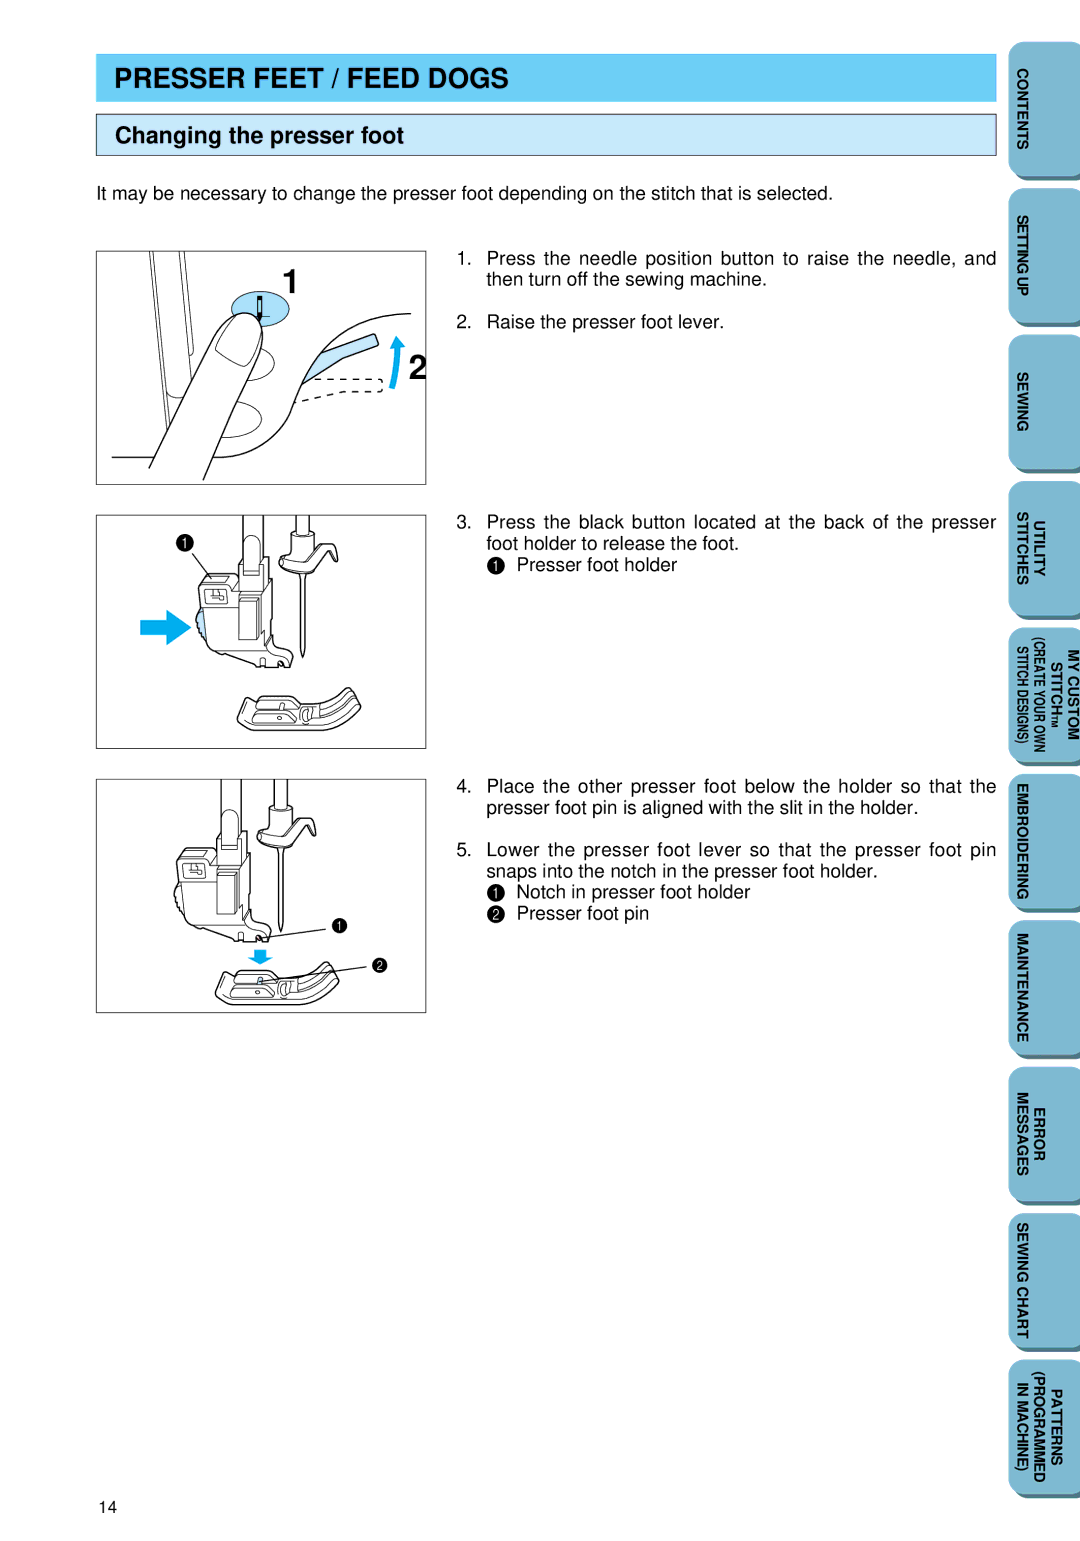
It may be necessary to change the presser foot depending on the stitch that is selected.
1 | 1. | Press the needle position button to raise the needle, and | |||
| then turn off the sewing machine. | ||||
|
|
|
| ||
|
|
| 2. | Raise the presser foot lever. | |
2 | |||||
|
| ||||
|
|
|
|
| |
CONTENTS |
SETTING UP |
SEWING |
1
1
3.Press the black button located at the back of the presser foot holder to release the foot.
1 Presser foot holder
4.Place the other presser foot below the holder so that the presser foot pin is aligned with the slit in the holder.
5.Lower the presser foot lever so that the presser foot pin snaps into the notch in the presser foot holder.
1 Notch in presser foot holder
2 Presser foot pin
STITCHES | UTILITY |
|
|
STITCH DESIGNS) | (CREATE YOUR OWN | STITCHTM | MY CUSTOM |
EMBROIDERING |
|
|
|
2
MAINTENANCE |
|
|
MESSAGES | ERROR |
|
SEWING CHART |
|
|
IN MACHINE) | (PROGRAMMED | PATTERNS |
14