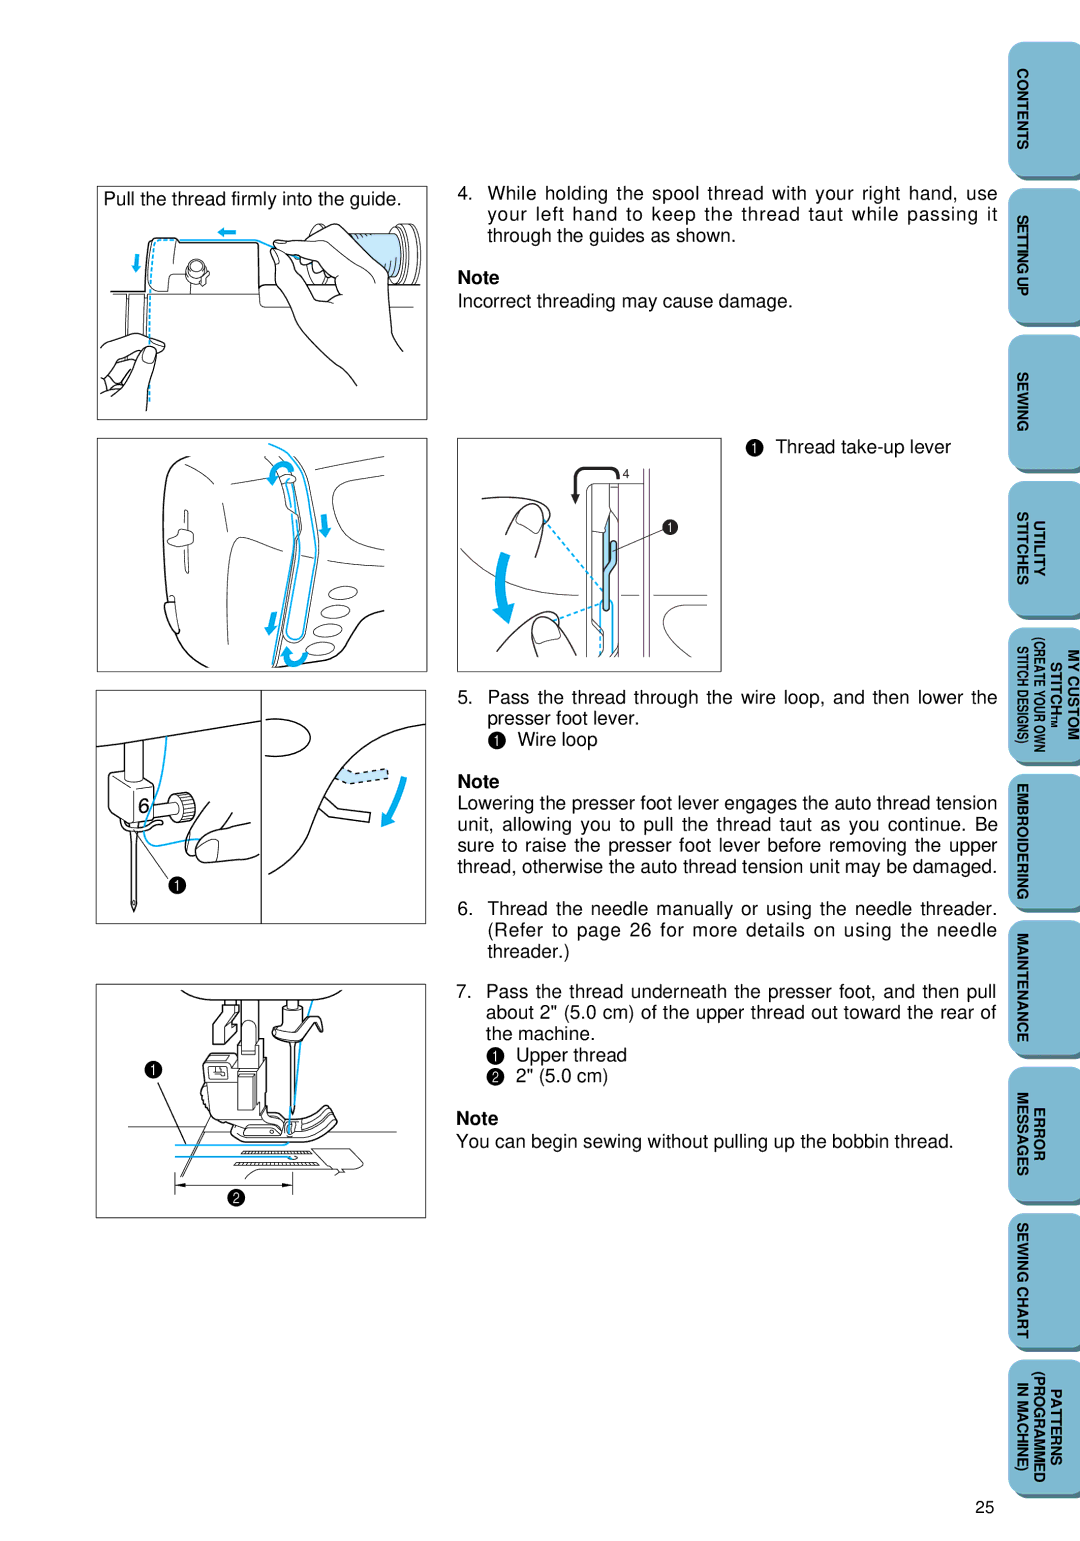
Pull the thread firmly into the guide.
1
1 |
2 |
4.While holding the spool thread with your right hand, use your left hand to keep the thread taut while passing it through the guides as shown.
Note
Incorrect threading may cause damage.
1 Thread
4
1
5.Pass the thread through the wire loop, and then lower the presser foot lever.
1 Wire loop
Note
Lowering the presser foot lever engages the auto thread tension unit, allowing you to pull the thread taut as you continue. Be sure to raise the presser foot lever before removing the upper thread, otherwise the auto thread tension unit may be damaged.
6.Thread the needle manually or using the needle threader. (Refer to page 26 for more details on using the needle threader.)
7.Pass the thread underneath the presser foot, and then pull about 2" (5.0 cm) of the upper thread out toward the rear of the machine.
1 Upper thread
2 2" (5.0 cm)
Note
You can begin sewing without pulling up the bobbin thread.
CONTENTS |
|
|
SETTING UP |
|
|
SEWING |
|
|
STITCHES | UTILITY |
|
STITCH DESIGNS) | (CREATE YOUR OWN | MY CUSTOM STITCHTM |
EMBROIDERING |
|
|
MAINTENANCE |
|
|
MESSAGES | ERROR |
|
SEWING CHART |
|
|
IN MACHINE) | (PROGRAMMED | PATTERNS |
25