OVERCASTING |
|
|
| G J | ||
|
|
|
|
|
| |
|
|
|
|
|
|
|
|
|
|
|
|
| Overcasting |
|
|
|
|
|
| 1 for sewing thin and medium weight fabrics |
|
|
|
|
|
| 2 for sewing thick fabrics |
1 | 2 | 3 | 4 | 5 | 6 | 3 for sewing thick and medium weight stretch |
fabrics | ||||||
4 for sewing mediumweight stretch fabrics
5 for sewing stretch fabrics
6 for sewing stretch fabrics
CONTENTSSETTING UP
Utility stitches that display ![]() can be sewn using the side cutter. For details on installing and using the side cutter, refer to page 16.
can be sewn using the side cutter. For details on installing and using the side cutter, refer to page 16.
Sewing with , or | G |
|
SEWING
5
![]() 6
6 ![]()
1
G
Sewing with ![]() ,
, ![]() or
or ![]()
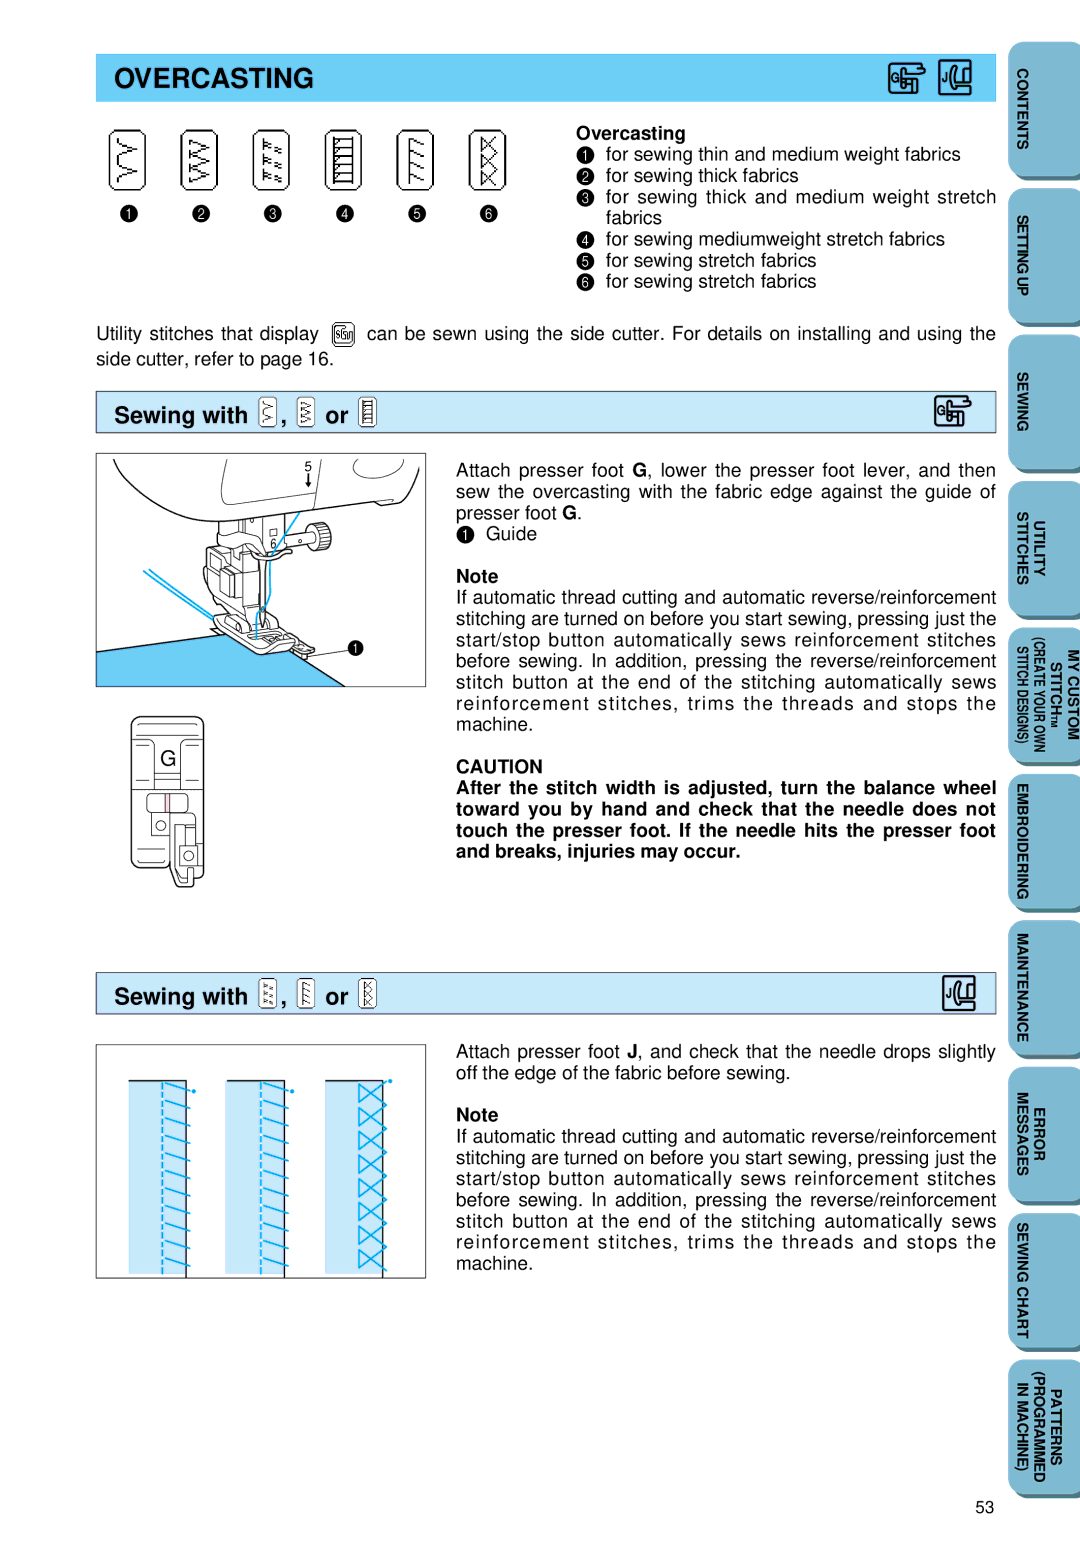
Attach presser foot G, lower the presser foot lever, and then sew the overcasting with the fabric edge against the guide of presser foot G.
1Guide
Note
If automatic thread cutting and automatic reverse/reinforcement stitching are turned on before you start sewing, pressing just the start/stop button automatically sews reinforcement stitches before sewing. In addition, pressing the reverse/reinforcement stitch button at the end of the stitching automatically sews reinforcement stitches, trims the threads and stops the machine.
CAUTION
After the stitch width is adjusted, turn the balance wheel toward you by hand and check that the needle does not touch the presser foot. If the needle hits the presser foot and breaks, injuries may occur.
J
Attach presser foot J, and check that the needle drops slightly off the edge of the fabric before sewing.
Note
If automatic thread cutting and automatic reverse/reinforcement stitching are turned on before you start sewing, pressing just the start/stop button automatically sews reinforcement stitches before sewing. In addition, pressing the reverse/reinforcement stitch button at the end of the stitching automatically sews reinforcement stitches, trims the threads and stops the machine.
STITCHES | UTILITY |
|
STITCH DESIGNS) | (CREATE YOUR OWN | MY CUSTOM STITCHTM |
EMBROIDERING |
|
|
MAINTENANCE |
|
|
MESSAGES | ERROR |
|
SEWING CHART |
|
|
IN MACHINE) | (PROGRAMMED | PATTERNS |
53