1
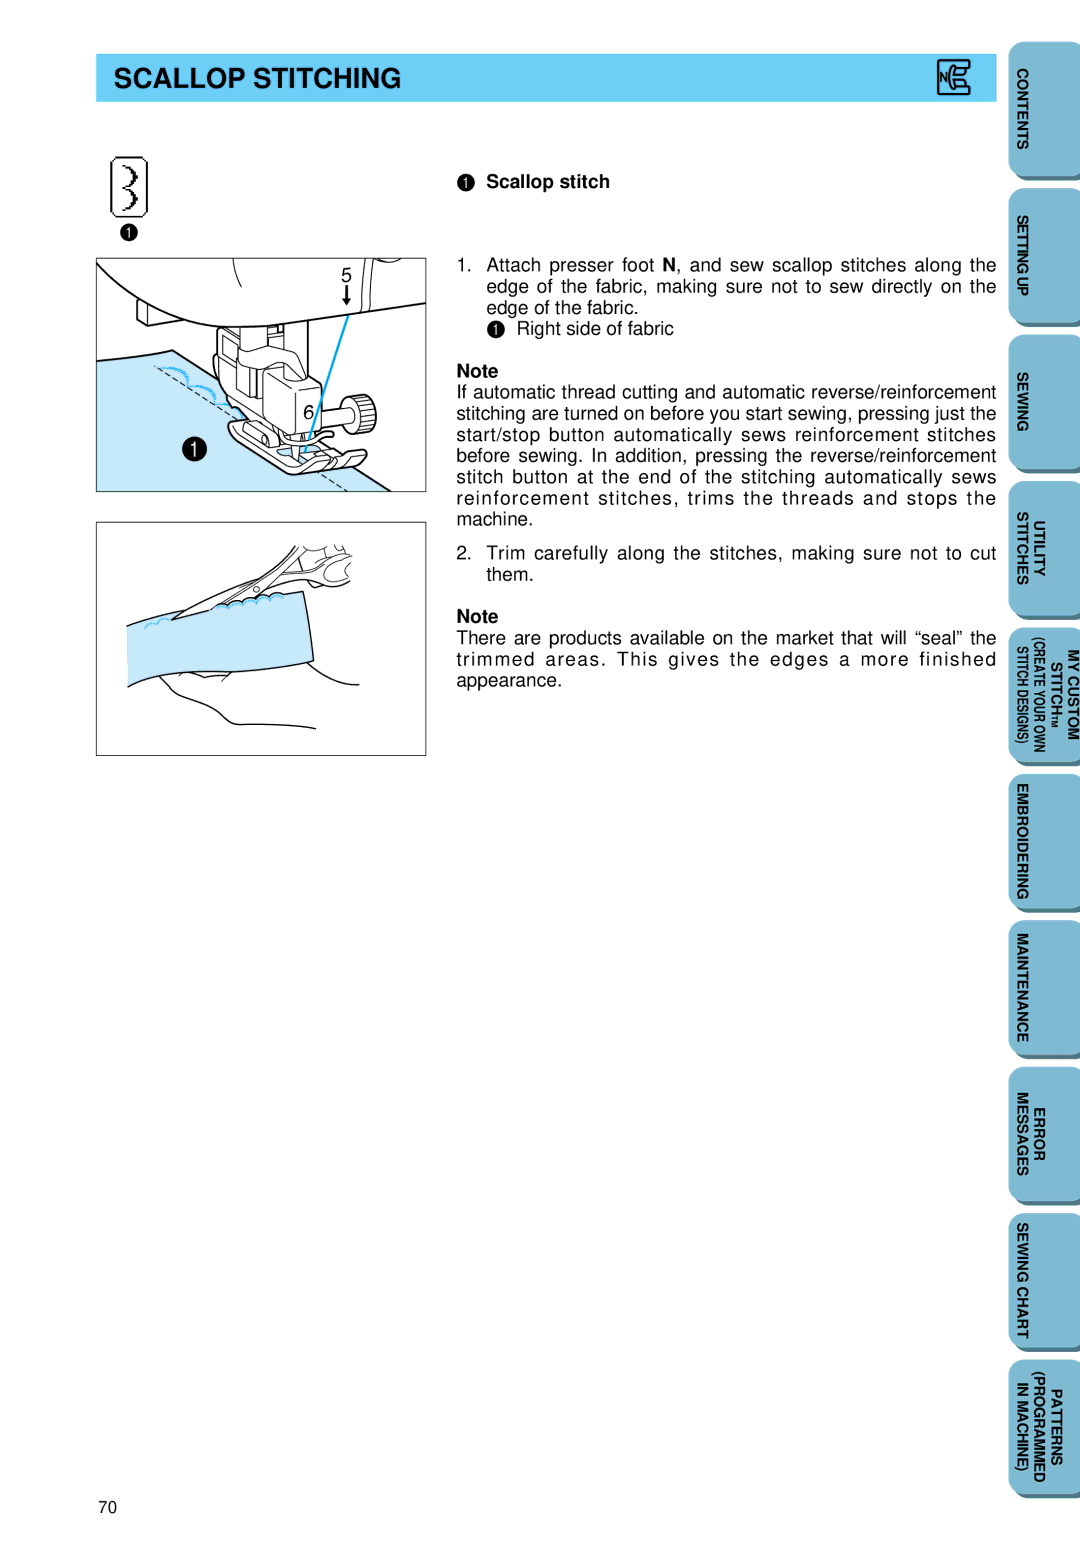
1 | Scallop stitch |
|
1. | Attach presser foot N, and sew scallop stitches along the | SETTING |
| edge of the fabric, making sure not to sew directly on the | UP |
| edge of the fabric. |
|
| 1 Right side of fabric |
|
Note
If automatic thread cutting and automatic reverse/reinforcement stitching are turned on before you start sewing, pressing just the start/stop button automatically sews reinforcement stitches before sewing. In addition, pressing the reverse/reinforcement stitch button at the end of the stitching automatically sews reinforcement stitches, trims the threads and stops the machine.
2.Trim carefully along the stitches, making sure not to cut them.
Note
There are products available on the market that will “seal” the trimmed areas. This gives the edges a more finished appearance.
70