1
![]()
![]() 4 2
4 2
5
3
6
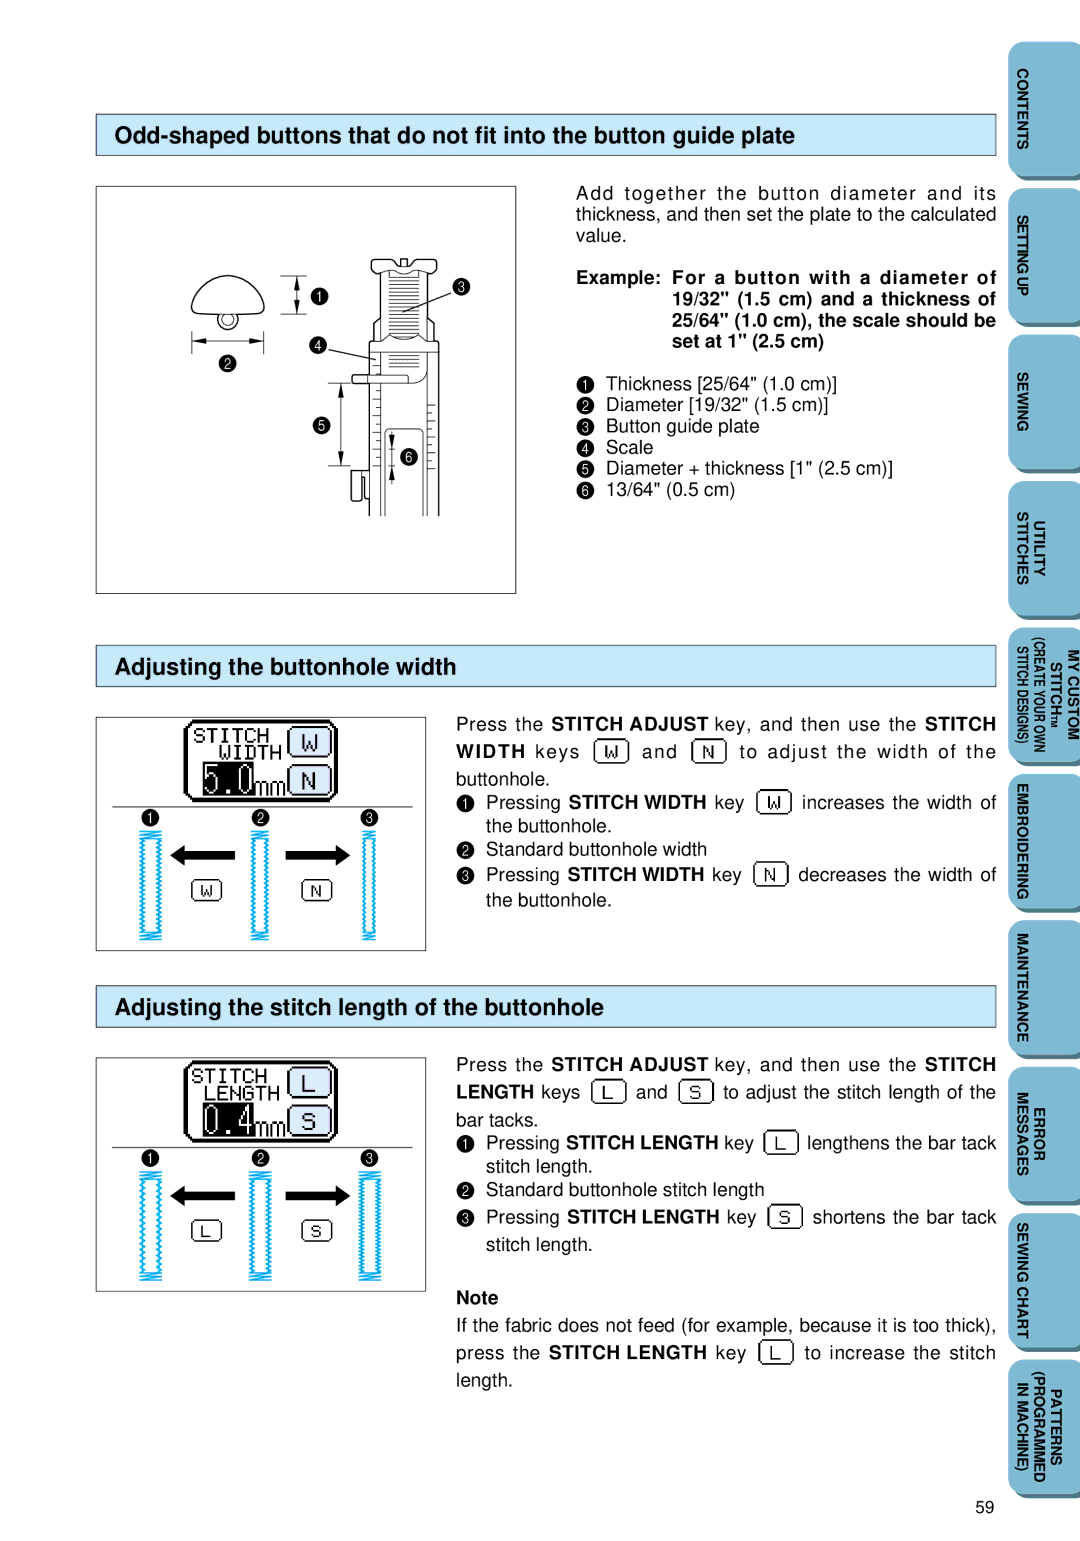
Add together the button diameter and its thickness, and then set the plate to the calculated value.
Example: For a button with a diameter of 19/32" (1.5 cm) and a thickness of 25/64" (1.0 cm), the scale should be set at 1" (2.5 cm)
1Thickness [25/64" (1.0 cm)]
2 Diameter [19/32" (1.5 cm)]
3 Button guide plate
4 Scale
5 Diameter + thickness [1" (2.5 cm)]
6 13/64" (0.5 cm)
SETTING UP |
|
SEWING |
|
STITCHES | UTILITY |
Adjusting the buttonhole width
MYCUSTOM STITCH (CREATE YOUR STITCHDESIGNS) |
1 2 3
Press the STITCH ADJUST key, and then use the STITCH
WIDTH keys ![]() and
and ![]() to adjust the width of the buttonhole.
to adjust the width of the buttonhole.
1Pressing STITCH WIDTH key ![]() increases the width of the buttonhole.
increases the width of the buttonhole.
2Standard buttonhole width
3Pressing STITCH WIDTH key ![]() decreases the width of the buttonhole.
decreases the width of the buttonhole.
OWN | TM |
EMBROIDERING |
|
MAINTENANCE |
|
Adjusting the stitch length of the buttonhole
1 2 3
Press the STITCH ADJUST key, and then use the STITCH
LENGTH keys ![]() and
and ![]() to adjust the stitch length of the bar tacks.
to adjust the stitch length of the bar tacks.
1Pressing STITCH LENGTH key ![]() lengthens the bar tack stitch length.
lengthens the bar tack stitch length.
2Standard buttonhole stitch length
3Pressing STITCH LENGTH key ![]() shortens the bar tack stitch length.
shortens the bar tack stitch length.
Note
If the fabric does not feed (for example, because it is too thick),
press the STITCH LENGTH key ![]() to increase the stitch length.
to increase the stitch length.
MESSAGES | ERROR |
|
SEWING CHART |
|
|
IN MACHINE) | (PROGRAMMED | PATTERNS |
59