BUTTONHOLE STITCHING |
| A |
|
| |
Buttonhole | 6 for stretch fabrics | |
1 for thin and medium weight 7 for making | a bound | |
fabrics (horizontal holes) | buttonhole |
|
2 for jeans and trousers | 8 for suits and overcoats | |
1 2 3 4 5 3 for thick coats | 9 for jeans and | trousers |
4for thin or medium weight 0 for thick coats fabrics
5for stretch fabric with coarse weaves
6 | 7 | 8 | 9 | 0 |
1. Mark the position and length of the buttonhole on the fabric.
Note
– The maximum buttonhole length is
– Thick thread (#30) cannot be used when sewing with
and .
CONTENTS |
|
SETTING UP |
|
SEWING |
|
STITCHES | UTILITY |
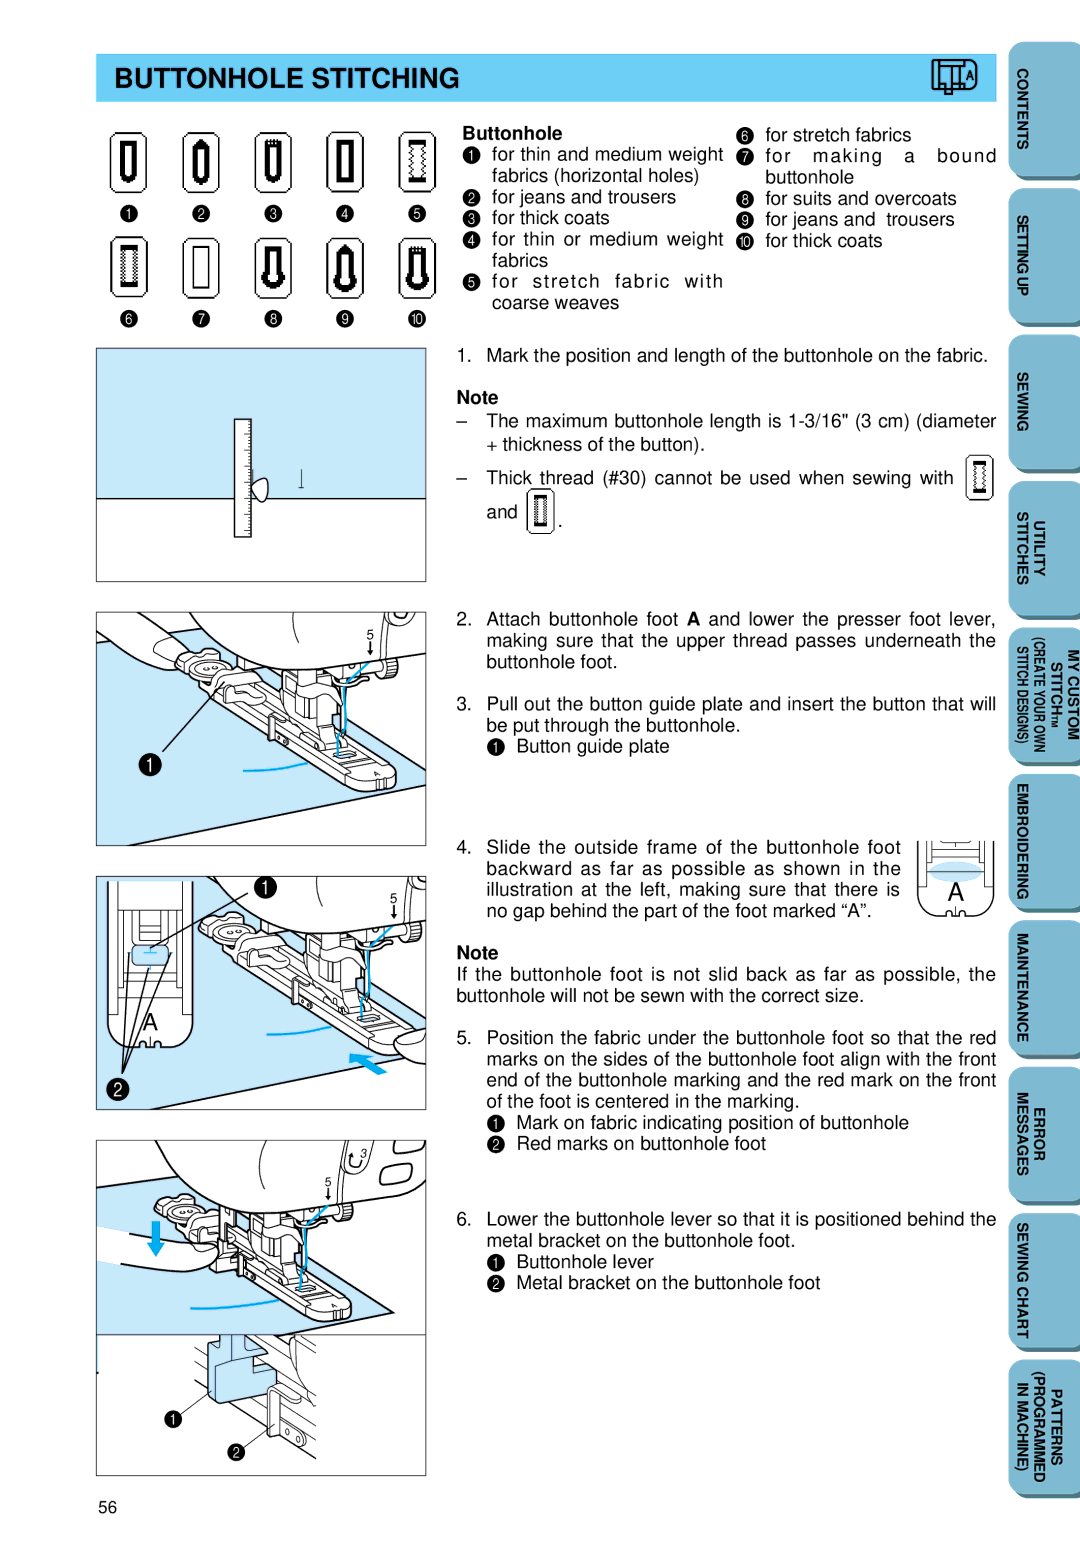
| 5 | 2. Attach buttonhole foot A and lower the presser foot lever, | |
| making sure that the upper thread passes underneath the | ||
|
| ||
|
| buttonhole foot. |
|
|
| 3. Pull out the button guide plate and insert the button that will | |
|
| be put through the buttonhole. |
|
|
| 1 Button guide plate |
|
|
| 4. Slide the outside frame of the buttonhole foot |
|
1 |
| backward as far as possible as shown in the | A |
5 | illustration at the left, making sure that there is | ||
|
| no gap behind the part of the foot marked “A”. |
|
|
| Note |
|
|
| If the buttonhole foot is not slid back as far as possible, the | |
|
| buttonhole will not be sewn with the correct size. |
|
A |
| 5. Position the fabric under the buttonhole foot so that the red | |
|
| ||
|
| marks on the sides of the buttonhole foot align with the front | |
|
| end of the buttonhole marking and the red mark on the front | |
|
| of the foot is centered in the marking. |
|
|
| 1 Mark on fabric indicating position of buttonhole |
|
| 3 | 2 Red marks on buttonhole foot |
|
|
|
| |
| 5 |
|
|
6. Lower the buttonhole lever so that it is positioned behind the metal bracket on the buttonhole foot.
1 Buttonhole lever
2 Metal bracket on the buttonhole foot
1
2
56