Inserting a side zipper
CONTENTS
1. Attach presser foot J, sew straight stitches up to the zipper |
| ||
opening, and then sew reverse stitches. Then, select a | SETTING | ||
basting stitch and continue sewing to the edge of the fabric. | |||
| |||
1 | End of zipper opening |
| |
2 | Reverse stitches | UP | |
3 | Basting stitch | ||
| |||
4 | Wrong side of fabric |
| |
|
| SEWING | |
4
I
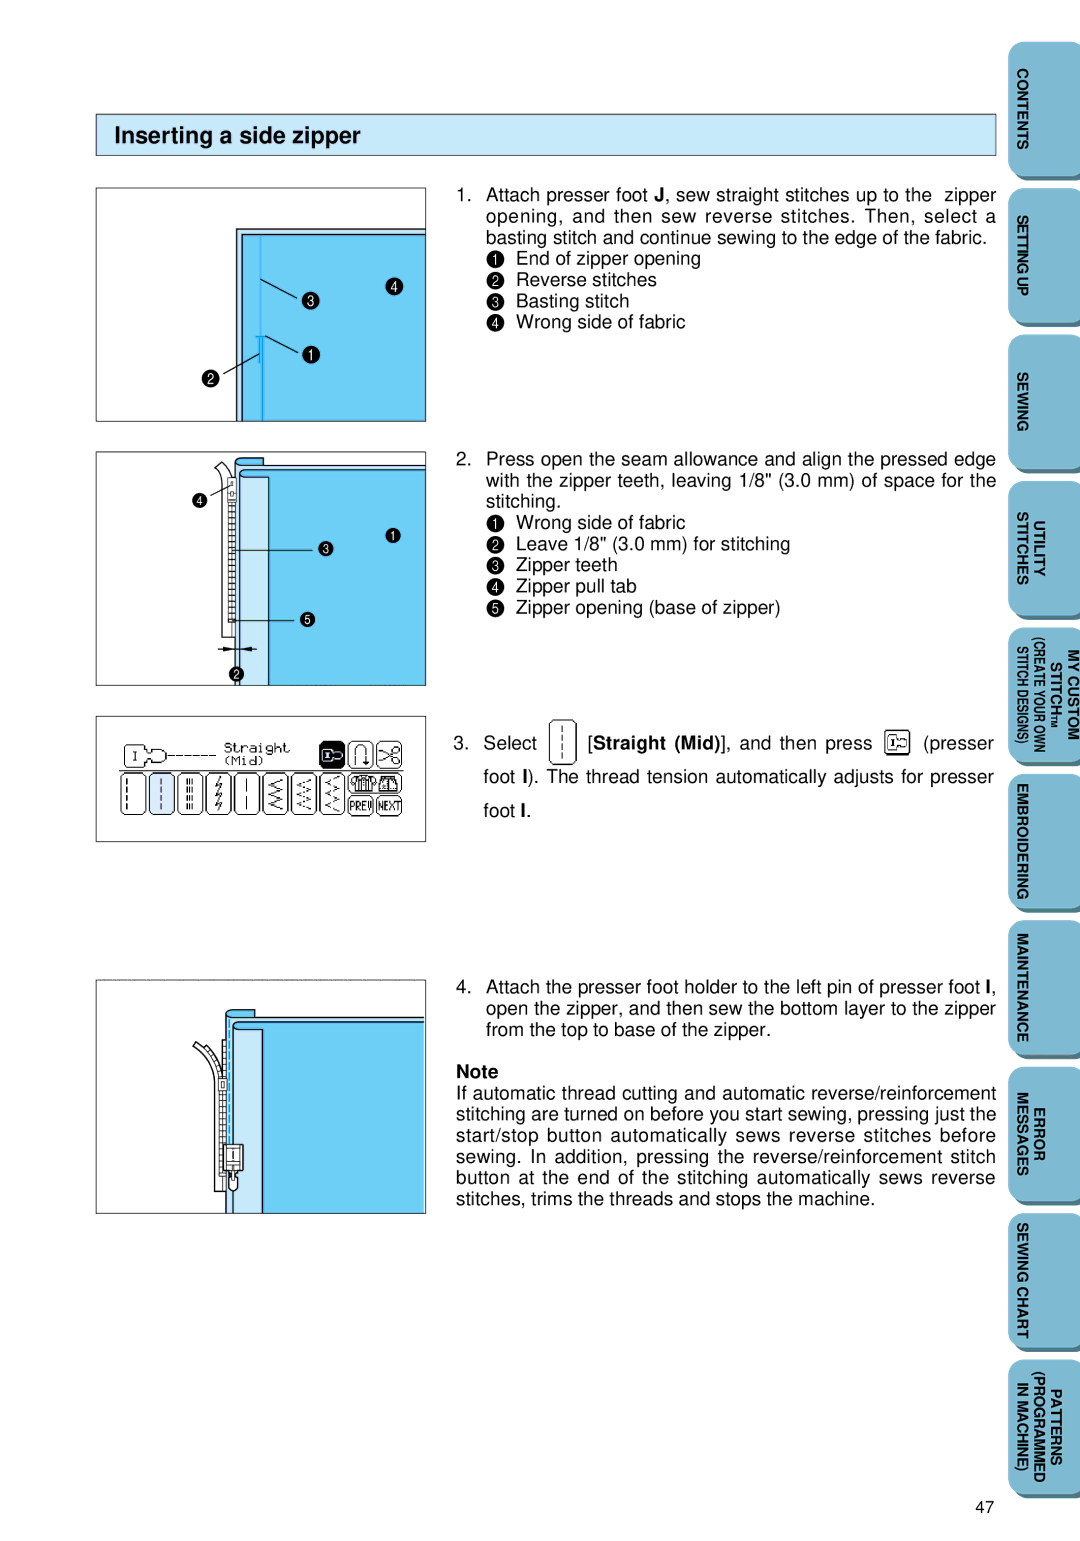
2.Press open the seam allowance and align the pressed edge with the zipper teeth, leaving 1/8" (3.0 mm) of space for the stitching.
1 Wrong side of fabric
2 Leave 1/8" (3.0 mm) for stitching
3 Zipper teeth
4 Zipper pull tab
5 Zipper opening (base of zipper)
3. Select | [Straight (Mid)], and then press | (presser |
foot I). The thread tension automatically adjusts for presser
foot I.
4.Attach the presser foot holder to the left pin of presser foot I, open the zipper, and then sew the bottom layer to the zipper from the top to base of the zipper.
Note
If automatic thread cutting and automatic reverse/reinforcement stitching are turned on before you start sewing, pressing just the start/stop button automatically sews reverse stitches before sewing. In addition, pressing the reverse/reinforcement stitch button at the end of the stitching automatically sews reverse stitches, trims the threads and stops the machine.
STITCHES | UTILITY |
|
STITCH DESIGNS) | (CREATE YOUR OWN | MY CUSTOM STITCHTM |
EMBROIDERING |
|
|
MAINTENANCE |
|
|
MESSAGES | ERROR |
|
SEWING CHART |
|
|
IN MACHINE) | (PROGRAMMED | PATTERNS |
47