1
![]()
![]()
![]()
![]()
![]() 2
2
9
3
![]()
![]()
![]()
![]()
![]()
![]()
![]()
![]()
![]()
![]()
![]()
![]()
![]()
![]() 4 8
4 8![]()
![]()
![]()
![]()
![]()
![]() 5
5 ![]()
![]() 6
6
7
1
2
3
4
5
 Use the
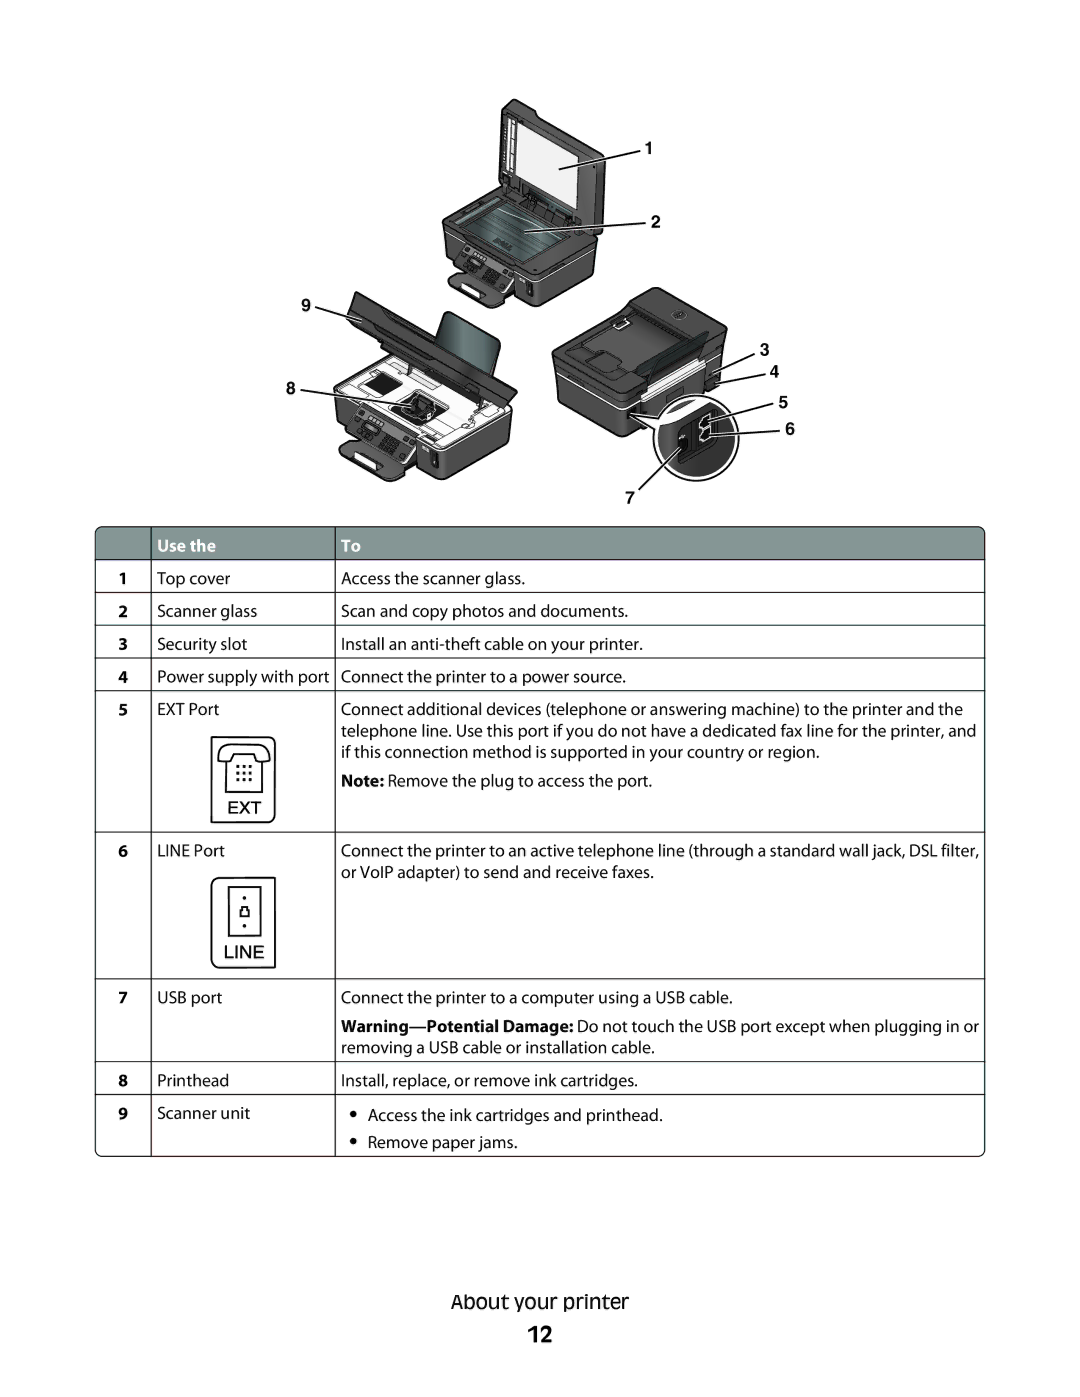
Top cover
Scanner glass
Security slot
Power supply with port
EXT Port
EXT
To
Access the scanner glass.
Scan and copy photos and documents.
Install an
Connect the printer to a power source.
Connect additional devices (telephone or answering machine) to the printer and the telephone line. Use this port if you do not have a dedicated fax line for the printer, and if this connection method is supported in your country or region.
Note: Remove the plug to access the port.
6
LINE Port | Connect the printer to an active telephone line (through a standard wall jack, DSL filter, |
| or VoIP adapter) to send and receive faxes. |
LINE
7USB port
8Printhead
9Scanner unit
Connect the printer to a computer using a USB cable.
Install, replace, or remove ink cartridges.
•Access the ink cartridges and printhead.
•Remove paper jams.
About your printer
12