Network Configuration Tool
The Network Configuration tool provides information on all network adapters installed in the system and any connected GigE Vision devices. For the Genie, the tool allows a simple method to assign a
Important: Any changes made with this tool will update the Genie flash memory. Do not remove power from the Genie camera for a minimum 10 seconds. Then cycle the Genie power to load the new flash settings.
Quick Genie Network Configuration
•Start the Network Configuration program from the windows start menu: Start•Programs•DALSA•Sapera Network Imaging Package•DALSA Network Configuration Tool.
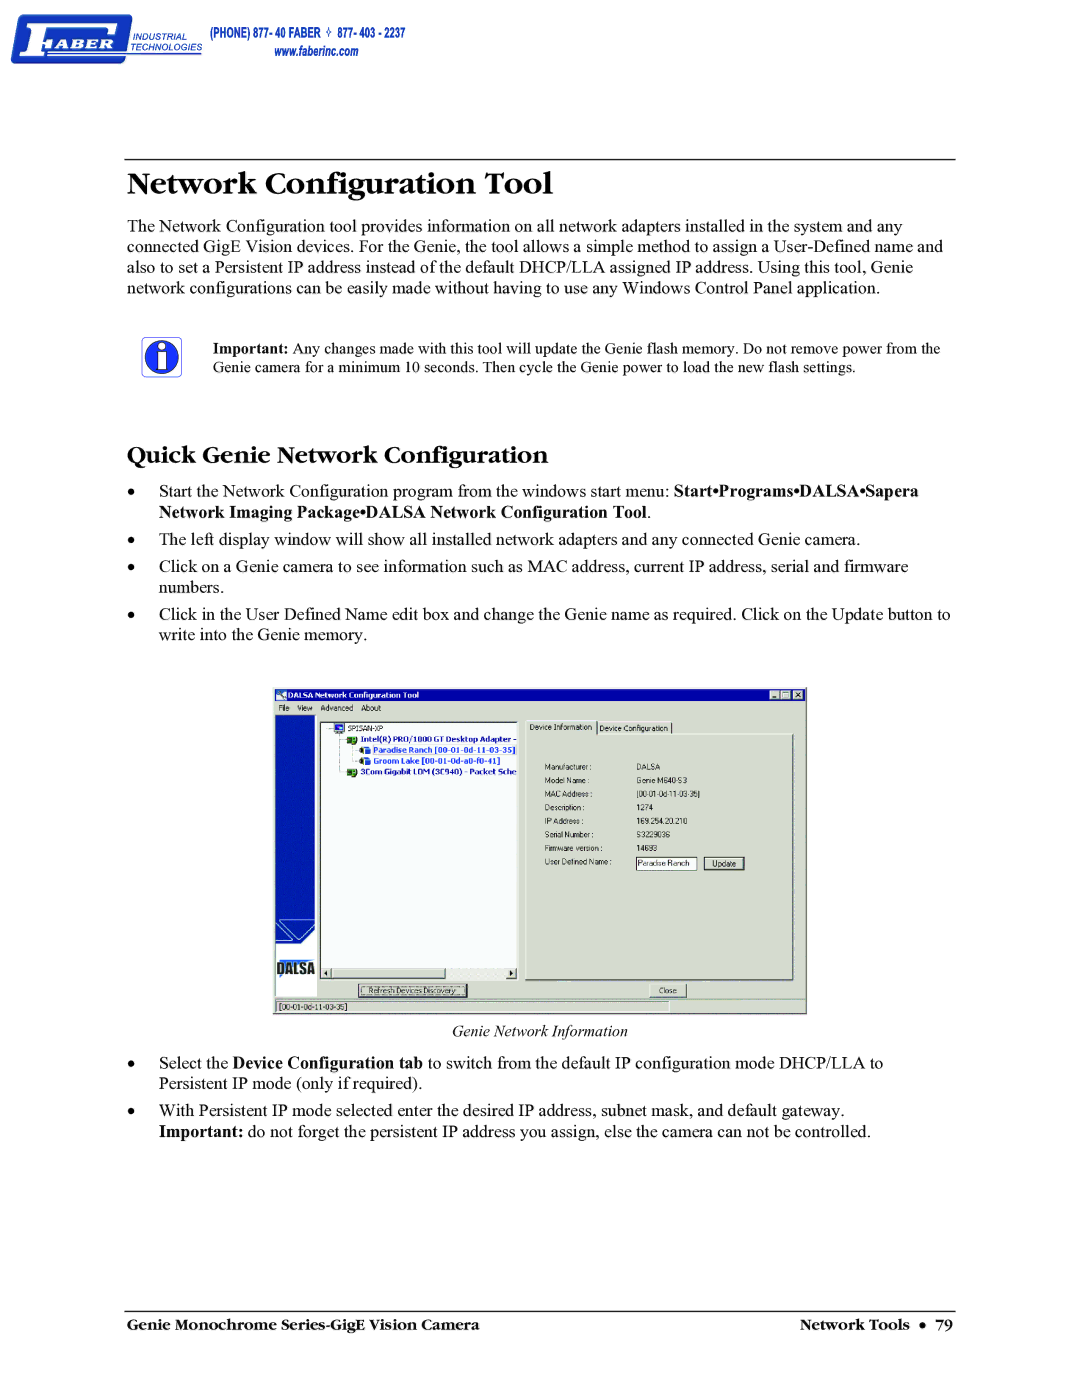
•The left display window will show all installed network adapters and any connected Genie camera.
•Click on a Genie camera to see information such as MAC address, current IP address, serial and firmware numbers.
•Click in the User Defined Name edit box and change the Genie name as required. Click on the Update button to write into the Genie memory.
Genie Network Information
•Select the Device Configuration tab to switch from the default IP configuration mode DHCP/LLA to Persistent IP mode (only if required).
•With Persistent IP mode selected enter the desired IP address, subnet mask, and default gateway. Important: do not forget the persistent IP address you assign, else the camera can not be controlled.
Genie Monochrome | Network Tools • 79 |