Several PMCS breaker management devices support the Lockout/Tagout Wizard in their Large Faceplate and Tabular Data Screen wizards. These devices are:
•750 / 760 Feeder Management Relay
Configuration
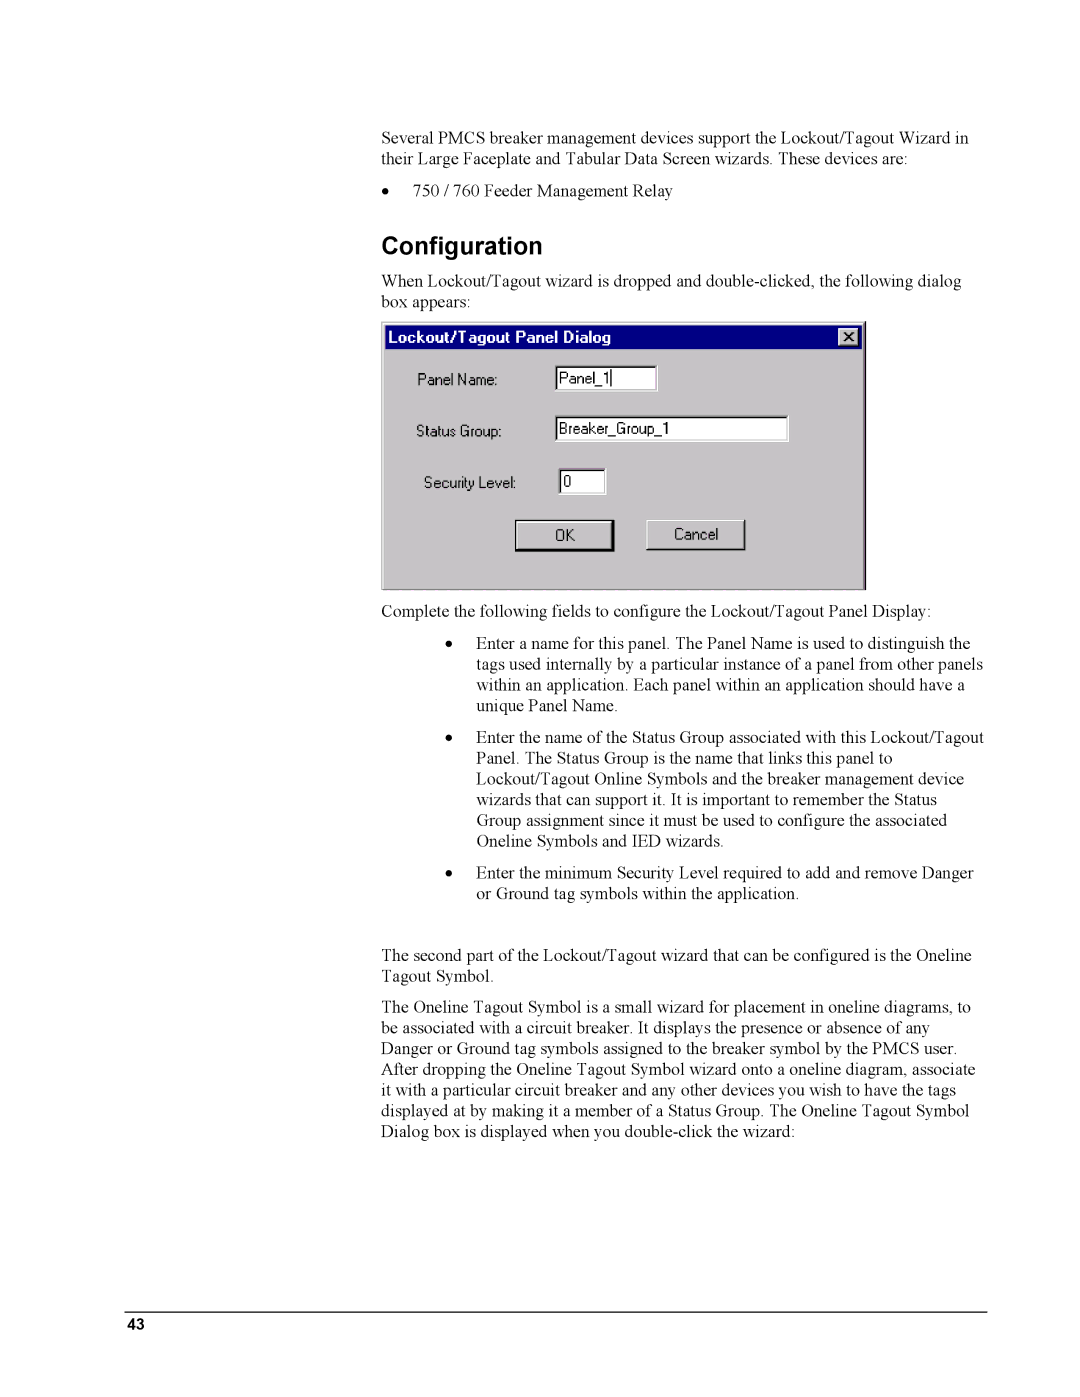
When Lockout/Tagout wizard is dropped and
Complete the following fields to configure the Lockout/Tagout Panel Display:
•Enter a name for this panel. The Panel Name is used to distinguish the tags used internally by a particular instance of a panel from other panels within an application. Each panel within an application should have a unique Panel Name.
•Enter the name of the Status Group associated with this Lockout/Tagout Panel. The Status Group is the name that links this panel to Lockout/Tagout Online Symbols and the breaker management device wizards that can support it. It is important to remember the Status Group assignment since it must be used to configure the associated Oneline Symbols and IED wizards.
•Enter the minimum Security Level required to add and remove Danger or Ground tag symbols within the application.
The second part of the Lockout/Tagout wizard that can be configured is the Oneline Tagout Symbol.
The Oneline Tagout Symbol is a small wizard for placement in oneline diagrams, to be associated with a circuit breaker. It displays the presence or absence of any Danger or Ground tag symbols assigned to the breaker symbol by the PMCS user. After dropping the Oneline Tagout Symbol wizard onto a oneline diagram, associate it with a particular circuit breaker and any other devices you wish to have the tags displayed at by making it a member of a Status Group. The Oneline Tagout Symbol Dialog box is displayed when you
43