First, we’ll create all our new windows and name them, then we’ll go back and flesh them out with their contents and add links between them. Create the following twelve windows:
• | Main Screen | • | Trip2_Face |
• | Panelboard | • | Trip2_Tab |
• | PQM_Face | • | Trip3_Face |
• | PQM_Tab | • | Trip3_Tab |
• | Trip1_Face | • | Trip4_Face |
• | Trip1_Tab | • | Trip4_Tab |
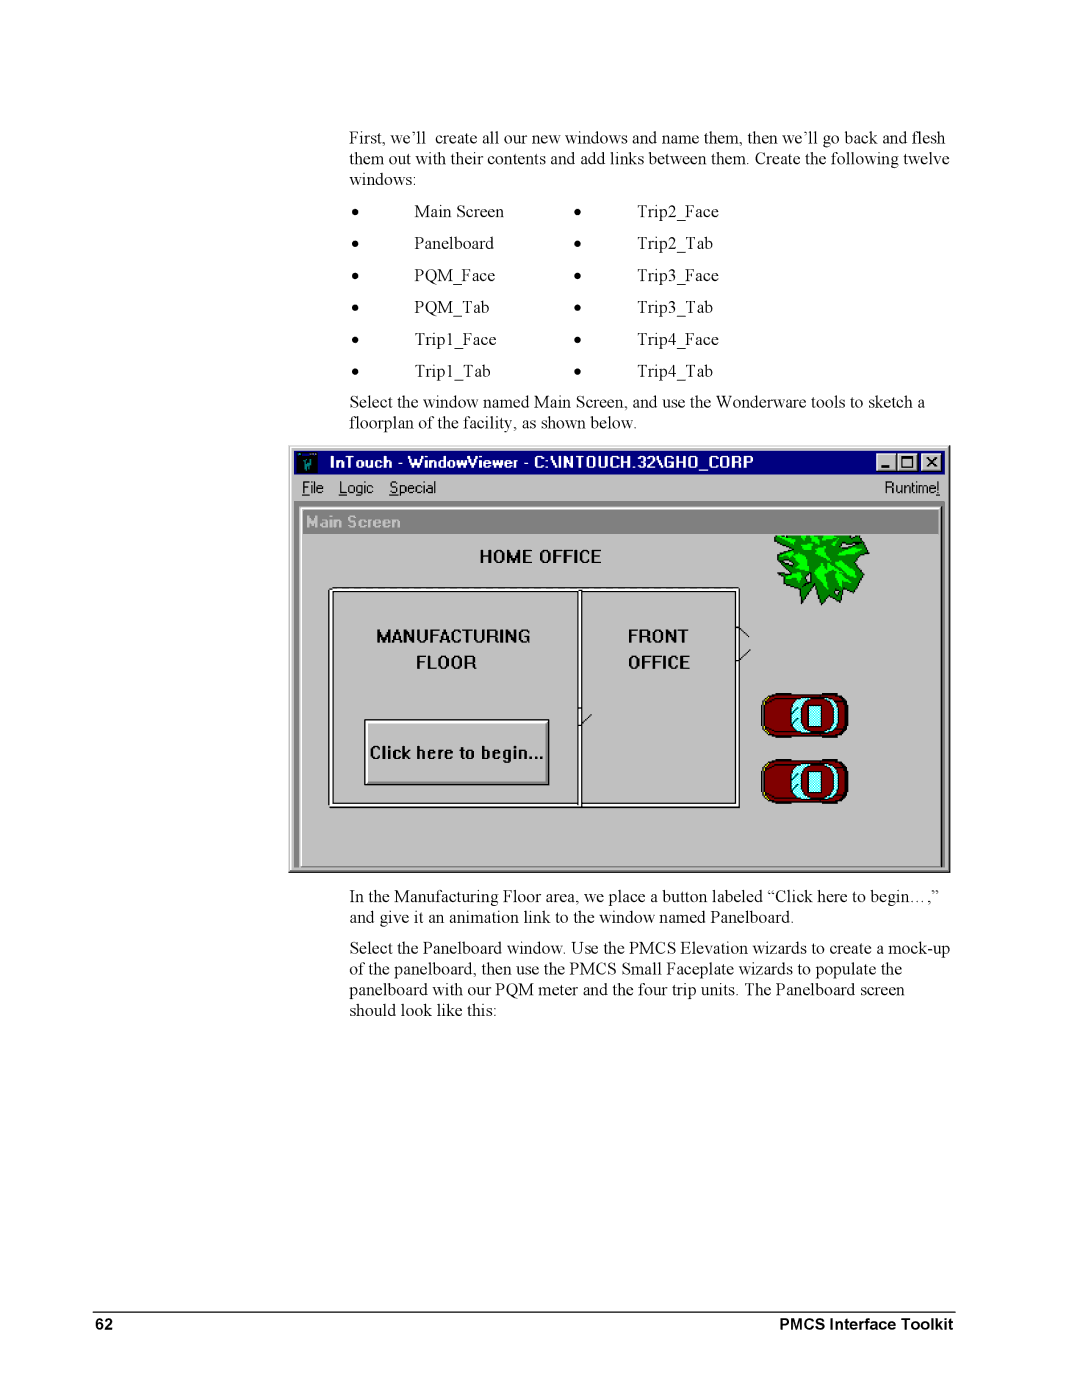
Select the window named Main Screen, and use the Wonderware tools to sketch a floorplan of the facility, as shown below.
In the Manufacturing Floor area, we place a button labeled “Click here to begin…,” and give it an animation link to the window named Panelboard.
Select the Panelboard window. Use the PMCS Elevation wizards to create a
62 | PMCS Interface Toolkit |
