78CHAPTER 5: ROUTER CONFIGURATION
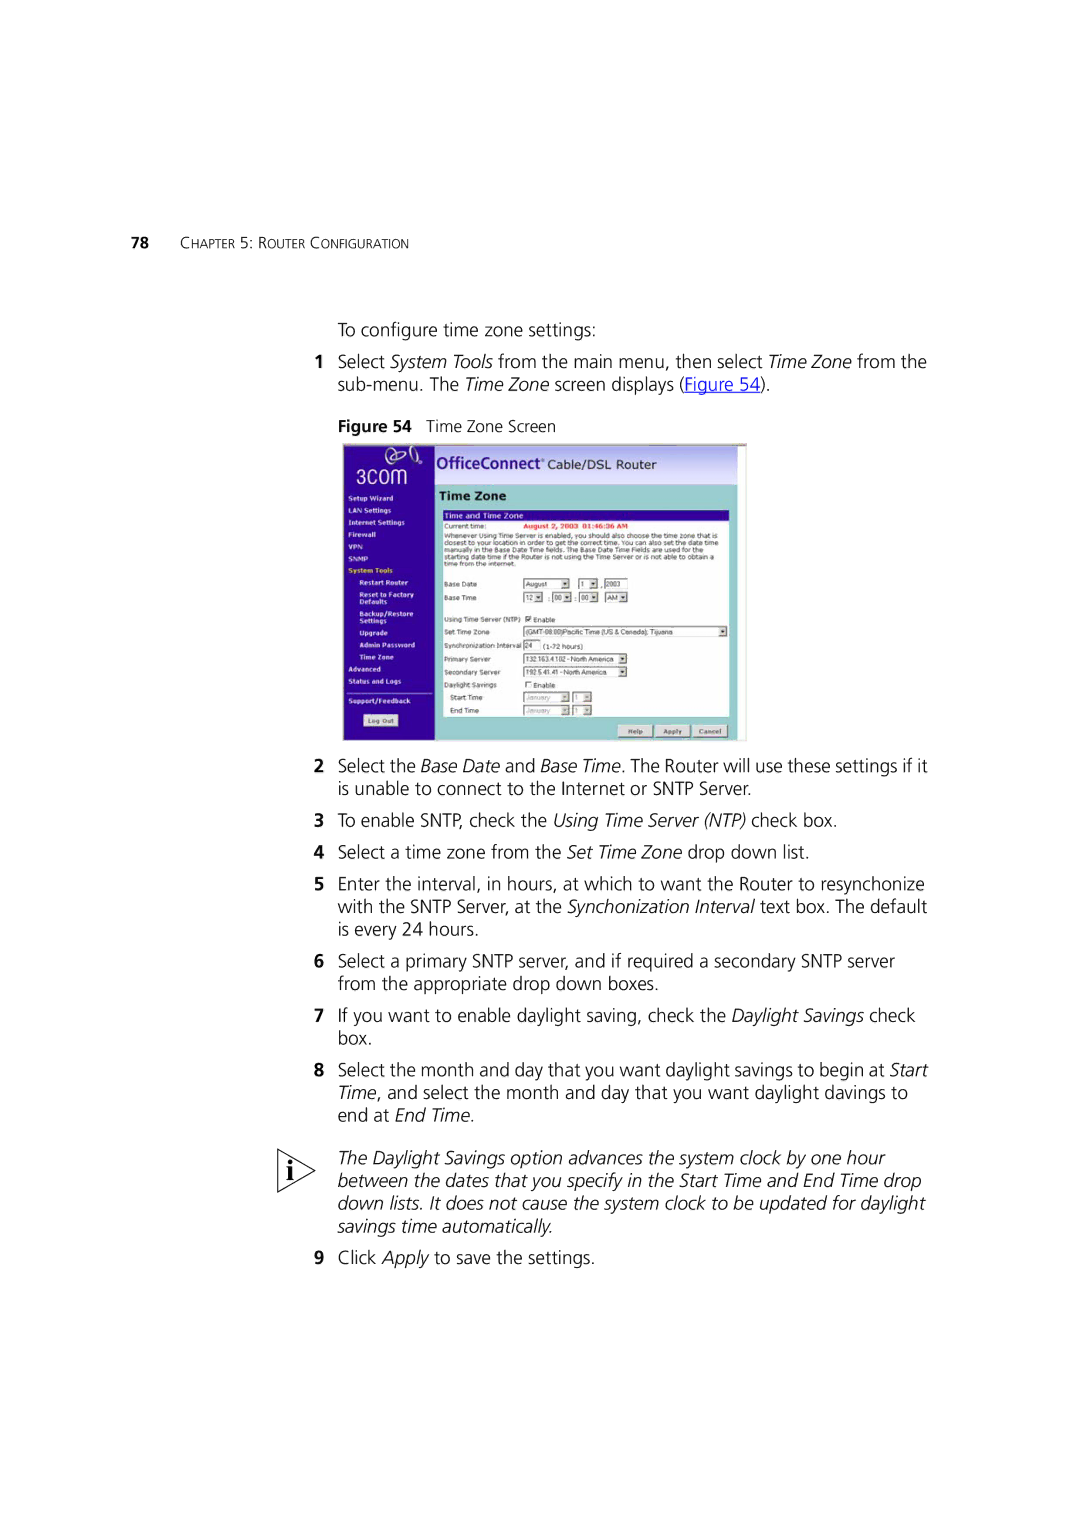
To configure time zone settings:
1Select System Tools from the main menu, then select Time Zone from the
Figure 54 Time Zone Screen
2Select the Base Date and Base Time. The Router will use these settings if it is unable to connect to the Internet or SNTP Server.
3To enable SNTP, check the Using Time Server (NTP) check box.
4Select a time zone from the Set Time Zone drop down list.
5Enter the interval, in hours, at which to want the Router to resynchonize with the SNTP Server, at the Synchonization Interval text box. The default is every 24 hours.
6Select a primary SNTP server, and if required a secondary SNTP server from the appropriate drop down boxes.
7If you want to enable daylight saving, check the Daylight Savings check box.
8Select the month and day that you want daylight savings to begin at Start Time, and select the month and day that you want daylight davings to end at End Time.
The Daylight Savings option advances the system clock by one hour between the dates that you specify in the Start Time and End Time drop down lists. It does not cause the system clock to be updated for daylight savings time automatically.
9Click Apply to save the settings.