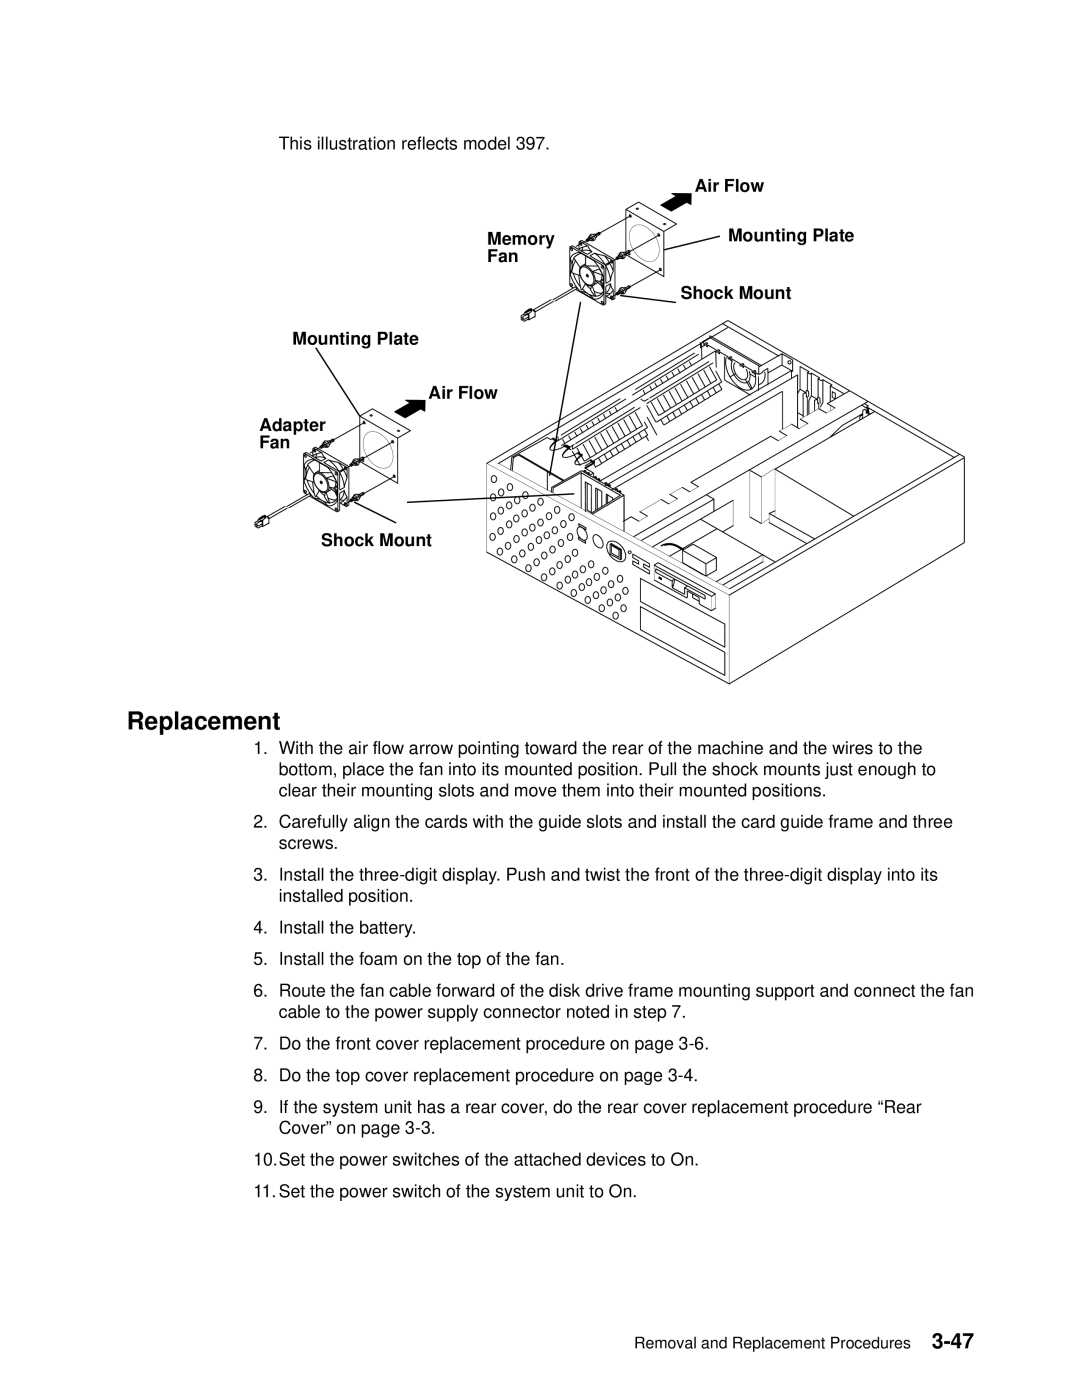
This illustration reflects model 397.
Memory
Fan
Mounting Plate
Air Flow
Adapter
Fan
Shock Mount
Air Flow
Mounting Plate
Shock Mount
Replacement
1.With the air flow arrow pointing toward the rear of the machine and the wires to the bottom, place the fan into its mounted position. Pull the shock mounts just enough to clear their mounting slots and move them into their mounted positions.
2.Carefully align the cards with the guide slots and install the card guide frame and three screws.
3.Install the
4.Install the battery.
5.Install the foam on the top of the fan.
6.Route the fan cable forward of the disk drive frame mounting support and connect the fan cable to the power supply connector noted in step 7.
7.Do the front cover replacement procedure on page
8.Do the top cover replacement procedure on page
9.If the system unit has a rear cover, do the rear cover replacement procedure ªRear Coverº on page
10.Set the power switches of the attached devices to On.
11. Set the power switch of the system unit to On.
Removal and Replacement Procedures