Power Supply
For Models 380, 390, 39H, and 397, refer to the procedure on page
For a translation of the following notice, see System Unit Safety Information, Order Number
DANGER
Do not attempt to open the covers of the power supply. Power supplies are not serviceable and are to be replaced as a unit.
Removal
1.Set the power switches of the attached devices to Off.
2.Set the power switches of the system unit to Off.
3.Remove the power cord from the electrical outlet first, then from the power supply.
4.Do the removal procedure in ªRear Coverº on page
5.Do the removal procedure in ªTop Coverº on page
6.Do the removal procedure in ªFront Coverº on page
7.Do removal procedure in ªDiskette Driveº on page
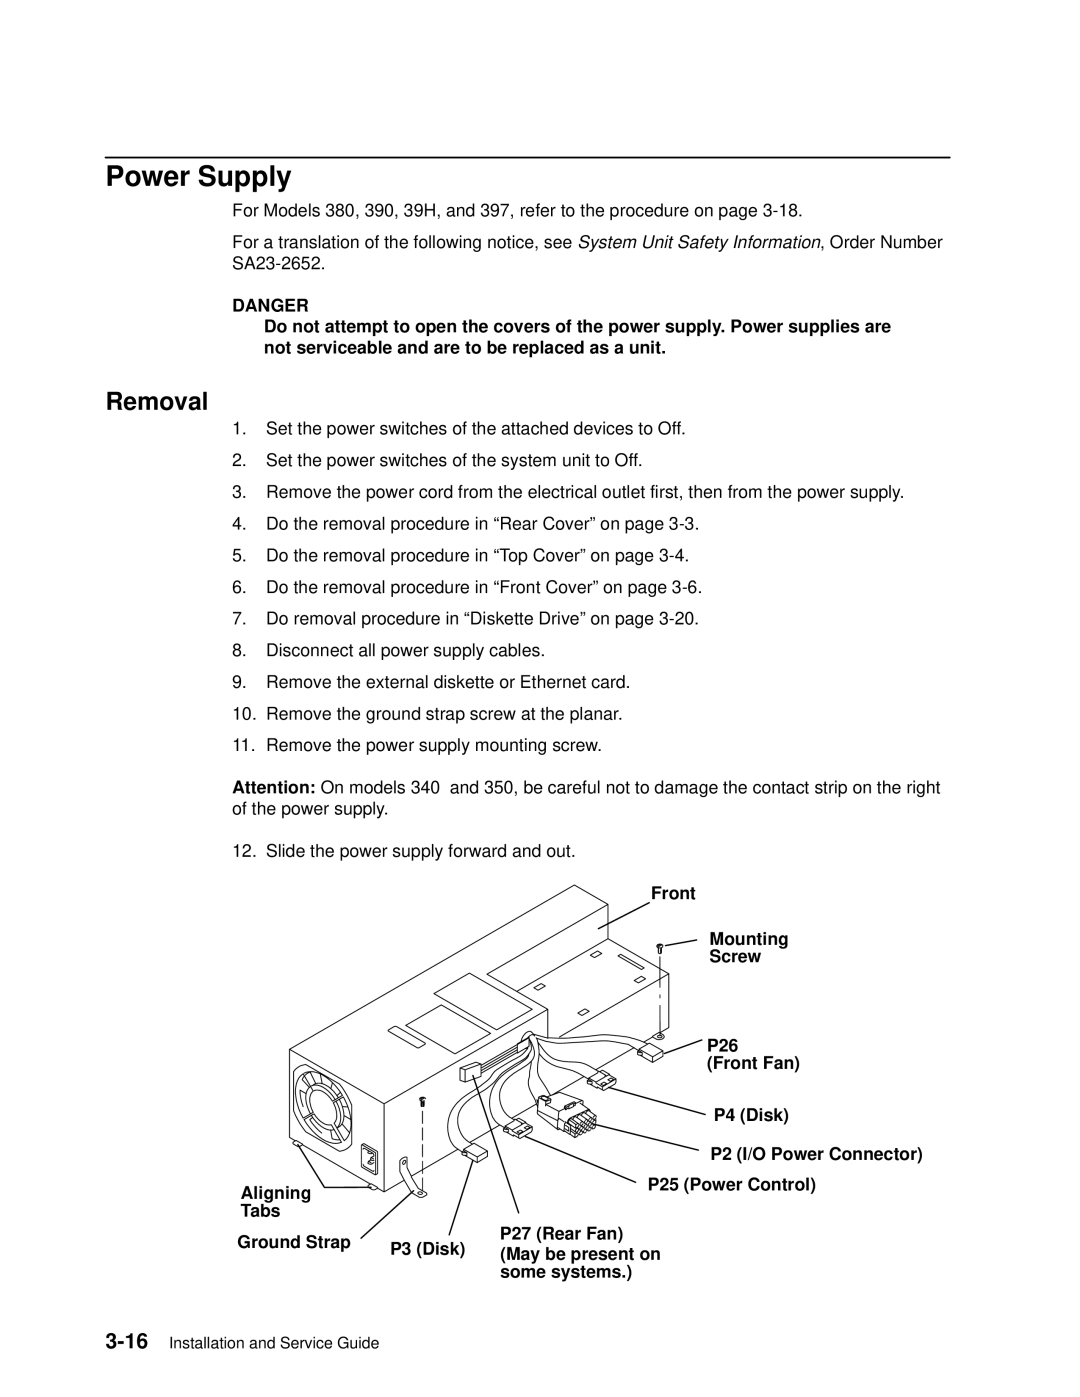
8.Disconnect all power supply cables.
9.Remove the external diskette or Ethernet card.
10.Remove the ground strap screw at the planar.
11.Remove the power supply mounting screw.
Attention: On models 340 and 350, be careful not to damage the contact strip on the right of the power supply.
12. Slide the power supply forward and out.
Front
Mounting
Screw
P26
(Front Fan)
P4 (Disk)
P2 (I/O Power Connector)
Aligning |
| P25 (Power Control) | |
Tabs |
|
| |
Ground Strap | P3 (Disk) | P27 (Rear Fan) | |
(May be present on | |||
| |||
|
| some systems.) |