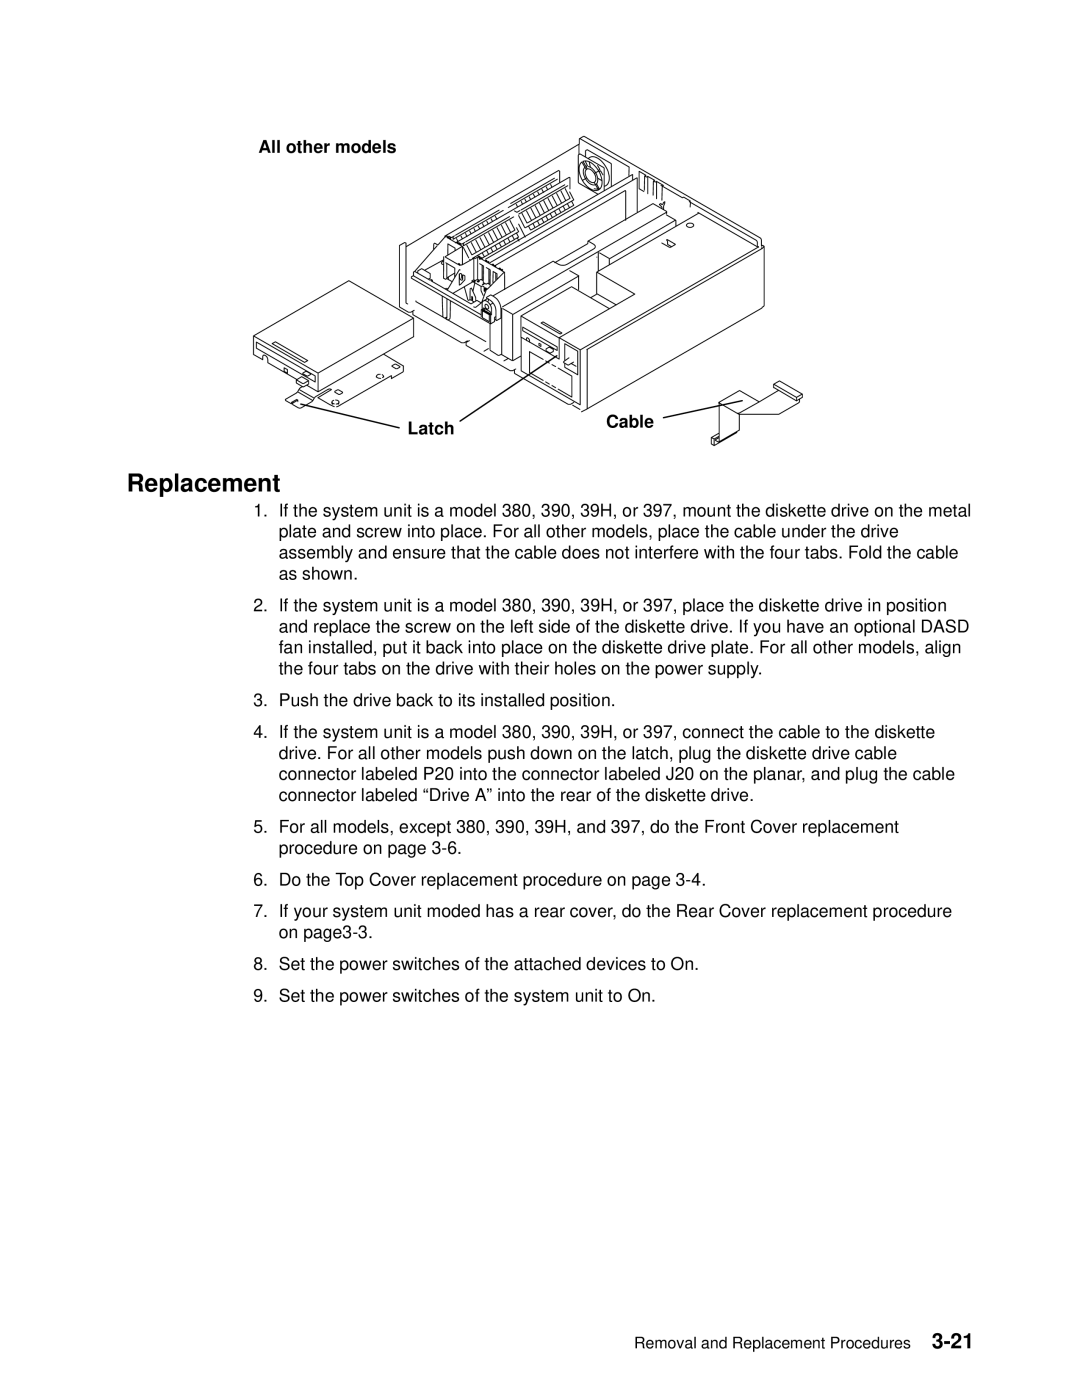
All other models
LatchCable
Replacement
1.If the system unit is a model 380, 390, 39H, or 397, mount the diskette drive on the metal plate and screw into place. For all other models, place the cable under the drive assembly and ensure that the cable does not interfere with the four tabs. Fold the cable as shown.
2.If the system unit is a model 380, 390, 39H, or 397, place the diskette drive in position and replace the screw on the left side of the diskette drive. If you have an optional DASD fan installed, put it back into place on the diskette drive plate. For all other models, align the four tabs on the drive with their holes on the power supply.
3.Push the drive back to its installed position.
4.If the system unit is a model 380, 390, 39H, or 397, connect the cable to the diskette drive. For all other models push down on the latch, plug the diskette drive cable connector labeled P20 into the connector labeled J20 on the planar, and plug the cable connector labeled ªDrive Aº into the rear of the diskette drive.
5.For all models, except 380, 390, 39H, and 397, do the Front Cover replacement procedure on page
6.Do the Top Cover replacement procedure on page
7.If your system unit moded has a rear cover, do the Rear Cover replacement procedure on
8.Set the power switches of the attached devices to On.
9.Set the power switches of the system unit to On.
Removal and Replacement Procedures