The following table lists the installation sequence for installing DIMMs in
Table 9.
| Number of installed |
|
DIMMs | microprocessors | DIMM connector |
|
|
|
First pair of DIMMs | 1 | 3, 6 |
|
|
|
Second pair of DIMMs | 1 | 2, 5 |
|
|
|
Third pair of DIMMs | 2 | 11, 14 |
|
|
|
Fourth pair of DIMMs | 2 | 10, 13 |
|
|
|
Note: DIMM connectors 7, 8, 15, and 16 are not used in
vWhen you install or remove DIMMs, the server configuration information changes. When you restart the server, the system displays a message that indicates that the memory configuration has changed.
Attention: Static electricity that is released to internal server components when the server is powered on might cause the server to stop, which could result in the loss of data. To avoid this potential problem, always use an
To install a DIMM, do the following:
1.Turn off the server and all attached devices; then, disconnect all power cords and external cables.
2.Unlock and remove the side cover (see “Removing the side cover” on page 43).
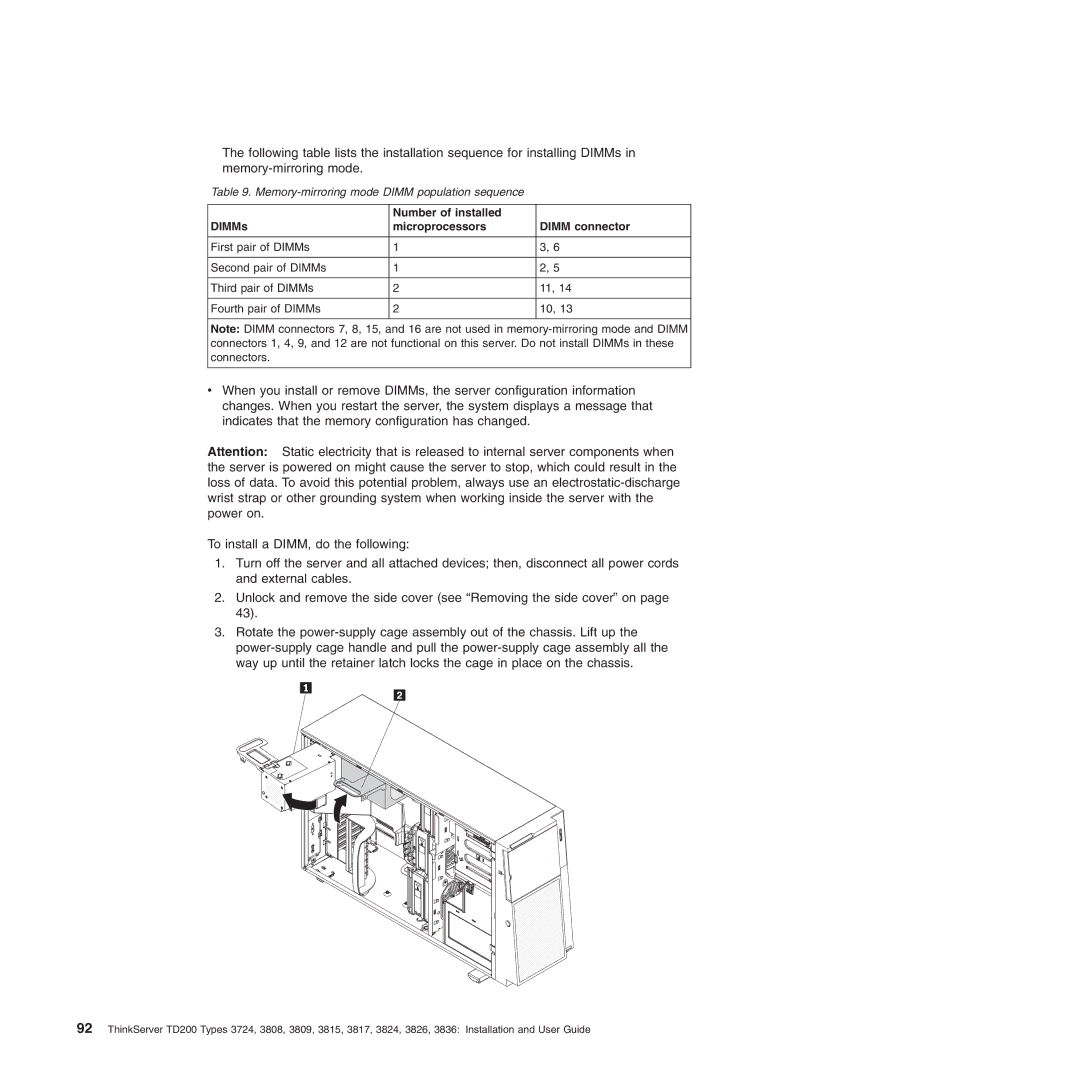
3.Rotate the
92ThinkServer TD200 Types 3724, 3808, 3809, 3815, 3817, 3824, 3826, 3836: Installation and User Guide
